Tuesday, October 24, 2017

Getting started with Pivotal Gemfire On Windows


This post will explain you about , how to start pivotal Gemfire on Windows
Step 1: What is Gemfire?
In-Memory Data Grid powered by Apache Geode
Scale your data services on demand to support high-performance, real-time apps
you can check more info on Gemfire docs

Step 2: Download - pivotal-gemfire-9.1.0.tar.gz using Download Pivotal Gemfire
Step 3: Unzip the downloaded file and set the PATH in environement variables.
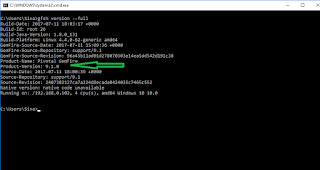
Step 4: check the version of the pivotal gemfire, which is available in your system gfsh version --full

Step 5: Now we need to create a locator - Go to the place which ever the location you want to create locator in command prompt.
Step 6:Start the gfsh.bat file from command prompt.
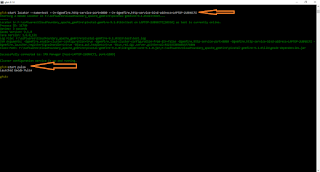
Step 7: start locator --name=test --J=-Dgemfire.http-service-port=8080 --J=-Dgemfire.http-service.bind-address=localhost or

gfsh>start locator --name=test --J=-Dgemfire.http-service-port=8080 --J=-Dgemfire.http-service-bind-address=LAPTOP-2U8NKC7I
Starting a Geode Locator in F:\softwares\CloudFoundary_apache_gemFire\pivotal-gemfire-9.1.0\bin\test...
.....
Locator in F:\softwares\CloudFoundary_apache_gemFire\pivotal-gemfire-9.1.0\bin\test on LAPTOP-2U8NKC7I[10334] as test is currently online.
Process ID: 11740
Uptime: 3 seconds
Geode Version: 9.1.0
Java Version: 1.8.0_131
Log File: F:\softwares\CloudFoundary_apache_gemFire\pivotal-gemfire-9.1.0\bin\test\test.log
JVM Arguments: -Dgemfire.enable-cluster-configuration=true -Dgemfire.load-cluster-configuration-from-dir=false -Dgemfire.http-service-port=8080 -Dgemfire.http-service-bind-address=LAPTOP-2U8NKC7I -Dgemfire.launcher.registerSignalHandlers=true -Djava.awt.headless=true -Dsun.rmi.dgc.server.gcInterval=9223372036854775806
Class-Path: F:\softwares\CloudFoundary_apache_gemFire\pivotal-gemfire-9.1.0\lib\geode-core-9.1.0.jar;F:\softwares\CloudFoundary_apache_gemFire\pivotal-gemfire-9.1.0\lib\geode-dependencies.jar

Successfully connected to: JMX Manager [host=LAPTOP-2U8NKC7I, port=1099]

Cluster configuration service is up and running.

gfsh>start pulse

Step 8: Open the start pulse
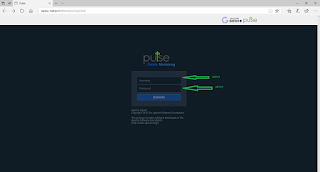
Step 9: Open the browser and enter port as 8080 -> http://laptop-2u8nkc7i:8080/pulse and provide username as admin and password as admin

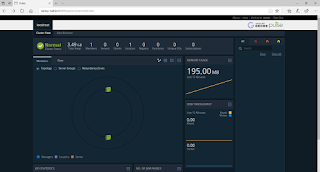
Step 10 cluster details will display after successful login.


Thank you verymuch for viewing this post. If you like this post please write comment and share.


Saturday, October 14, 2017

Getting started with Spring Boot deployed on Google Cloud. Maven, Google CloudSDK installation


This post will explain you. How to deploy springboot application on google cloud

Step 1: Open Open Google Cloud


Step 2: Login into google cloud.
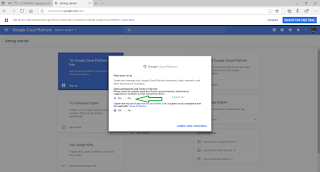
Step 3: Register Cloud application with free trail - Cloud Application Registration

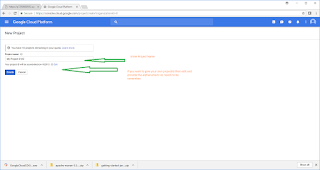
Step 4:Create a new Project -
Provide necessary details and signup the same.
Step 5: Now you are completed signup process . Spring boot application needs to be deployed.
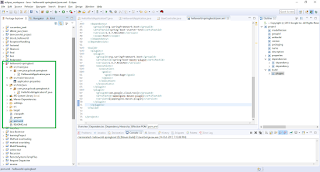
Step 6: Create a maven java project with name - helloworld-springboot and below code to pom.xml file.


  4.0.0

  com.java.gcloud.springboot
  helloworld-springboot
  0.0.1-SNAPSHOT
  jar

  helloworld-springboot
  Demo project for Spring Boot with google cloud


    1.8
    ${java.version} 
    ${java.version} 
    UTF-8
    1.3.1


      org.springframework.boot
      spring-boot-starter-web
      1.5.7.RELEASE


        org.springframework.boot
        spring-boot-maven-plugin
        1.5.7.RELEASE


              repackage


        com.google.cloud.tools
        appengine-maven-plugin
        ${appengine.maven.plugin}


Step 7: Now we need to write controller class name HelloworldApplication.java
package com.java.gcloud.springboot;

import org.springframework.boot.SpringApplication;
import org.springframework.boot.autoconfigure.SpringBootApplication;
import org.springframework.web.bind.annotation.PathVariable;
import org.springframework.web.bind.annotation.RequestMapping;
import org.springframework.web.bind.annotation.RequestMethod;
import org.springframework.web.bind.annotation.RestController;

@SpringBootApplication
@RestController
public class HelloworldApplication {
  @RequestMapping("/")
  public String home() {
    return "Hello World.. Welcome to Spring Boot.. which is deployed on Google cloud appengine!";
  }

  @RequestMapping(value = "/add/{a}/{b}", method = RequestMethod.GET)
  public String add(@PathVariable("a") int a,@PathVariable("b") int b) {
    return "Addition of a["+a+"] and b ["+b+"]is   ======   " + (a+b) ;
  }
  
  @RequestMapping(value = "/substract/{a}/{b}", method = RequestMethod.GET)
  public String substract(@PathVariable("a") int a,@PathVariable("b") int b) {
    return "Substract of a["+a+"] and b ["+b+"]is   ======   " + (a-b) ;
  }
  
  @RequestMapping(value = "/multiply/{a}/{b}", method = RequestMethod.GET)
  public String multiply(@PathVariable("a") int a,@PathVariable("b") int b) {
    return "Multiply of a["+a+"] and b ["+b+"]is   ======   " + (a*b) ;
  }
  
  @RequestMapping(value = "/division/{a}/{b}", method = RequestMethod.GET)
  public String division(@PathVariable("a") int a,@PathVariable("b") int b) {
    return "Division of a["+a+"] and b ["+b+"]is   ======   " + (a/b) ;
  }

  public static void main(String[] args) {
    SpringApplication.run(HelloworldApplication.class, args);
  }
}


Step 8: Run the pom.xml file using mvn clean install
Step 9: Now we need to run the application. go to the directory , where jar created and run the
java -jar   
another way to execute the application is right click on the HelloWorldApplication Run As- JavaApplication.
Step 10: Once spring boot started successfully then go to browser and hit http://localhost:8080 .
you should get the -Hello World.. Welcome to Spring Boot.. which is deployed on Google cloud appengine!

Step 11: That is done. Now we need to deploy this application on google cloud.
Step 12: Install the Google Cloud SDK for windows version and set the PATH in environment variables.
Step 13: Go to the place where pom.xml file is there in command prompt.
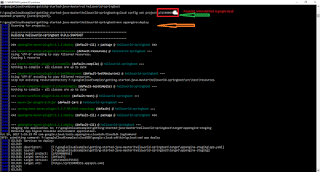
gcloud config set project p7259000552 After this command
mvn appengine:deploy

Step 14: You will get Build Success message. So application has been deployed successfully.
Step 15: Verify, whether it has been deployed or not - https://.appspot.com/
Step 16: This application will have simple math operations like add,sustarct,multiply,division if you click any of this links you will get appropriate results.
https://p7259000552.appspot.com/add/20/30
   https://p7259000552.appspot.com/substract/20/30
   https://p7259000552.appspot.com/multiply/20/30
   https://p7259000552.appspot.com/division/20/30


Thank you verymuch for viewing this post. If you like please share and comment.

Thursday, October 12, 2017

CRUD (Create, Read,Update,Delete) operations with Spring Boot , Mysql, JPA , Hibernate with in built Tomcat server.


This post will explain you. How to work with Spring boot and Mysql CRUD(create,read,update,delete) operations
Step 1: Open eclipse and create a java project.. more details please check my previous post getting started with spring boot.

Step 2: create a new pom.xml file under project and the below code to that file.


    4.0.0

    org.springframework
    spring_boot_first
    0.1.0

  
        org.springframework.boot
        spring-boot-starter-parent
        1.5.1.RELEASE


                   org.springframework.boot
                   spring-boot-starter-web
            
     
                   org.springframework.boot
                   spring-boot-starter-tomcat
             
      
                    org.springframework.boot
                    spring-boot-starter-security
       
       
                     org.springframework.boot
                     spring-boot-starter-data-jpa
        
                             
                                     org.apache.tomcat
                                     tomcat-jdbc


                       mysql
                       mysql-connector-java
                
   
                         commons-dbcp
                         commons-dbcp


        1.8


Step 3:Create new model object called User.
 package springboot.model;

import javax.persistence.Column;
import javax.persistence.Entity;
import javax.persistence.GeneratedValue;
import javax.persistence.GenerationType;
import javax.persistence.Id;
import javax.persistence.Table;

@Entity
@Table
public class User {
 @Id
 @Column
 private long id;
 @Column
 private String name;
 @Column
 private String gender;
 @Column
 private String country;
 @Column
 private String password;
 
 
 public long getId() {
  return id;
 }
 public void setId(long id) {
  this.id = id;
 }
 public String getName() {
  return name;
 }
 public void setName(String name) {
  this.name = name;
 }
 public String getGender() {
  return gender;
 }
 public void setGender(String gender) {
  this.gender = gender;
 }
 public String getCountry() {
  return country;
 }
 public void setCountry(String country) {
  this.country = country;
 }
 public String getPassword() {
  return password;
 }
 public void setPassword(String password) {
  this.password = password;
 }


}
Step 4: Create UserService and UserServiceImpl under package springboot.service
  package springboot.service;

import java.util.List;

import springboot.model.User;

public interface UserService {

   public List getUsers();
   public List createOrUpdateUser( User user);
   public List deleteUser( User user);
   
 
}
Step 5: Add below code in UserServiceImpl.

  package springboot.service;

import java.util.List;

import org.springframework.beans.factory.annotation.Autowired;
import org.springframework.stereotype.Component;

import springboot.dao.UserDAO;
import springboot.model.User;

@Component
public class UserServiceImpl implements UserService{

 @Autowired
 private UserDAO userDAO;
 
 @Override
 public List getUsers() {
  return userDAO.getUsers();
 }
 
 public List createOrUpdateUser( User user){
  return userDAO.createOrUpdateUser(user);
 }
   public List deleteUser( User user){
    return userDAO.deleteUser(user);
   }

 public void setUserDAO(UserDAO userDAO) {
  this.userDAO = userDAO;
 }

}


Step 6: Create UserDAO and UserDAOImpl under package springboot.dao as mentioned below
 package springboot.dao;

import java.util.List;

import javax.transaction.Transactional;

import org.springframework.data.repository.CrudRepository;

import springboot.model.User;

@Transactional
public interface UserDAO {
 public List getUsers();
 public List createOrUpdateUser( User user);
 public List deleteUser( User user);

}

Step 7: Add below code inside UserDAOImpl
 package springboot.dao;

import java.util.List;

import org.hibernate.Criteria;
import org.hibernate.Session;
import org.hibernate.SessionFactory;
import org.springframework.beans.factory.annotation.Autowired;
import org.springframework.stereotype.Component;

import springboot.model.User;

@Component
public class UserDAOImpl implements UserDAO{
 
 @Autowired
 private SessionFactory sessionFactory;

 public List getUsers(){
  Criteria criteria = sessionFactory.openSession().createCriteria(User.class);
  return criteria.list();
 }
 
 public List createOrUpdateUser( User user){
  Session session = sessionFactory.openSession();
  User oldUser = session.get(User.class, user.getId() );
  //System.out.println("oldUser id["+ oldUser.getId()+"]");
  if(oldUser == null){
   session.save(user);
   session.flush();
   System.out.println("Created or Update Successful");
    }
  Criteria criteria = sessionFactory.openSession().createCriteria(User.class);
  return criteria.list();
 }
 public List deleteUser( User user){
  Session session = sessionFactory.openSession();
  User oldUser = session.get(User.class, user.getId() );
  if(oldUser != null){
   session.delete(oldUser);
   session.flush();
   System.out.println("Deleted successfully");
  }
  Criteria criteria = sessionFactory.openSession().createCriteria(User.class);
  return criteria.list();
 }

 public void setSessionFactory(SessionFactory sessionFactory) {
  this.sessionFactory = sessionFactory;
 }

}

Step 8: Create BeanConfig class. which will create EntityManagerFactory.
 package springboot;

import javax.persistence.EntityManagerFactory;

import org.hibernate.SessionFactory;
import org.springframework.beans.factory.annotation.Autowired;
import org.springframework.context.annotation.Bean;
import org.springframework.context.annotation.Configuration;

@Configuration
public class BeanConfig {

 @Autowired
 private EntityManagerFactory entityManagerFactory;

 @Bean
 public SessionFactory getSessionFactory() {
     if (entityManagerFactory.unwrap(SessionFactory.class) == null) {
         throw new NullPointerException("factory is not a hibernate factory");
     }
     return entityManagerFactory.unwrap(SessionFactory.class);
 }

 public void setEntityManagerFactory(EntityManagerFactory entityManagerFactory) {
  this.entityManagerFactory = entityManagerFactory;
 }

}

Step 9: Now we need to add code related to database details called application.properties
  # ===============================
# = DATA SOURCE
# ===============================

# Set here configurations for the database connection
spring.datasource.url = jdbc:mysql://localhost:3306/employee?useSSL=false

# Username and password
spring.datasource.username = root
spring.datasource.password = root

spring.jpa.show-sql = true
spring.jpa.hibernate.ddl-auto = update
spring.jpa.hibernate.naming-strategy = org.hibernate.cfg.ImprovedNamingStrategy
spring.jpa.properties.hibernate.dialect = org.hibernate.dialect.MySQL5Dialect
Step 10: Create a RestController class. Name it as UserController
package springboot;

import java.util.List;

import org.springframework.beans.factory.annotation.Autowired;
import org.springframework.http.HttpStatus;
import org.springframework.http.ResponseEntity;
import org.springframework.stereotype.Controller;
import org.springframework.web.bind.annotation.PathVariable;
import org.springframework.web.bind.annotation.RequestMapping;
import org.springframework.web.bind.annotation.RequestMethod;
import org.springframework.web.bind.annotation.RequestParam;

import springboot.model.User;
import springboot.service.UserService;

@Controller
public class UserController {
 
 @Autowired
 private UserService userService;
 
 @RequestMapping(value = "/list", method = RequestMethod.GET)
 public ResponseEntity userDetails() {
        
  List userDetails = userService.getUsers();
  return new ResponseEntity(userDetails, HttpStatus.OK);
 }
 
 @RequestMapping(value = "/create/{id}/{name}/{password}/{gender}/{country}/", method = RequestMethod.GET)
 public ResponseEntity createOrUpdateUserDetails(@PathVariable("id") long id, @PathVariable("name") String name,
   @PathVariable("password") String password,@PathVariable("gender") String gender,@PathVariable("country") String country) {
        User user = new User();
        user.setId(id);
        user.setName(name);
        user.setCountry(country);
        user.setGender(gender);
        user.setPassword(password);
  List userDetails = userService.createOrUpdateUser(user);
  return new ResponseEntity(userDetails, HttpStatus.OK);
 }
 @RequestMapping(value = "/delete/{id}", method = RequestMethod.GET)
 public ResponseEntity deleteUserDetails(@PathVariable("id") long id) {
        User user = new User();
        user.setId(id);
  List userDetails = userService.deleteUser(user);
  return new ResponseEntity(userDetails, HttpStatus.OK);
 }


 public void setUserService(UserService userService) {
  this.userService = userService;
 }

}

Step 11: Now we need to run this application through spring boot. So we have to write Application class.
  package springboot;

import java.util.Arrays;

import org.springframework.boot.CommandLineRunner;
import org.springframework.boot.SpringApplication;
import org.springframework.boot.autoconfigure.SpringBootApplication;
import org.springframework.context.ApplicationContext;
import org.springframework.context.annotation.Bean;

@SpringBootApplication
public class Application {

    public static void main(String[] args) {
        SpringApplication.run(Application.class, args);
    }

    @Bean
    public CommandLineRunner commandLineRunner(ApplicationContext ctx) {
        return args -> {

            System.out.println("Let's inspect the beans provided by Spring Boot:");

            String[] beanNames = ctx.getBeanDefinitionNames();
            Arrays.sort(beanNames);
            for (String beanName : beanNames) {
                System.out.println(beanName);
            }

        };
    }

}


Step 12: Now we need to build and run this application.
Right click on the pom.xml file and Run As - clean install
Once that is done. Right click on the Application.java and Run As-> Java Application. Below details will be printed in Console
     .   ____          _            __ _ _
 /\\ / ___'_ __ _ _(_)_ __  __ _ \ \ \ \
( ( )\___ | '_ | '_| | '_ \/ _` | \ \ \ \
 \\/  ___)| |_)| | | | | || (_| |  ) ) ) )
  '  |____| .__|_| |_|_| |_\__, | / / / /
 =========|_|==============|___/=/_/_/_/
 :: Spring Boot ::        (v1.5.1.RELEASE)

2017-10-12 17:17:15.600  INFO 13036 --- [           main] springboot.Application                   : Starting Application on LAPTOP-2U8NKC7I with PID 13036 (F:\eclipse_workspace\spring_boot_first\target\classes started by Siva in F:\eclipse_workspace\spring_boot_first)
2017-10-12 17:17:15.626  INFO 13036 --- [           main] springboot.Application                   : No active profile set, falling back to default profiles: default
2017-10-12 17:17:16.033  INFO 13036 --- [           main] ationConfigEmbeddedWebApplicationContext : Refreshing org.springframework.boot.context.embedded.AnnotationConfigEmbeddedWebApplicationContext@23bb8443: startup date [Thu Oct 12 17:17:15 IST 2017]; root of context hierarchy


Step 13: Use http://localhost:8080/list -- it will display all the records which is there inside user table.
If it askes username and password - then username will be - user and password will be check Using default security password: in console. that is your password.


Step 14: Use http://localhost:8080/create/16/sanju/sam/M/India/ - it will insert record inside DB and will display all the records from user table.

Step 15 : http://localhost:8080/delete/16 - it will delete where id is 16 and display all the results from user table.

Step 16 : Now we will learn how to create database and create a table.
Step 17: Install mysql and create database with name- employee. and create a table name called User with columns as mentioned below.
     CREATE TABLE user (
  id int(11) NOT NULL,
  name varchar(45) DEFAULT NULL,
  gender varchar(10) DEFAULT NULL,
  password varchar(45) DEFAULT NULL,
  country varchar(45) DEFAULT NULL,
  PRIMARY KEY (`id`)) 
     

Step 18: If you want to use another database. simply change the application.properties respective DB details and dialect along with respective connecter in pom.xml

Thanks for viewing this post. If you like this please share and write comments.


Thursday, October 5, 2017

Getting started with spring boot , eclipse and maven


This post will explain about How to work with spring boot , eclipse and maven

Step 1: Start eclipse
Step 2: Create new java project
Step 3 : Add below code into pom.xml file
       

    4.0.0

    org.springframework
    spring_boot_first
    0.1.0

    
        org.springframework.boot
        spring-boot-starter-parent
        1.5.7.RELEASE


            org.springframework.boot
            spring-boot-starter-web
        
        
            org.springframework.boot
            spring-boot-starter-actuator
        
        
            org.springframework.boot
            spring-boot-starter-test
            test


        1.8


                org.springframework.boot
                spring-boot-maven-plugin
            
            
                maven-failsafe-plugin


                            integration-test
                            verify


Step 4: Right click on Project-> Configure->Convert To Maven Project
Step 5: If maven plugin not installed in your eclipse then got to market place of eclipse and search for maven , install from there.
Step 6: Now we need to create source folder -
create a folder with name main under src folder
create a folder with name java under main folder
create a folder with name test under main folder

Step 7: Link created folder to src.
Right click on src -> new -> Source folder -> browse on Folder Name-> Give upto main/java
Check the first check box

Right click on src -> new -> Source folder -> browse on Folder Name-> Give upto main/test
Check the first check box

Step 8: Create package wiht name springboot and create a class called HelloController.java


     package springboot;

import org.springframework.web.bind.annotation.RestController;
import org.springframework.web.bind.annotation.RequestMapping;

@RestController
public class HelloController {
    
    @RequestMapping("/")
    public String index() {
        return "Greetings from Spring Boot you have done the greate job!";
    }
    
}


Step 9: Create a class called Application . This is the main class to run the spring boot application.

    package springboot;

import java.util.Arrays;

import org.springframework.boot.CommandLineRunner;
import org.springframework.boot.SpringApplication;
import org.springframework.boot.autoconfigure.SpringBootApplication;
import org.springframework.context.ApplicationContext;
import org.springframework.context.annotation.Bean;

@SpringBootApplication
public class Application {

    public static void main(String[] args) {
        SpringApplication.run(Application.class, args);
    }

    @Bean
    public CommandLineRunner commandLineRunner(ApplicationContext ctx) {
        return args -> {

            System.out.println("Spring boot beans:");

            String[] beanNames = ctx.getBeanDefinitionNames();
            Arrays.sort(beanNames);
            for (String beanName : beanNames) {
                System.out.println(beanName);
            }

        };
    }

}


Step 10:Now we need to run this project. Right click on the pom.xml file and Run As -> maven install
Step 11: After Build success . Now we Need to run the Spring Boot Applcation.
Step 12 : Right click on the Application.java Run As - Java Application.
Step 13 : Once executed successfully, then open any Browser and type - http://localhost:8080/
Step 14: Out put will be -Greetings from Spring Boot you have done the greate job! - This details will be available in HelloController.java
Step 15: If you notice that , spring boot will have in built tomcat. Once we started Spring boot, then it will start the tomcat. No external server configuration required.
Step 16 : if you want to know more about spring boot please check the Spring Boot
Step 17 : if you want to change the out put in HelloController. change the return value and again try to run the Application.java.
In this case you may get the below error
      2017-10-05 11:23:38.382  INFO 9172 --- [           main] o.s.c.support.DefaultLifecycleProcessor  : Starting beans in phase 0
2017-10-05 11:23:41.318 ERROR 9172 --- [           main] o.a.coyote.http11.Http11NioProtocol      : Failed to start end point associated with ProtocolHandler ["http-nio-8080"]

java.net.BindException: Address already in use: bind
 at sun.nio.ch.Net.bind0(Native Method) ~[na:1.8.0_131]
 at sun.nio.ch.Net.bind(Unknown Source) ~[na:1.8.0_131]
 at sun.nio.ch.Net.bind(Unknown Source) ~[na:1.8.0_131]
        service.getName(): "Tomcat";  Protocol handler start failed
 at org.apache.catalina.connector.Connector.startInternal(Connector.java:1029) ~[tomcat-embed-core-8.5.20.jar:8.5.20]
 at org.apache.catalina.util.LifecycleBase.start(LifecycleBase.java:150) ~[tomcat-embed-core-8.5.20.jar:8.5.20]
 ... 13 common frames omitted
Caused by: java.net.BindException: Address already in use: bind
The Tomcat connector configured to listen on port 8080 failed to start. The port may already be in use or the connector may be misconfigured.


To Kill the existing port 8080, which is already in use.
Step 18: Go to command prompt- type netstat -a -o -n
Step 19 find the PID for tomcat port 0.0.0.0:8080 then kill that PID using below command
Step 20 - taskkill /F /PID 28345

Thanks for viewing this post.


Wednesday, September 13, 2017

java 8 Simple example, Stream , BiFunction, Sorting Using comparator and streams


This post will explain how to sort the list by name using Comparator and java 8 Stream.

usage of BiFunction

package com.siva;

import java.util.ArrayList;
import java.util.Comparator;
import java.util.List;
import java.util.function.BiFunction;
import java.util.stream.Stream;

public class TestJava8Example {
 
 public static void main(String[] args) {
  
  //Usage of BiFunction
  
  BiFunction add = (a, b) -> a + b;
  System.out.println("Addition of two values["+add.apply(20, 30) +"]");
  
  //usage of stream 
  
  List arrayList = new ArrayList();
  Person p = new Person();
  p.setName("siva");
  p.setAge(32);
  arrayList.add(p);
  Person p1 = new Person();
  p1.setName("kumar");
  p1.setAge(33);
  arrayList.add(p1);
  
  Person p2 = new Person();
  p2.setName("raju");
  p2.setAge(33);
  arrayList.add(p2);
  
  Person p3 = new Person();
  p3.setName("jatin");
  p3.setAge(2);
  arrayList.add(p3);
 
  Stream stream = arrayList.stream();
  stream.forEach(x -> System.out.println("Name: [" + x.getName()+"] Age ["+x.getAge()+"]"));
  
  
  //Sort By name Using comparator
  Comparator byPersonName = (Person p4, Person p5) -> p4.getName().compareTo(
              p5.getName());
  Stream sorted = arrayList.stream().sorted(byPersonName);
  sorted.forEach(e -> System.out.println("sorted Name: [" + e.getName()+"] Age ["+e.getAge()+"]"));
  
  
 }
 

}


output

Addition of two values[50]
Name: [siva] Age [32]
Name: [kumar] Age [33]
Name: [raju] Age [33]
Name: [jatin] Age [2]
sorted Name: [jatin] Age [2]
sorted Name: [kumar] Age [33]
sorted Name: [raju] Age [33]
sorted Name: [siva] Age [32]


Getting Started With Jboss Drools, Simple Drools program with eclipse maven and java


This post will explain , how to work with Jboss Drools.

Step 1: Open eclipse and install Drools plugin through Market place.
Help - Eclipse Marketplace- search for drools and install the same.
Step 2: Create a new Maven Project and add below code snippet in pom.xml

//created on: 7 Sep, 2017
package src.main.resources.rules
import com.sample.*;

//list any import classes here.


rule "We have an Best Cricketer"
    salience 10
    when
    then
        System.out.println("We have an Best Cricketer");
end

rule "Cricket Lives"
    salience 10
        when
        then
            System.out.println("Hurrah!!! Cricket Lives");
end

rule "Hello World"
    when
        Cricketer( name == "sachin" )
    then
        System.out.println( "Hello sachin" );
        end


rule "Cricket Score above 50"
    when
      $cricketerDetails : Cricketer( score >= 50 )   
    then
        System.out.println( "I'm best bat's man , my name is[ " + $cricketerDetails.getName() + "]and my score is["+$cricketerDetails.getScore()+"]");
        
  
end


rule "Cricket Score below 50"
      when
      $cricketerDetails : Cricketer( score < 50 )   
    then
        System.out.println( "I'm not best bat's man , my name is[ " + $cricketerDetails.getName() + "]and my score is["+$cricketerDetails.getScore()+"]");
end


Step 3: Write a Simple Pojo Java class.
package com.sample;

public class Cricketer {
    private String name;
     private boolean honest;
     private int score;

     public Cricketer(){
      
     }
     public Cricketer(String name, boolean honest,int score){
      this.name = name;
      this.honest = honest;
      this.score = score;
     }
  public String getName() {
   return name;
  }

  public void setName(String name) {
   this.name = name;
  }

  public boolean isHonest() {
   return honest;
  }

  public void setHonest(boolean honest) {
   this.honest = honest;
  }
  public int getScore() {
   return score;
  }
  public void setScore(int score) {
   this.score = score;
  }

}

Step 4: Now Write a Test java class to execute the drool file.
package com.sample;

import org.kie.api.KieServices;
import org.kie.api.runtime.KieContainer;
import org.kie.api.runtime.KieSession;

public class BestCricketer {
 public static void main(String[] args) {
   KieServices ks = KieServices.Factory.get();
      KieContainer kContainer = ks.getKieClasspathContainer();
      KieSession ksession = kContainer.newKieSession("ksession-rules");
      Cricketer sachin = new Cricketer("sachin", true,70);

      Cricketer dravid = new Cricketer("dravid", true,55);

      Cricketer rohan = new Cricketer("rohan", true,100);

      Cricketer ajay = new Cricketer("ajay", true,40);


      ksession.insert( sachin );

      ksession.insert( dravid );

      ksession.insert( rohan );

      ksession.insert( ajay );


      ksession.fireAllRules();
 }

}

Step 5: Output could be like below
We have an Best Cricketer
Hurrah!!! Cricket Lives
Hello sachin
I'm best bat's man , my name is[ rohan]and my score is[100]
I'm best bat's man , my name is[ dravid]and my score is[55]
I'm best bat's man , my name is[ sachin]and my score is[70]
I'm not best bat's man , my name is[ ajay]and my score is[40]
More information about droolsMore Information on drools Thanks for viewing this post

Monday, August 14, 2017

Spring MVC annotations rest controller , JUnit With Service layer , Mockmvc for Controller test with JSON Object


This post will explain about, how to work with spring mvc ,Junit test case for Services,Mock test for controller with Json Object.


Step 1: Create a dynamic webproject in eclipse->i have created with name spring_junit
Step 2: Modify the web.xml


  spring_junit
  
     redirect.jsp
  
  
  contextConfigLocation/WEB-INF/applicationContext.xml


  org.springframework.web.context.ContextLoaderListener
 
  
        dispatcher
        org.springframework.web.servlet.DispatcherServlet
        1
    
    
        dispatcher
        *.htm
    

Step 3: we need to create applicationContext.xml inside WEB-INF folder. This will have details related to database and other values. Here mentioned only DB details.


Step 4: Create dispatcher-servlet.xml(in web.xml we have mentioned servlet name as dispatcher, so in sping mvc xml configuration with name [servletname-servlet.xml].
So here we have to give name as dispatcher-servlet.xml


Step 5: Create a database schema name as employee and create a table called user with the columns - id,name,password,gender,country
Step 6: Configuration files has been created for spring-mvc . Now we need to write source code. First we will create controller class with name UserController under package - com.siva.controller
package com.siva.web;

import org.springframework.beans.factory.annotation.Autowired;
import org.springframework.stereotype.Controller;
import org.springframework.ui.ModelMap;
import org.springframework.web.bind.annotation.ModelAttribute;
import org.springframework.web.bind.annotation.RequestMapping;
import org.springframework.web.bind.annotation.RequestMethod;
import org.springframework.web.bind.annotation.SessionAttributes;

import com.siva.domain.User;
import com.siva.service.UserService;

@Controller
@RequestMapping("/userRegistration.htm")
@SessionAttributes("user")
public class UserController {

 
 private UserService userService;

 @Autowired
 public void setUserService(UserService userService) {
  this.userService = userService;
 }
 
 @RequestMapping(method = RequestMethod.GET)
 public String showUserForm(ModelMap model)
 {
  User user = new User();
  model.addAttribute(user);
  return "userForm";
 }

 @RequestMapping(method = RequestMethod.POST)
 public String onSubmit(@ModelAttribute("user") User user) {
  userService.add(user);
  return "redirect:userSuccess.htm";
 }

 public UserService getUserService() {
  return userService;
 }
 
}


Step 7: Create domain class with name User under com.siva.domain package
package com.siva.domain;

public class User {
   
 private int id;
 private String name;
 private String password;
 private String gender;
 private String country;
 
 public int getId() {
  return id;
 }
 public void setId(int id) {
  this.id = id;
 }
 public String getName() {
  return name;
 }
 public void setName(String name) {
  this.name = name;
 }
 public String getPassword() {
  return password;
 }
 public void setPassword(String password) {
  this.password = password;
 }
 public String getGender() {
  return gender;
 }
 public void setGender(String gender) {
  this.gender = gender;
 }
 public String getCountry() {
  return country;
 }
 public void setCountry(String country) {
  this.country = country;
 }
}

Step 8: Create service and serviceImpl classes inside com.siva.service package.
package com.siva.service;

import com.siva.domain.User;

public interface UserService {

 public void add(User user);
}

package com.siva.service;

import org.springframework.beans.factory.annotation.Autowired;
import org.springframework.stereotype.Repository;

import com.siva.dao.UserDAO;
import com.siva.domain.User;

@Repository("userService")
public class UserServiceImpl implements UserService {

 @Autowired
 private UserDAO userDAO;
 
 public void setUserDAO(UserDAO userDAO) {
 this.userDAO = userDAO;
}
 @Override
 public void add(User user) {
  //Persist the user object here. 
  userDAO.add(user);
  System.out.println("User added successfully");
  System.out.println("UserName["+user.getName()+"]");
  System.out.println("Gender["+user.getGender()+"]");
  System.out.println("Pasword["+user.getPassword()+"]");
  System.out.println("Country["+user.getCountry()+"]");

 }
 public UserDAO getUserDAO() {
  return userDAO;
 }

}


Step 9: Create dao and daoImpl classes inside com.siva.dao package.
package com.siva.dao;

import com.siva.domain.User;

public interface UserDAO {

 public void add(User user);
}

package com.siva.dao;

import org.springframework.beans.factory.annotation.Autowired;
import org.springframework.jdbc.core.JdbcTemplate;
import org.springframework.stereotype.Repository;

import com.siva.domain.User;
@Repository("userDAO")
public class UserDAOImpl implements UserDAO {

 @Autowired
    public JdbcTemplate jdbcTemplate;
 
    public JdbcTemplate getJdbcTemplate() {
     return jdbcTemplate;
    }
     
 @Override
 public void add(User user) {
  //Persist the user object here. 
   String sql = "INSERT INTO USER(id,name,gender,password,country) VALUES(?, ?, ?,?,?)";
        int returnValue = getJdbcTemplate().update(
                sql,
                new Object[] {user.getId(), user.getName(), user.getGender(),user.getPassword(),user.getCountry()});
        if(1 == returnValue)
            System.out.println("Record inserted successfully");
        else{
         System.out.println("Record inserted Failure");
        }
  

 }

}


Step 10: Java code has been completed. Now we need to write jsp files under /WEB-INF/jsp/userForm.jsp

<%@ page language="java" contentType="text/html; charset=ISO-8859-1"
 pageEncoding="ISO-8859-1"%>
<%@ taglib uri="http://www.springframework.org/tags/form" prefix="form"%>


Registration Page


User Id :
User Name :
Password :
Gender :
Country :

Step 11: create one more jsp /WEB-INF/jsp/userSuccess.jsp
<%@ page language="java" contentType="text/html; charset=ISO-8859-1"
    pageEncoding="ISO-8859-1"%>


Success Page


User Details

User ID : ${user.id} User Name : ${user.name} Password : ${user.password} Gender : ${user.gender} Country : ${user.country}
Step 12 : We need to add the jar file under /WEB-INF/lib
antlr-runtime-3.0.jar
com.mysql.jdbc_5.1.5.jar
commons-logging-1.0.4.jar
hamcrest-core-1.2.jar
javax.json-1.0.jar
junit-4.11.jar
spring-aop-4.1.6.RELEASE.jar
spring-beans-4.1.6.RELEASE.jar
spring-context-4.1.6.RELEASE.jar
spring-core-4.1.6.RELEASE.jar
spring-expression-4.1.6.RELEASE.jar
spring-jdbc-4.1.6.RELEASE.jar
spring-orm-4.1.6.RELEASE.jar
spring-test-4.1.6.RELEASE.jar
spring-tx-4.1.6.RELEASE.jar
spring-web-4.1.6.RELEASE.jar
spring-webmvc-4.1.6.RELEASE.jar

Step 13: We can run this project by using any one of the server. I have used tomcat and input and output will be display like below.
use URL - http://localhost:8080/spring_junit/userRegistration.htm and provide input details like id, name etc..


Step 14: Now it's time to write junit test case for service. Here i have written simple test case , u can write more test cases depening upon your requirement.
Step 15: First Create a UserServiceAndControllerTest under package - com.siva.test
package com.siva.test;

import static org.junit.Assert.assertEquals;
import static org.junit.Assert.assertTrue;
import static org.springframework.test.web.servlet.request.MockMvcRequestBuilders.post;
import static org.springframework.test.web.servlet.result.MockMvcResultMatchers.redirectedUrl;
import static org.springframework.test.web.servlet.result.MockMvcResultMatchers.status;

import javax.sql.DataSource;

import org.junit.Test;
import org.junit.runner.RunWith;
import org.springframework.beans.factory.annotation.Autowired;
import org.springframework.http.MediaType;
import org.springframework.mock.web.MockHttpSession;
import org.springframework.test.context.ContextConfiguration;
import org.springframework.test.context.junit4.SpringJUnit4ClassRunner;
import org.springframework.test.web.servlet.MockMvc;
import org.springframework.test.web.servlet.setup.MockMvcBuilders;

import com.siva.domain.User;
import com.siva.service.UserService;
import com.siva.web.UserController;


@RunWith(SpringJUnit4ClassRunner.class)
@ContextConfiguration(classes=AppConfig.class)
public class UserServiceAndControllerTest {
 
 private MockMvc mockMvc;
 @Autowired
 private UserService userService;
 
 @Autowired
 DataSource dataSource;
 
 @Autowired
 private UserController userController;
 
 @Autowired 
 MockHttpSession mockHttpSession;
 @Test
 public void testUserService(){
  
  assertEquals("class com.siva.service.UserServiceImpl", this.userService.getClass().toString());
  
 }
 @Test
 public void testUserController(){
  
  assertEquals("class com.siva.web.UserController", this.userController.getClass().toString());
  
 }
 @Test
 public void testAdd() {
  User user = new User();
  user.setId(13);
  user.setName("Varma");
  user.setGender("Male");
  user.setPassword("Varma 123");
  user.setCountry("India");
  userService.add(user);
  assertTrue(true);
 }
 
 @Test
 public void testOnSubmit(){
   mockMvc= MockMvcBuilders.standaloneSetup(this.userController).build();
  try {
   /*User user = new User();
   user.setName("siva1");
   user.setGender("Male");
   user.setPassword("Raju1");*/
   mockHttpSession.setAttribute("user", new UserJSONReader().getUserJSOnObject());
   mockMvc.perform(post("/userRegistration.htm").session(mockHttpSession).accept(MediaType.APPLICATION_JSON))
   .andExpect(status().is3xxRedirection()).andExpect(redirectedUrl("userSuccess.htm"));
  } catch (Exception e) {
   e.printStackTrace();
  }
 }

}


Step 16: In the above class we have 4 test methods first two are to check whether service and controller classes loaded successfully or not.
Other two are actual functionality for service and controller method test through spring mockmvc.
Step 17 : In the above class to test the controller method either passing user object values as hard coded or we can pass through json object.
I have passed here json object for this we need to create one json class to read the json file and conver it into user json object.
Step 18: create UserJSONReader.java under package com.siva.test
package com.siva.test;

import java.io.FileInputStream;
import java.io.IOException;
import java.io.InputStream;

import javax.json.Json;
import javax.json.JsonObject;
import javax.json.JsonReader;

import com.siva.domain.User;

public class UserJSONReader {
 
 public User getUserJSOnObject(){
   User user = new User();
  try {
 InputStream fis = new FileInputStream("user_json.txt");
 
 //create JsonReader object
 JsonReader jsonReader = Json.createReader(fis);
 //get JsonObject from JsonReader
 JsonObject jsonObject = jsonReader.readObject();
   
 user.setId(jsonObject.getInt("id"));
 user.setName(jsonObject.getString("name"));
 user.setPassword(jsonObject.getString("password"));
 user.setCountry(jsonObject.getString("country"));
 user.setGender(jsonObject.getString("gender"));
 
  jsonReader.close();
  fis.close();
 } catch (IOException e) {
  e.printStackTrace();
 }
 
 return user;
 }
 }


Step 19: create user_json.txt file under project.
{
    "id":14,
 "name":"Jatin",
 "password":"jatin 123",
 "gender":"Male",
 "country":"India is a Great Country"
}

Step 20: Now we need to create one xml file with name-UserServiceAndControllerTest-context.xml


Step 21: This is very important step for spring junit. need to configure bean details inside java class. Create class called AppConfig under package com.siva.test
package com.siva.test;

import javax.sql.DataSource;

import org.springframework.context.annotation.Bean;
import org.springframework.context.annotation.Configuration;
import org.springframework.jdbc.core.JdbcTemplate;
import org.springframework.jdbc.datasource.DriverManagerDataSource;
import org.springframework.mock.web.MockHttpSession;
import org.springframework.web.context.WebApplicationContext;
import org.springframework.web.context.support.WebApplicationContextUtils;

import com.siva.dao.UserDAO;
import com.siva.dao.UserDAOImpl;
import com.siva.service.UserService;
import com.siva.service.UserServiceImpl;
import com.siva.web.UserController;
import com.siva.web.UserSuccessController;

@Configuration
public class AppConfig {
 
 @Bean
 public UserService getUserService(){
  return new UserServiceImpl();
 }
 @Bean
 public UserDAO getUserDAO(){
  return new UserDAOImpl();
 }
 @Bean
 public JdbcTemplate getJdbcTemplate() {
   JdbcTemplate jdbcTemplate = new JdbcTemplate();
         jdbcTemplate.setDataSource(getDataSource());
         return jdbcTemplate;
  }
 @Bean
 public DataSource getDataSource() {
         DriverManagerDataSource dataSource = new DriverManagerDataSource();
         //MySQL database we are using
         dataSource.setDriverClassName("com.mysql.jdbc.Driver");
         dataSource.setUrl("jdbc:mysql://localhost:3306/employee");//change url
         dataSource.setUsername("root");//change userid
         dataSource.setPassword("root");//change pwd
         return dataSource;
     }


 @Bean
 public UserController getUserController(){
  return new UserController();
 }
 @Bean
 public UserSuccessController getUserSuccessController(){
  return new UserSuccessController();
 }
 
 @Bean
 public MockHttpSession getMockHttpSession(){
  return new MockHttpSession(); 
 }
}


Step 21: Once everything is done , then we will run this Test program as Run AS Junit, it has to insert data successfully and test case execution should be passed.

Thank you very much for viewing this post.


Tuesday, August 1, 2017

Getting started with Spring XD(exstream Data)in windows environment and Retrieve twitter live tweets data using Spring XD

Step 0: Java 1.7 or above needs to be installed.
Step1 : Download spring xd from below URL Spring XD
Step2: Unzip and place it where ever you desire. I have placed it in F:\softwares\spring-xd
Step3: Open command Prompt- go to F:\softwares\spring-xd\spring-xd-1.2.0.RELEASE\xd\bin
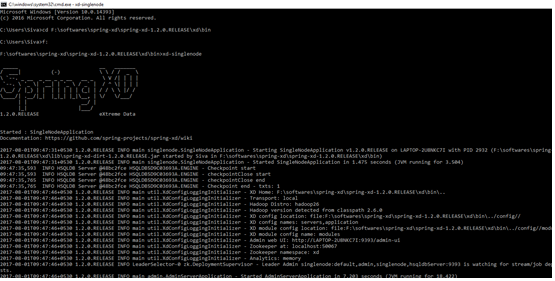
Step 4: F:\softwares\spring-xd\spring-xd-1.2.0.RELEASE\xd\bin>xd-singlenode
Spring xd will start and displayed as mentioned below.


Step 5: Now open another command prompt to run the shell- F:\softwares\spring-xd\spring-xd-1.2.0.RELEASE\shell\bin
Step 6: F:\softwares\spring-xd\spring-xd-1.2.0.RELEASE\shell\bin>xd-shell
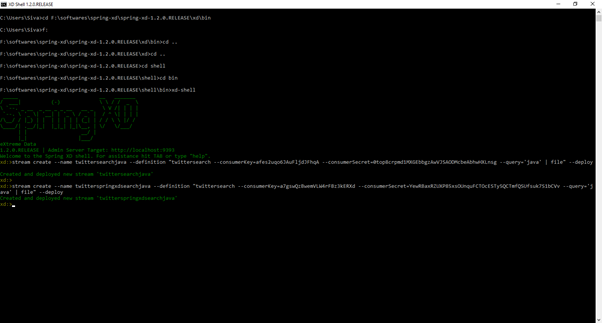
Shell prompt will display as mentioned below.


Step 7: Now we need to create twitter steam inside Spring XD shell
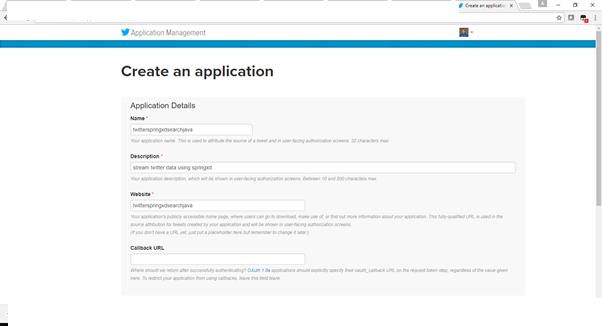
Step 8: We need to create an application inside twitter to get the consumer key and consumer secret key
Step 9: I have created application with name- twitterspringxdsearchjava.
Step 10: Please login into - https://apps.twitter.com and create your own application


Step 11: Now we need to run the created twitter application using spring xd shell
Xd> stream create --name twitterspringxdsearchjava --definition "twittersearch --consumerKey=a7gswQzBwemVLW4rFBz3kERXd --consumerSecret=YewRBaxRZUXP85xsOUnquFCTOcESTy5QCTmfQSUfsuk7S1bCVv --query='java' | file" –deploy

Step 12: output file created inside - F:\tmp\xd\output with name – twitterspringxdsearchjava.out
Step 13: This file will have live tweets data in json format.


Thank you very much for for viewing this post


Friday, June 2, 2017

How to load Environment specific properties using Spring PropertyPlaceholderConfigurer

This post will explain how to load environment specific[DEV,SIT,UAT,PROD] properties from the single properties file

Step 1: Create simple java project using eclipse
Step 2: Create a abstract class , with under package - com.javaguru.property, i have created with name - PropertyClient.java
package com.javaguru.property;

public abstract class PropertyClient {

 
 protected String hostName;
 protected String userId;
 protected String password;


 public PropertyClient(String hostName, String userId, String password) {
  super();
  this.hostName = hostName;
  this.userId = userId;
  this.password = password;
  
 }
 
 public PropertyClient(){
  
 }
 
 public String getHostName() {
  return hostName;
 }
 public void setHostName(String hostName) {
  this.hostName = hostName;
 }
 public String getUserId() {
  return userId;
 }
 public void setUserId(String userId) {
  this.userId = userId;
 }
 public String getPassword() {
  return password;
 }
 public void setPassword(String password) {
  this.password = password;
 }
 
 //common methods related to functionality
}
   

Step 3: Create implementation class.
package com.javaguru.property;

public class PropertyClientImpl extends PropertyClient{

 
 public PropertyClientImpl(String hostName, String userId, String password) {
  super(hostName, userId, password);
 }
 public PropertyClientImpl(){
  super();
 }
 //Implementation of abstract methods
}

Step 4: Create property file name called - application.properties under src folder

[DEV]
ftp.dev.hostname=dev.com
ftp.dev.username=user
ftp.dev.password=pass

[SIT]
ftp.sit.hostname=sit.net
ftp.sit.username=user
ftp.sit.password=pass

[UAT]
ftp.uat.hostname=uat.net
ftp.uat.username=user
ftp.uat.password=pass

[PROD]
ftp.prod.hostname=prod.net
ftp.prod.username=user
ftp.prod.password=pass


Step 5: Create applicationContext.xml under src- folder


  application.properties


Step 6: Create Test class with name - TestEnvSpecificProperty.java- or call the code which ever place you need to load the properties

import org.springframework.context.ApplicationContext;
import org.springframework.context.support.ClassPathXmlApplicationContext;

import com.javaguru.property.PropertyClient;
import com.javaguru.property.PropertyClientImpl;
/**
 * 
 * @author siva
 *
 */
public class TestEnvSpecificProperty {

 public static void main(String[] args) {
  //Set which environment properties we need to load.
  System.setProperty("env","dev");
  //load the applicationContext.xml file
  ApplicationContext context =  new ClassPathXmlApplicationContext("applicationContext.xml");
  PropertyClient propertyClient= (PropertyClientImpl)context.getBean("propertyClient");
  //print property details
   System.out.println("Host Name: ["+propertyClient.getHostName()+"]");
   System.out.println("User ID: ["+propertyClient.getUserId()+"]");
   System.out.println("Password: ["+propertyClient.getPassword()+"]");
  
 }
}

Step 7: Output would be like below, if you mention System property as dev
Host Name: [dev.com]
User ID: [user]
Password: [pass]

Step 8: Required jars

commons-codec-1.3.jar
commons-collections-3.2.jar
commons-logging-1.1.1.jar
commons-net-3.3.jar
spring-asm-3.0.5.RELEASE.jar
spring-beans-3.0.4.RELEASE.jar
spring-context-3.0.5.RELEASE.jar
spring-core-3.0.4.RELEASE.jar
spring-expression-3.2.1.release.jar

Thursday, October 6, 2016

How to check given interger value is palindrome or not using java


This post will explain you about, given integer palindrome or not.
ex: 121 or 1441 is palindrome- if we write reverse also it should be same


public class PalindromeTest {
 
 public static  boolean isPalindrome(int number){
  boolean isPolindrome = false;
  int palindrome = number;
  int reverseValue = 0;
  while(palindrome !=0){
   int reminder = palindrome % 10;
   reverseValue = reverseValue * 10 + reminder;
   palindrome = palindrome/10;
  }
   if(number==reverseValue){
    isPolindrome = true;
   }
  return isPolindrome;
  
 }
 public static void main(String[] args) {
  System.out.println("Given number is palindrome["+PalindromeTest.isPalindrome(121)+"]");
 }

}


output:

Given number is palindrome[true]

How to print fibonacci series values using java


This post will explain you about how to write fibonacci program for given 10 integer value using java

public class Fibonacci {
 
 public static void main(String[] args) {
  
  int febonacci[] = new int[10];
  febonacci[0]=0;
  febonacci[1]=1;
  for (int i = 2; i < febonacci.length; i++) {
   febonacci[i] = febonacci[i-1]+febonacci[i-2];
   
  }
  for (int i = 0; i < febonacci.length; i++) {
   System.out.print(febonacci[i]+",");
  }
  
  
 }

output:
0,1,1,2,3,5,8,13,21,34

Wednesday, September 28, 2016

Java interview questions


1.How ArrayList internally works or What will happen if we initialized arraylist size as 10 and tried to add 11th element to arrayList?

Ans: ArrayList uses object[] internally.
ArrayList default size is - 10
If we initialize default size as 10 for arraylist.
Now we are trying add 11th element to ArrayList.
Then it will doubled the size(now size is 20).
Copy previous elements(old array) to new arraylist(new array)
Add the new element(11th element) in newly created array.
Arraylist internally uses array datastructure.


Saturday, September 24, 2016

How to do customized Sorting byHashMap key or by value using Comparator - Java


This post will explain how to sort by key and sort by value using HashMap and Comparator.

Step 1: First create a Employee class which is having all the details related to Employee

/**
 * 
 * @author rajusiva
 *
 */

public class Employee {

	
	Integer empId;
	String name;
	Float salary;
	
	public Employee(Integer id,String name, Float sal){
		this.empId = id;
		this.name = name;
		this.salary = sal;
		
	}
	
	@Override
	public String toString() {
		return "Emp Id: "+this.empId+" Name: "+this.name +" salary: " +this.salary;
	}

	public Integer getEmpId() {
		return empId;
	}
	public void setEmpId(Integer empId) {
		this.empId = empId;
	}
	public String getName() {
		return name;
	}
	public void setName(String name) {
		this.name = name;
	}
	public Float getSalary() {
		return salary;
	}
	public void setSalary(Float salary) {
		this.salary = salary;
	}

}


Step 2: Below is the class for sort by key and sort by value using comparator
import java.util.Collections;
import java.util.Comparator;
import java.util.HashMap;
import java.util.Iterator;
import java.util.LinkedHashMap;
import java.util.List;
import java.util.Map;
import java.util.TreeMap;

/** This class is used to custom sort using Comparator interface and overriding compare method.
 * 
 * @author rajusiva
 *
 */
public class CustomHashMapSort {
	
	public static void main(String[] args) {
		Map map = new HashMap();
		map.put("205", new Employee(1, "siva", 75000f));
		map.put("202", new Employee(2, "raju", 85000f));
		map.put("203", new Employee(3, "kumar", 50000f));
		map.put("204", new Employee(4, "arjun", 35000f));
		map.put("200", new Employee(5, "neha", 45000f));
		map.put("198", new Employee(6, "sneha", 25000f));
		
		Map sortedMap = new TreeMap(map);
		for (Iterator iterator = sortedMap.keySet().iterator(); iterator.hasNext();) {
			String key = (String) iterator.next();
			Employee emp = map.get(key);
			System.out.println("Sort By key [" + key  +"]  [" + emp + "]");
			
		}
		System.out.println("=============================================");
		HashMap sortedMapByValue = sortByValue(map);
		for (Iterator iterator = sortedMapByValue.keySet().iterator(); iterator.hasNext();) {
			String key = (String) iterator.next();
			Employee emp = map.get(key);
			System.out.println("Sort By Value by Name  Key-[ "+key  +"]  value [" + emp.getName() +"]");
			
		}
		
		
	}
	/**This method will used to sort custom object value type(either empId,name, salary)
	 * 
	 * @param empLoyeeMap of type Map values
	 * @return sorted hashmap values
	 */
	public static  HashMap sortByValue(Map empLoyeeMap) {
		List> list = new java.util.LinkedList>(empLoyeeMap.entrySet());

		Collections.sort(list, new Comparator>() {
        // sort the value using compare method and comparator
		 @Override
		 public int compare(Map.Entry value1, Map.Entry value2) {
		 return (value1.getValue().getName()).compareTo(value2.getValue().getName());
		 }
		});
		
		 HashMap sortedHashMap = new LinkedHashMap();
	       for (Iterator it = list.iterator(); it.hasNext();) {
	              Map.Entry entry = (Map.Entry) it.next();
	              sortedHashMap.put(entry.getKey(), entry.getValue());
	       } 
	       return sortedHashMap;
		
		
	}
	

}


output:

Sort By key [198]  [Emp Id: 6 Name: sneha salary: 25000.0]
Sort By key [200]  [Emp Id: 5 Name: neha salary: 45000.0]
Sort By key [202]  [Emp Id: 2 Name: raju salary: 85000.0]
Sort By key [203]  [Emp Id: 3 Name: kumar salary: 50000.0]
Sort By key [204]  [Emp Id: 4 Name: arjun salary: 35000.0]
Sort By key [205]  [Emp Id: 1 Name: siva salary: 75000.0]
=============================================
Sort By Value by Name  Key-[ 204]  value [arjun]
Sort By Value by Name  Key-[ 203]  value [kumar]
Sort By Value by Name  Key-[ 200]  value [neha]
Sort By Value by Name  Key-[ 202]  value [raju]
Sort By Value by Name  Key-[ 205]  value [siva]
Sort By Value by Name  Key-[ 198]  value [sneha]


Hope this will help you to understand how we can custom object sort by key and value using comparator.


Tuesday, August 9, 2016

Validate IP address using Java regex


Step 1. Write a java class with name ValidateIPAddress
Step 2. Write a regex pattern. Learn more about reg expression https://docs.oracle.com/javase/tutorial/essential/regex/
public class ValidateIPAddress {
 
 private static final String PATTERN =
   "^([01]?\\d\\d?|2[0-4]\\d|25[0-5])\\." +
   "([01]?\\d\\d?|2[0-4]\\d|25[0-5])\\." +
   "([01]?\\d\\d?|2[0-4]\\d|25[0-5])\\." +
   "([01]?\\d\\d?|2[0-4]\\d|25[0-5])$";
 public static void main(String []args)
    {
     //Pass input value has hard coded value or as a input parameter
            String IP = "000.12.12.034";
            System.out.println(IP.matches(PATTERN));
        

    }
}
Step 3. Description about regex

1. ^                   #line start
2. (                #  start of group 
3. [01]?\\d\\d?        # It can be one or two digits. If three digits appear, it must start either 0 or 1
4. |             # or
5. 2[0-4]\\d        # start with 2, follow by 0-4 and end with any digit (2[0-4][0-9])
6. |                   # or
7. 25[0-5]             # start with 2, follow by 5 and ends with 0-5 (25[0-5])
8. )             #  end of group #2
9. \.                  #  follow by a dot "."
10. ....               # repeat with 3 times (3x)
11. $             #end of the line
 
Step 4. Input 1. Hello.IP 2. 000.12.12.034
Step 5. Output 1. false 2.true

Thank you very much for viewing this post

Monday, July 18, 2016

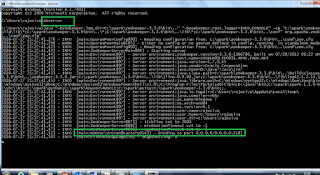
Getting started with Apache Kafka on windows environment. Run kafka, zoookeeper on windows environment


This post will explain you about how to work with apache kafka on windows environment along with zookeeper and java.

Pre requesties
1. Download Java latest version and install the same.
Setup the path variables where our java is installed.
2.Download zookeeper latest version and install the same.
Setup the path variables where our zookeeper is installed.
3.Download apache kafka latest version( kafka_2.10-0.10.0.0.tgz) and install the same.

Zookeeper setup

1. Go to confdir, where we have installed our zookeeper.
2. Rename zoo_sample.cfg to zoo.cfg
3. Open zoo.cfg file
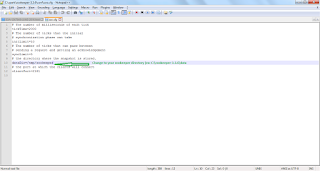
4. find dataDir=/tmp/zookeeper to C:\zookeeper-3.3.6\data

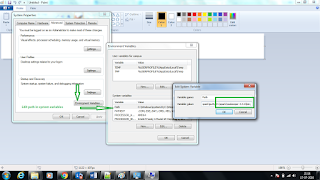
5. Setup path for zookeeper in Environment variables


6. Open the Environment variables- click the system variables C:\spark\zookeeper-3.3.6\bin
7. If we want we can change the default port no 2181 in zoo.cfg file
8. Run the Zookeeper from cmd prompt. execute zkserver command
9. We can see the below image after successful zookeeper started


Kafka setup and run kafka

1. Untar the same and go to kafka config directory
2. Look for server.properties and edit the same
3. Find the log.dirs=/tmp/kafka-logs to log.dirs= “C:\spark\kafka_2.10-0.10.0.0\kafka-logs”
4. Now go to kafka installation directory – copy the installation path
5. Open the command prompt and go to kafka installation directory-
C:\spark\kafka_2.10-0.10.0.0
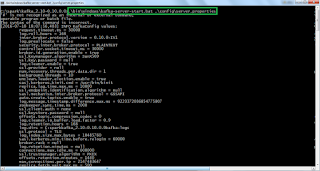
6. Execute the below command from the command prompt
.\bin\windows\kafka-server-start.bat .\config\server.properties


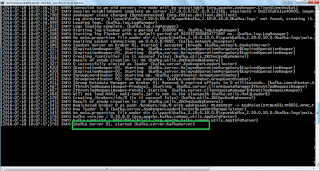
7. Once everything fine then kafka server will start and display image as mentioned below


How to Create topics

1. Open command prompt and go to C:\spark\kafka_2.10-0.10.0.0\bin\windows
2. Copy the below command and hit enter
kafka-topics.bat --create --zookeeper localhost:2181 --replication-factor 1 --partitions 1 --topic kafkatest
         

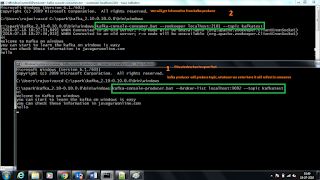
How to create producer
1. Open command prompt and go to C:\spark\kafka_2.10-0.10.0.0\bin\windows
2. Copy the below command and hit enter
kafka-console-producer.bat –broker-list localhost:9092 --topic kafkatest 

How to create consumer
1. Open command prompt and go to C:\spark\kafka_2.10-0.10.0.0\bin\windows
2. Copy the below command and hit enter
kafka-console-consumer.bat --zookeeper localhost:2181 --topic kafkatest
        

Once Producer and consumer started then, we can start to post messages from producer and reflect in consumer.
How to replicate data from producer to consumer
1. Try to enter some data in producer window, the same data will be replicates in consumer window.


More useful commands


1. Listing all topics which we have created
-
kafka-topics.bat --list --zookeeper localhost:2181
2. describe about particular topic
-
kafka-topics.bat --list --zookeeper localhost:2181 
3. Read all messages from particular topic
-
kafka-console-consumer.bat --zookeeper localhost:2181 --topic kafkatest --from-beginning 


Thank you very much for viewing this post.

Sunday, July 17, 2016

Spark Closures, Broadcasting , Optimizing and Partitioning


This post will explain you about how to do Optimization in Spark and how to work with closures, Broadcasting and partitioning.

1. Closures
- It is standalone function, which contains at least one bound variable
var count = 0
   var list =  1 to 20
   list.foreach(x => {
    count +=1
    println(s"count is currently $count")
    })
   println(s"Final count is $count") 


How to use Closures in our Spark?
1. Since Spark distributed so variable reference is could not cross node boundary’s.
So each partition will get it’s own copy of variables.
var count = 0
   val rdd = sc.makeRDD(1 to 20 , 10)
   rdd.foreach(x => {
     count +=1
println(s"count is currently $count")
})
println(s"Final count is $count") 


2. This happens in outside Driver . So final count will not be updated.
3. For this we will us built in methods
2. Broadcasting

val indexer =Map(…) //1MB - it will be distributed across clusters for each execution
rdd.flatMap(rddVal => indexer.get(rddVal))
a. Usually Map will distribute Simple 1MB data into multiple workers and store size will be 10 to 11 MB data
b. To avoid this we have broadcast variables into place
val indexer = sc.brodcast(Map(…)) //Map 1MB ; indexer<1MB rdd.flatMap(rddVal = >indexer.value.get(rddVal))
3. Optimizing Partitioning
a. Make RDD with lot of data with 10000 chunks
b. Then use the filter to drastically reduces the data set
c. Then we will do the some more transformations before calling the final collect.
sc.makeRDD(1 to Int.MaxValue,10000).filter(x=>x < 10).sortBy(x=>x).map(x=>x+1).collect
          sc.makeRDD(1 to Int.MaxValue,10000).filter(x=>x < 10).coalesce(8,true).sortBy(x=>x).map(x=>x+1).collect
       
We can check the jobs data using http://localhost:4040

How normal partition will work as how partition will work with coalesce


This is how spark advanced concepts will work.
Thank you very much for viewing this post.

Friday, July 15, 2016

Getting Started with Spark Libraries , Spark SQL,Spark Streaming,Spark MLlib, Spark GraphX


This post will explain you about spark built in libraries

Libraries
- SQL – processing semi structured data , using the structured query to optimize the data
- Streaming- it is officially described enabling the processing live streams of the data
in scalable,fault tolerant manner.
The ability to switch between batch analysis and writing the streaming
- MLlib/GraphX- MLlib is used to machine learning more scalable and easy
- GraphX is more on data parallel and Graph parallel computation


Spark SQL

1. It works with the data with similar fashion with SQL
2. It goal is to meet SQL-92 standards

myStructureData.registerTempTable(“SparkTable)
sqlContext.sql(“select * from SparkTable where SomeColumn==’someData’”)


3. But we can write the creative code let the engine use as much of data and storage structure as much as it can to optimize the result and distributed query behind the scene.
4. The main goal is developer not worry about distributed nature as much and focus on your business usecases.
5. As Spark continues to grow ,we want to enabler wider audiences beyond Big Data engineers to leverage the power of distributed processing


How we will compare Spark SQL with other competitors?

1. Apache Hive
- It very slow and require complex custom user defined functions.
- Simply to extends it’s functionality
- Unit testing is very difficult.
- If we are having already hive then we have mechanisms to use existing hive table structure into Spark SQL
- If we use Spark SQL it is 100 times faster when compare to Hive
2. Apache DRILL
- It is very new and focusing on the sql on Hadoop

3. Impala
- It is C++ established tool and it can beats spark in direct performance benchmark
4. Spark can work with many data sources.

Data Sources

1. Hive
- Spark SQL originated from product called shark
- Shark is very much hive on Spark and it is quite successful
- It is re written in decoupling the code and keeping the best parts and known as Spark SQL
- If want to Couple with Hive, then we need to copy hive-sev.xml file into spark home conf directory
- After this we will have automatically access to the hive administrator.
- Even it supports Hive UDF’s
- If we want to access existing table just load it by name.

2. JSON
3. Parquet
4. Avro
5. Amazon REDSHIFT
6. CSV


1. Optimizations
a. Predicate push down
b. Column pruning
2. Uniform API
3. Code generation == Performance gains

1. Optimizations
a. Predicate push down
b. Column pruning
2. Uniform API
3. Code generation == Performance gains


4. SQL --> RDD - ->SQL

a. New API makes Spark programmes more concise and easier to understand and at the same time exposes more application semantics to the engine.

Data Frames
1. There is unification across the languages and it is influenced by python pandas and R frameworks.

Python pandas
- sqlContext.createDataFrame(pandas)
- dataframe.toPandas()
R
- createDataFrame(sqlContext,RDataFrame)
- Collect(df)

2.Data frames are still experimental and it is available under SAPRK-6116
3. Even it is in experimental it is also called stable component
Spark SQL Demo
1. We can use sqlContext to work with Spark SQL.
Scala>  import sqlContext.implicits._
   Scala>
Implicits loaded in spark 1.3 onwards
How to create class using sqlContext in Scala?
Scala> case class Company(name: String,employeeCount:Int , isPublic:Boolean)
//create list of employees data for company class

Scala> val companies = List(Company(“IBM”,25000,true), Company(“TCS”,27000,true), Company(“INFOSYS”,50000,true), Company(“Oracle”,125000,true), Company(“Cognizant”,225000,true) ,Company(“Siva Inc”,125,false))

Create a DataFrame using toDF method
Scala>   val companiesDF = companies.toDF
   or 
scala> val companiesDF = sqlContext.CreateDataFrame(companies)


Display the results first 20 rows

Scala>  companiesDF.show

How to Load the data from the source?

Place this json file in your local system and name it as companies.json
{"employeeCount" : 10000, "isPublic": true, "name" : "Amazon"}
{"employeeCount" : 1201, "isPublic" : false, "name" : "ABC Inc"}
{"employeeCount" : 1201, "isPublic" : true, "name" : "ICIC"}
{"employeeCount" : 120000, "isPublic" : true, "name" : "NetFlix"}
{"employeeCount" : 220001, "isPublic" : true, "name" : "Spark"}

val  companiesJsonDF = sqlContext.read.json(“file:///c:/spark/Companies.json”)
we can load the data using format method
val  companiesJsonDF = sqlContext.read.format(“json”).load(“file:///c:/spark/Companies.json”)

Print the schema
companiesJsonDF.printSchema
unionAll
val allCompaniesDF = companiesDF.unionAll(companiesJsonDF)

we will get error, since companiesDF and companiesJsonDF schema is in different alignment order.
We can cast the required columns with the select.
Val companiesJsonIntDF = companiesJsonDF.select($”name”,$”employeeCount”.cast(“int”).as(“employeeCount”),$”isPublic”)
If we use unionAll then both Data frames will be combined.
val allCompaniesDF = companiesDF.unionAll(companiesJsonDF)
How to access union data in java
allCompaniesDF.groupBy(allCompaniesDF.col(“isPublic”)).agg(avg(“employeeCount”)).show
Filter condition using where clause
allCompaniesDF.where($”employeeCount”>100000).show

How to use in Java

allCompaniesDF.where(allCompaniesDF .col($”employeeCount”). gt 100000)).show
How to save the data

allCompaniesDF.write.json((file:///c:/spark/all.json)

we can write the same as providing format, how we have read the file same

sqlContext.write.format(“json”).save(“file:///c:/spark/Companies.json”)
How to import the ROW
Import org.apache.spark.sql.Row
How to convert data into row.
allCompaniesDF.map(company=>company(0).asInstanceOf[String])
How to retrieve column values
.foreach(println)

How to register the table to run the sql like statements.
- We can use hql also for hive tables.
allCompaniesDF.registerTempTable(“Companies”)
sql “SELECT * from Companies”
.show
Sql(“SELECT AVG(employeeCount) AS AverageEmpCount FROM Companies GROUP BY isPublic”).show
How to cache tables
Sql(“CACHE TABLE Companies”)


Spark Streaming
1. It is for streaming the data.
2. It is very popular library and it takes up the spark big data processing power and crunch up the speed.
3. It has the ability to stream GiGa byte data in sec.
4. It will steam the real time data as much fast as it can
5. It can have exactly one transformation schematics’ and failure recovery time as in matter of sec or 2 secs.
6. Due to 1 transformation the transformation output can’t be duplicated.
7. The transformation method itself will execute multiple times on failure.


Competitors

1. Apache STORM
1. Spark streaming is 40 times faster compare to STROM
2. In Storm data can be duplicated.
3. Spark is complete package we can inter mixed concepts without learning a new framework
4. STORM is true streaming framework. It will process item one by one as it arrives
5. SPARK process the incoming data as a small deterministic batch jobs. This is called micro batching.


Source of data to be stream

1. Kafka
2. Twitter
3. Flume
4. HDFS
a. Once we picked the Source then it will flow into Spark Streaming receiver. Where we have one receiver per one stream.
b. Behind the scene Streaming incoming data store into series of RDDS with specified windows of time.
c. Then each time window it will passed to spark core and it will process as normal.
d. So our stream becomes series of RDDS.
e. Here we have two points of Spark processing one is Receiver and one worker

Spark Streaming DEMO

This demo will explain how to process the tweets data which is mentioned in hash tags
1. First we need to get access for twitter API.
2. Go to https://apps.twitter.com
3. Please refer my previous posts, how to create app in twitter.
4. Provide key details in build.sbt file.
5. Write a program to retrieve the tweets data and process the same

MLlib
1. This is very complex library. Since it is having complex algorithms.
Competitors for MLlib
1. MATLAB
2. R
These are easy to use and fairly scalable.
On the other hand we are having
3. mahout and
4. GraphLab
 These are more scalable and cost of use.
 It was Started by MATLABS and driven by ML stack
 It was a three form approach to make machine learning easy and scalable
 ML Optimizer and MLI were used for machine learning pipe lines and algorithm development.
 MLlib was the production implementation , that came from ML Optimizer and MLI
 Spark MLlib implementation as assumed most of this stack, with mllib has original based RDD algorithms reside.
 And ML name space contains high level pipe line API built on top of Data Frames. Which has taken from ML Optimizer

org.apache.spark.mllib
org.apache.spark.ml


 These ML pipelines officially introduced into the Spark 1.2 as attempt to simplified machine learning.
 In machine learning flow and loading the data , extracting features , training the data and testing the data.
1. Algorithms
1. Classification
2. Regression
3. Collaborative Filtering
4. Clustering
5. Dimensional Reduction
2. Feature Extraction and Transformation
3. Uses of these algorithms
1. SPAM filtering
2. FRUD Alert
3. Recommendation
4. Determine the information on clusters
5. Speech Recognition

Graphx


1. It is a library that brings table structure into grapgh like structure. Like social networking.
2. It is used for data parallel and Graph parallel
3. GraphX works RDD behind the scene. Just drawing the data in graph optimized data structure.
4. The execution run through this parallel pattern for each node computation depends on each of it’s neighbours.
5. This focus on graph specialization with some impressive performance gain.
Competitors
1. Try to run graphs on Hadoop is very complex.
2. Apache GIRAPH is another competitor but it is slow compare to Graphx while running the page rank algorithm
3. Graph Lab is 33% slower than Graphx
What kind of things we can do using GrpahX?
1. Web itself is joint graph
2. Algorithm for website rendering.(google and Wikipedia)
3. Social network data analysis using Social Graphs available.
4. Graphs available for product valuation in websites like amazon and NETFLIX
5. We can use our technological power to advance science to research generic analysis


1. Data will be referred as vertex with vertex id vertex Type
2. Again Vertex id referred as Long


Edge will be described with vertex Id type of along with edge type


Then we will have Vertex and Edge, then we can build graph like below.
1. Graph(VType,EType)
2. Graph(RDD[Vertex],RDD[Edge])
Edge Triplet-
Grapghx will expose through object known as EdgeTriplet and it is having all the information about each connection
This will provide us on Graph complete view more reasonable understanding.

Thank you very much for viewing this post.
AddToAny

Contact Form

Name

Email *

Message *