Monday, July 18, 2016

Getting started with Apache Kafka on windows environment. Run kafka, zoookeeper on windows environment


This post will explain you about how to work with apache kafka on windows environment along with zookeeper and java.

Pre requesties
1. Download Java latest version and install the same.
Setup the path variables where our java is installed.
2.Download zookeeper latest version and install the same.
Setup the path variables where our zookeeper is installed.
3.Download apache kafka latest version( kafka_2.10-0.10.0.0.tgz) and install the same.

Zookeeper setup

1. Go to confdir, where we have installed our zookeeper.
2. Rename zoo_sample.cfg to zoo.cfg
3. Open zoo.cfg file
4. find dataDir=/tmp/zookeeper to C:\zookeeper-3.3.6\data

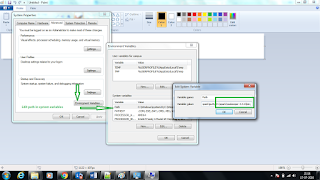
5. Setup path for zookeeper in Environment variables


6. Open the Environment variables- click the system variables C:\spark\zookeeper-3.3.6\bin
7. If we want we can change the default port no 2181 in zoo.cfg file
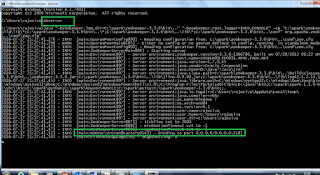
8. Run the Zookeeper from cmd prompt. execute zkserver command
9. We can see the below image after successful zookeeper started


Kafka setup and run kafka

1. Untar the same and go to kafka config directory
2. Look for server.properties and edit the same
3. Find the log.dirs=/tmp/kafka-logs to log.dirs= “C:\spark\kafka_2.10-0.10.0.0\kafka-logs”
4. Now go to kafka installation directory – copy the installation path
5. Open the command prompt and go to kafka installation directory-
C:\spark\kafka_2.10-0.10.0.0
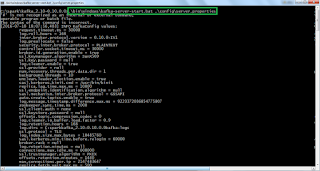
6. Execute the below command from the command prompt
.\bin\windows\kafka-server-start.bat .\config\server.properties


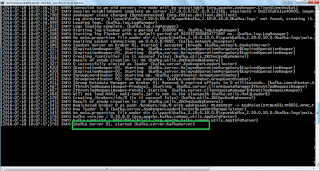
7. Once everything fine then kafka server will start and display image as mentioned below


How to Create topics

1. Open command prompt and go to C:\spark\kafka_2.10-0.10.0.0\bin\windows
2. Copy the below command and hit enter
kafka-topics.bat --create --zookeeper localhost:2181 --replication-factor 1 --partitions 1 --topic kafkatest
         

How to create producer
1. Open command prompt and go to C:\spark\kafka_2.10-0.10.0.0\bin\windows
2. Copy the below command and hit enter
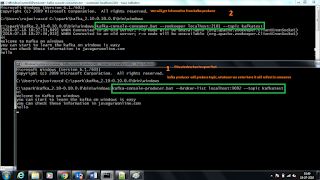
kafka-console-producer.bat –broker-list localhost:9092 --topic kafkatest 

How to create consumer
1. Open command prompt and go to C:\spark\kafka_2.10-0.10.0.0\bin\windows
2. Copy the below command and hit enter
kafka-console-consumer.bat --zookeeper localhost:2181 --topic kafkatest
        

Once Producer and consumer started then, we can start to post messages from producer and reflect in consumer.
How to replicate data from producer to consumer
1. Try to enter some data in producer window, the same data will be replicates in consumer window.


More useful commands


1. Listing all topics which we have created
-
kafka-topics.bat --list --zookeeper localhost:2181
2. describe about particular topic
-
kafka-topics.bat --list --zookeeper localhost:2181 
3. Read all messages from particular topic
-
kafka-console-consumer.bat --zookeeper localhost:2181 --topic kafkatest --from-beginning 


Thank you very much for viewing this post.

Sunday, July 17, 2016

Spark Closures, Broadcasting , Optimizing and Partitioning


This post will explain you about how to do Optimization in Spark and how to work with closures, Broadcasting and partitioning.

1. Closures
- It is standalone function, which contains at least one bound variable
var count = 0
   var list =  1 to 20
   list.foreach(x => {
    count +=1
    println(s"count is currently $count")
    })
   println(s"Final count is $count") 


How to use Closures in our Spark?
1. Since Spark distributed so variable reference is could not cross node boundary’s.
So each partition will get it’s own copy of variables.
var count = 0
   val rdd = sc.makeRDD(1 to 20 , 10)
   rdd.foreach(x => {
     count +=1
println(s"count is currently $count")
})
println(s"Final count is $count") 


2. This happens in outside Driver . So final count will not be updated.
3. For this we will us built in methods
2. Broadcasting

val indexer =Map(…) //1MB - it will be distributed across clusters for each execution
rdd.flatMap(rddVal => indexer.get(rddVal))
a. Usually Map will distribute Simple 1MB data into multiple workers and store size will be 10 to 11 MB data
b. To avoid this we have broadcast variables into place
val indexer = sc.brodcast(Map(…)) //Map 1MB ; indexer<1MB rdd.flatMap(rddVal = >indexer.value.get(rddVal))
3. Optimizing Partitioning
a. Make RDD with lot of data with 10000 chunks
b. Then use the filter to drastically reduces the data set
c. Then we will do the some more transformations before calling the final collect.
sc.makeRDD(1 to Int.MaxValue,10000).filter(x=>x < 10).sortBy(x=>x).map(x=>x+1).collect
          sc.makeRDD(1 to Int.MaxValue,10000).filter(x=>x < 10).coalesce(8,true).sortBy(x=>x).map(x=>x+1).collect
       
We can check the jobs data using http://localhost:4040

How normal partition will work as how partition will work with coalesce


This is how spark advanced concepts will work.
Thank you very much for viewing this post.

Friday, July 15, 2016

Getting Started with Spark Libraries , Spark SQL,Spark Streaming,Spark MLlib, Spark GraphX


This post will explain you about spark built in libraries

Libraries
- SQL – processing semi structured data , using the structured query to optimize the data
- Streaming- it is officially described enabling the processing live streams of the data
in scalable,fault tolerant manner.
The ability to switch between batch analysis and writing the streaming
- MLlib/GraphX- MLlib is used to machine learning more scalable and easy
- GraphX is more on data parallel and Graph parallel computation


Spark SQL

1. It works with the data with similar fashion with SQL
2. It goal is to meet SQL-92 standards

myStructureData.registerTempTable(“SparkTable)
sqlContext.sql(“select * from SparkTable where SomeColumn==’someData’”)


3. But we can write the creative code let the engine use as much of data and storage structure as much as it can to optimize the result and distributed query behind the scene.
4. The main goal is developer not worry about distributed nature as much and focus on your business usecases.
5. As Spark continues to grow ,we want to enabler wider audiences beyond Big Data engineers to leverage the power of distributed processing


How we will compare Spark SQL with other competitors?

1. Apache Hive
- It very slow and require complex custom user defined functions.
- Simply to extends it’s functionality
- Unit testing is very difficult.
- If we are having already hive then we have mechanisms to use existing hive table structure into Spark SQL
- If we use Spark SQL it is 100 times faster when compare to Hive
2. Apache DRILL
- It is very new and focusing on the sql on Hadoop

3. Impala
- It is C++ established tool and it can beats spark in direct performance benchmark
4. Spark can work with many data sources.

Data Sources

1. Hive
- Spark SQL originated from product called shark
- Shark is very much hive on Spark and it is quite successful
- It is re written in decoupling the code and keeping the best parts and known as Spark SQL
- If want to Couple with Hive, then we need to copy hive-sev.xml file into spark home conf directory
- After this we will have automatically access to the hive administrator.
- Even it supports Hive UDF’s
- If we want to access existing table just load it by name.

2. JSON
3. Parquet
4. Avro
5. Amazon REDSHIFT
6. CSV


1. Optimizations
a. Predicate push down
b. Column pruning
2. Uniform API
3. Code generation == Performance gains

1. Optimizations
a. Predicate push down
b. Column pruning
2. Uniform API
3. Code generation == Performance gains


4. SQL --> RDD - ->SQL

a. New API makes Spark programmes more concise and easier to understand and at the same time exposes more application semantics to the engine.

Data Frames
1. There is unification across the languages and it is influenced by python pandas and R frameworks.

Python pandas
- sqlContext.createDataFrame(pandas)
- dataframe.toPandas()
R
- createDataFrame(sqlContext,RDataFrame)
- Collect(df)

2.Data frames are still experimental and it is available under SAPRK-6116
3. Even it is in experimental it is also called stable component
Spark SQL Demo
1. We can use sqlContext to work with Spark SQL.
Scala>  import sqlContext.implicits._
   Scala>
Implicits loaded in spark 1.3 onwards
How to create class using sqlContext in Scala?
Scala> case class Company(name: String,employeeCount:Int , isPublic:Boolean)
//create list of employees data for company class

Scala> val companies = List(Company(“IBM”,25000,true), Company(“TCS”,27000,true), Company(“INFOSYS”,50000,true), Company(“Oracle”,125000,true), Company(“Cognizant”,225000,true) ,Company(“Siva Inc”,125,false))

Create a DataFrame using toDF method
Scala>   val companiesDF = companies.toDF
   or 
scala> val companiesDF = sqlContext.CreateDataFrame(companies)


Display the results first 20 rows

Scala>  companiesDF.show

How to Load the data from the source?

Place this json file in your local system and name it as companies.json
{"employeeCount" : 10000, "isPublic": true, "name" : "Amazon"}
{"employeeCount" : 1201, "isPublic" : false, "name" : "ABC Inc"}
{"employeeCount" : 1201, "isPublic" : true, "name" : "ICIC"}
{"employeeCount" : 120000, "isPublic" : true, "name" : "NetFlix"}
{"employeeCount" : 220001, "isPublic" : true, "name" : "Spark"}

val  companiesJsonDF = sqlContext.read.json(“file:///c:/spark/Companies.json”)
we can load the data using format method
val  companiesJsonDF = sqlContext.read.format(“json”).load(“file:///c:/spark/Companies.json”)

Print the schema
companiesJsonDF.printSchema
unionAll
val allCompaniesDF = companiesDF.unionAll(companiesJsonDF)

we will get error, since companiesDF and companiesJsonDF schema is in different alignment order.
We can cast the required columns with the select.
Val companiesJsonIntDF = companiesJsonDF.select($”name”,$”employeeCount”.cast(“int”).as(“employeeCount”),$”isPublic”)
If we use unionAll then both Data frames will be combined.
val allCompaniesDF = companiesDF.unionAll(companiesJsonDF)
How to access union data in java
allCompaniesDF.groupBy(allCompaniesDF.col(“isPublic”)).agg(avg(“employeeCount”)).show
Filter condition using where clause
allCompaniesDF.where($”employeeCount”>100000).show

How to use in Java

allCompaniesDF.where(allCompaniesDF .col($”employeeCount”). gt 100000)).show
How to save the data

allCompaniesDF.write.json((file:///c:/spark/all.json)

we can write the same as providing format, how we have read the file same

sqlContext.write.format(“json”).save(“file:///c:/spark/Companies.json”)
How to import the ROW
Import org.apache.spark.sql.Row
How to convert data into row.
allCompaniesDF.map(company=>company(0).asInstanceOf[String])
How to retrieve column values
.foreach(println)

How to register the table to run the sql like statements.
- We can use hql also for hive tables.
allCompaniesDF.registerTempTable(“Companies”)
sql “SELECT * from Companies”
.show
Sql(“SELECT AVG(employeeCount) AS AverageEmpCount FROM Companies GROUP BY isPublic”).show
How to cache tables
Sql(“CACHE TABLE Companies”)


Spark Streaming
1. It is for streaming the data.
2. It is very popular library and it takes up the spark big data processing power and crunch up the speed.
3. It has the ability to stream GiGa byte data in sec.
4. It will steam the real time data as much fast as it can
5. It can have exactly one transformation schematics’ and failure recovery time as in matter of sec or 2 secs.
6. Due to 1 transformation the transformation output can’t be duplicated.
7. The transformation method itself will execute multiple times on failure.


Competitors

1. Apache STORM
1. Spark streaming is 40 times faster compare to STROM
2. In Storm data can be duplicated.
3. Spark is complete package we can inter mixed concepts without learning a new framework
4. STORM is true streaming framework. It will process item one by one as it arrives
5. SPARK process the incoming data as a small deterministic batch jobs. This is called micro batching.


Source of data to be stream

1. Kafka
2. Twitter
3. Flume
4. HDFS
a. Once we picked the Source then it will flow into Spark Streaming receiver. Where we have one receiver per one stream.
b. Behind the scene Streaming incoming data store into series of RDDS with specified windows of time.
c. Then each time window it will passed to spark core and it will process as normal.
d. So our stream becomes series of RDDS.
e. Here we have two points of Spark processing one is Receiver and one worker

Spark Streaming DEMO

This demo will explain how to process the tweets data which is mentioned in hash tags
1. First we need to get access for twitter API.
2. Go to https://apps.twitter.com
3. Please refer my previous posts, how to create app in twitter.
4. Provide key details in build.sbt file.
5. Write a program to retrieve the tweets data and process the same

MLlib
1. This is very complex library. Since it is having complex algorithms.
Competitors for MLlib
1. MATLAB
2. R
These are easy to use and fairly scalable.
On the other hand we are having
3. mahout and
4. GraphLab
 These are more scalable and cost of use.
 It was Started by MATLABS and driven by ML stack
 It was a three form approach to make machine learning easy and scalable
 ML Optimizer and MLI were used for machine learning pipe lines and algorithm development.
 MLlib was the production implementation , that came from ML Optimizer and MLI
 Spark MLlib implementation as assumed most of this stack, with mllib has original based RDD algorithms reside.
 And ML name space contains high level pipe line API built on top of Data Frames. Which has taken from ML Optimizer

org.apache.spark.mllib
org.apache.spark.ml


 These ML pipelines officially introduced into the Spark 1.2 as attempt to simplified machine learning.
 In machine learning flow and loading the data , extracting features , training the data and testing the data.
1. Algorithms
1. Classification
2. Regression
3. Collaborative Filtering
4. Clustering
5. Dimensional Reduction
2. Feature Extraction and Transformation
3. Uses of these algorithms
1. SPAM filtering
2. FRUD Alert
3. Recommendation
4. Determine the information on clusters
5. Speech Recognition

Graphx


1. It is a library that brings table structure into grapgh like structure. Like social networking.
2. It is used for data parallel and Graph parallel
3. GraphX works RDD behind the scene. Just drawing the data in graph optimized data structure.
4. The execution run through this parallel pattern for each node computation depends on each of it’s neighbours.
5. This focus on graph specialization with some impressive performance gain.
Competitors
1. Try to run graphs on Hadoop is very complex.
2. Apache GIRAPH is another competitor but it is slow compare to Graphx while running the page rank algorithm
3. Graph Lab is 33% slower than Graphx
What kind of things we can do using GrpahX?
1. Web itself is joint graph
2. Algorithm for website rendering.(google and Wikipedia)
3. Social network data analysis using Social Graphs available.
4. Graphs available for product valuation in websites like amazon and NETFLIX
5. We can use our technological power to advance science to research generic analysis


1. Data will be referred as vertex with vertex id vertex Type
2. Again Vertex id referred as Long


Edge will be described with vertex Id type of along with edge type


Then we will have Vertex and Edge, then we can build graph like below.
1. Graph(VType,EType)
2. Graph(RDD[Vertex],RDD[Edge])
Edge Triplet-
Grapghx will expose through object known as EdgeTriplet and it is having all the information about each connection
This will provide us on Graph complete view more reasonable understanding.

Thank you very much for viewing this post.

Saturday, July 9, 2016

Spark Distribution and Instrumentation, Spark Cluster, Spark AWS Setup,Spark on Yarn in EMR,Spark UI,foxyProxy, AWS Cluster configuration

This post will explain advance topics in Spark.
1. Spark Distribution
2. Spark Cluster Management
3. AWS setup for ec2 and Access and Identity Management
4. How to create cluster using AWS
5.Spark UI
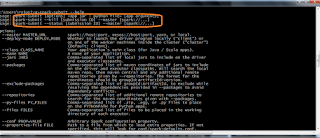
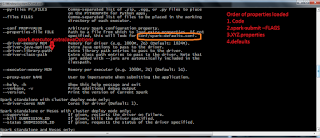
Spark –Submit
We will see how spark –submit will work.
1. When application submitted it launches to the driver and which will run through the application main method.
2. This Driver process could decide submitting machine or distributed cluster on master node, it is depending how it is submitted.
3. Then Driver asks the Cluster manager to specify the amount of resources. As long as resources are available. Cluster was spend them up to use.
4. Then Driver will run through the main application to building up the RDD until it reach action. Which causes the Driver to trigger the execution of the DAG and manage the work flow.
5. Once that completes the driver continues to the main code until the entire execution done. At that point resources are cleaned up. However this resource clean up could occur before the Driver completes. If the Spark context start method called before that.


Spark submit for mater through local means single machine
Local[#] – specifies no of CPUs , spark has to work
Local[*] – specifies all CPUs , spark has to work

Deploy mode :
Client – will deploy in same machine
Master –one of the worker machines inside the cluster


Cluster Managers
1. What is cluster Manager?
- It is distributed tunnel and like a model data center.
- One machine is referred as cluster manager- which is responsible to manage other systems.
2. Primary cluster managers used for spark.
- Spark will have it’s own built in manager called spark standalone.
[ --master spark://[HOST]:7077
It is work with client/cluster mode
Spark.deploy.spreadOut=true
--total-executor-cores #
--executor-cores
- Hadoop will have manager name called YARN
- Apache MESOS
--master mesos://[HOST]:5050
Client/(cluster)
Spark.mesos.coarse=false


Spark Standalone

1. To configure Spark standalone each machine required compiled version of spark.
2. We need to configure $SPARK_HOME on each machine. So they point to that location.
3. In master machine we need conf/slaves directory and spark_home directory
4. Inside conf directory we will have SLAVE files(SLAVES_ADDRESS_1, SLAVES_ADDRESS_2…….. SLAVES_ADDRESS_N)
5. We will listing the slave address for each machine address separated by new line
6. If it’s not found these slave address files, then it will take from localhost.
./sibn/start-all.sh to start the spark process. It requires password less ssh directory.
How to start the MASTER
 >bin/spark-class org.apache.spark.deploy.master.Master

How to start the Worker
  >bin/spark-class org.apache.spark.deploy.worker.Worker
   Spark://[MASTER]:7077
How to stop the running spark process
1. Use the stop-all.sh from the sbin directory
Standalone manager using amazon ec2
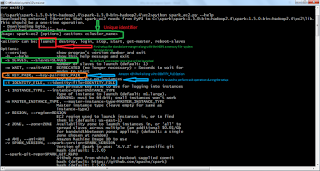
1. To start with ec2 we required AWS credentials like AWS_ACCESS_KEY_ID and AWS_SECRET_ACCESS_KEY


How to do AWS setup
1. To work with ec2 cluster environments we need AWS_ACCESS_KEY_ID and AWS_SECRET_ACCESS_KEY. For this we need to be register the same.
2. First open the https://aws.amazon.com/ in browser.
3. Create AWS account


4. We need to install AWS command line interface (https://aws.amazon.com/cli)
5. After installation we need to set the path for aws in environment variables.( C:\Program Files\Amazon\AWSCLI)
6. In this home we page we will have download link for our respective systems.
7. Here I have downloaded 64 bit windows installer and installed the same.
8. Now go to https://console.aws.amazon.com. If you don’t have account create the same.
9. Please follow the instructions which is displayed in amazon sites to register successfully.
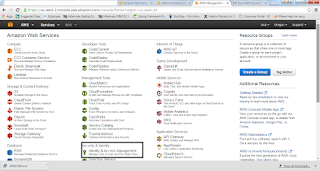
10. Once your registration successful, then login into the aws console. Page should look like this.
11. Now we will do configuration in Identity and Access Management

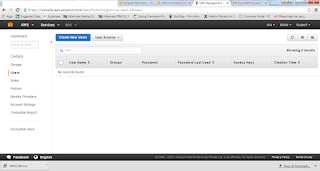
12. Then in the Left panel click on the Users and create Create New Users
13. Provide the User Name and check the Generate Access key for each user


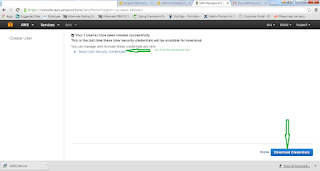
14. This key information needed to access AWS functions outside of this web management like ec2 script or CLI.
15. Once we have created then we can show the Credentials, it copy or Download as CSV.

16. It will be available only once, if missed them again we can generate new access keys the same.
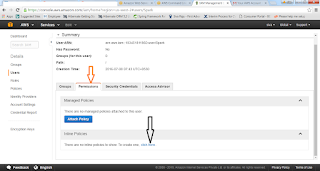
17. Then we need to provide permission to access this cluster
18. Once we have setup the permissions and policies.


How to configure the AWS
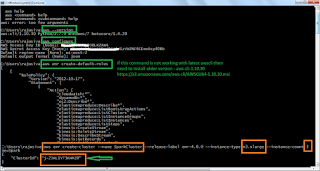
C:> aws configure

 Provide all the details like access key id
 Secret key id
 Default region
 Default output format
C:>aws emr create-default-roles


ssh ability setup
https://console.aws.amazon.com/console
1. First we need to make sure our console is pointing to correct region which we setup at the time of CLI. Because keypair is region specific
2.If we are using non windows file, then we need to change the permissions of the file.chmod 444 [KEY FILE PATH]
3. We are the soul owner of this file.
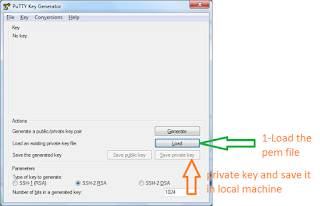
4. Now we are working on windows , we need to convert to the pem file into ppk file using putty gen
5.If you don’t have putty – then go to putty.org download the putty.exe and puttygen.exe
6.Putty is for enabling ssh on windows
7.puttygen to generate ppk files
8.Load the file (.pem file) through putty gen and click on the Generate.


9.If you face any error while creating default-roles then u can download awscli version and install the same.
https://s3.amazonaws.com/aws-cli/AWSCLI64-1.10.30.msi


Spark on Yarn in EMR(ElasticMapReduce)
How to create a cluster in AWS
C:>
aws emr create-cluster --name SparkCluster --release-label emr-4.0.0 --instance-type m3.xlarge --instance-count 3 --applications Name=Spark --use-default-roles --ec2-attributes KeyName=Spark


1. To create a cluster, we need to specify cluster name
2. Release label- which tells the emr which version of the machine setup to use.
3. What type of instance we want to use in our cluster
4. How many instances we want to use in cluster
5. We will specify bootstrap with the spark application.
6. We will specify the use default roles
7. We will specify the key pair name which we have created.

8. Once we have successfully submitted then we will get back the cluster id, which is useful to make CLI calls in future respect to this cluster.
{
"ClusterId": "j-2JKL1Y73KHMZ0"
}


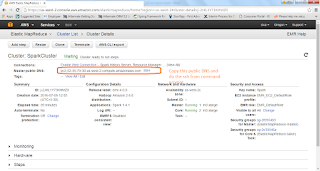
Let us now monitor the cluster in the EMR section of console

https://us-west-2.console.aws.amazon.com/elasticmapreduce/home?region=us-west-2#

1. once cluster started then we need to copy the master PUBLIC DNS to do the ssh from our environment to cluster.


putty –ssh –i <.ppk>(which is available in our system)  hadoop@ -D 8157
1. username hadoop by default
2. dynamic proxy 8157
3. export SPARK_PUBLIC_DNS=< ec2-52-35-79-30.us-west-2.compute.amazonaws.com>
4. spark-shell run in EMR

Once spark shell executed in EMR, then we can execute all the actions in EMR.


SPARK UI


1. We can monitor and maintain spark applications using tool called Spark UI.
2. We need to configure browser to handle the proxy for ssh connections.
3. Follow the instructions http://amzn.to/1LWax9x
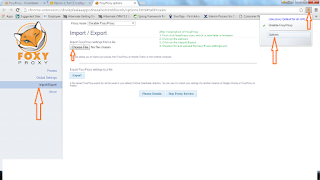
4. First install proxy named FoxyProxy - https://getfoxyproxy.org/downloads/
5. Follow the http://docs.aws.amazon.com/ElasticMapReduce/latest/DeveloperGuide/emr-connect-master-node-proxy.html#emr-connect-foxy-proxy-chrome
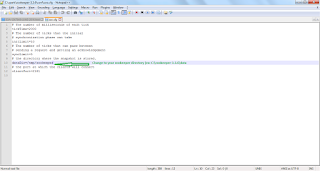
6. Copy that content and create a file called foxyProxy-settings.xml
7. Once that is done, if we execute any job or program, the details will be available in the
8. http://ec2-52-35-79-30.us-west-2.compute.amazonaws.com:4040/jobs/
9. Here ip address is our cluster ip address and default port is 4040
10. We can use port 20888, and following the address like
11. http://ec2-52-35-79-30.us-west-2.compute.amazonaws.com:20888/proxy/
12. History of completed applications available under port :18080
13. http://ec2-52-35-79-30.us-west-2.compute.amazonaws.com:18080


Wednesday, July 6, 2016

Spark Core Advanced concepts Cache, Accumulator, Java in Spark


Advanced Concepts in Spark Core

1. KeyValue Format
2. Cache - Speed up the data while persisting
3. Accumulator
4. Java

How to create a implicit class

Ex: If we try to use - 1.plus(1) – we will get error

error: value plus is not a member of Int
1.plus(1)

To avoid the error we can write custom implicit conversion
case class IntExtensions(value:Int){
def plus(operand:Int) = value+operand
}


The above code is not looking good. So we will use implicit conversions.
scala>import scala.language.implicitConversions

scala> import scala.language.implicitConversions
import scala.language.implicitConversions

scala> implicit def intToIntExtensions(value:Int)={
     | IntExtensions(value)
     | }
intToInteExtensions: (value: Int)IntExtensions

1. We are using implicit to convert our integer value
If we use scala> 1.plus(1) – result will be 2, Since internally conversion happened.
Scala > 1.plus(1) is nothing but intToIntExtensions(1).plus(1)
RDD Implicits
1. doubleRDDToDoubleRDDFunctions(rdd:RDD[Double]): DoubleRDDFunctions
2. numericRDDToDoubleRDDFunctions[T](rdd:RDD[T]): DoubleRDDFunctions
3. rddTOAsyncRDDActions[T](rdd:RDD[t]): AsyncRDDActions[T]
4. rddToOrderedRDDFunctions[K,V](rdd:RDD[(K,V)]: OrderedRDDFunctions
5. rddToPairRDDFunctions[K,V](rdd:RDD[(K,V)]: PairRDDFunctions
6. rddToSequenceFileRDDFunctions[K,V](rdd:RDD[(K,V)]: SequenceFileRDDFunctions

If we are using older versions then we have to import rdd’s from Spark Context using import.SparkContext._
Pairs


If we see the above data we will have same key and different data for few of the keys.
But data stored in different nodes like below


If we see the above tables data, same key and values will be stored in same node. So it easy to us to pair the key and values.
Pair Methods
1. collectAsMap – which does the same thing as collect and it can return as map and also we can extract only keys or values or we can lookup is to get sequence of values for given key
- keys/values/lookup
2. mapValues -same as values
3. flatMapValues- same as values
4. reduceByKey- it is same as key. But it is transformation instead of action. Since we are having all the keys in same machine, we can work with same worker instead of going back to driver.
5. foldByKey
6. aggregateByKey(0)(….[AGG FUNCTIONS]…)
7. combineByKey(x=>x*x)(….[AGG FUNCTIONS]…) - it accepts functions instead of static which aggregateByKey will accept
8. groupByKey – It is same as using group By method.
9. countByKey
10. countApproxDistinctByKey
11. sampleByKey
12. substractByKey
13. sortByKey – it is made for OrderedRDDFunctions

SQL-Like Pairings

1. join- RDD[K,(TLeft,TRight)]
2. innerjoin- left and right keys match
3. fulleOuterJoin – retrieve all the details which right key does not match(left,NULL) and (NULL,right) left key does not match and left and right keys matched values (left,right)
4. left join- all the records from left table and matched values from the right table (left,NULL) and (left,right)
5. rightJoin-opposite of leftJoin
6. cogroup/groupWith-


rddToPairRDDFunctions[K,V](rdd:RDD[(K,V)]: PairRDDFunctions

Pair Saving

1. saveAS(NewAPI)HadoopFile
- path
- keyClass
- valueClass
- outputFormatClass: outputFormat
2. saveAS(NewAPI)HadoopDataSet
- conf

3. saveAsSequenceFile – available in Scala and python
- saveAsHadoopFile(path,keyClass,valueClass,sequencFileOutputFormat)
1. Cache
1.It’s ability to store intermediate data in memory while keeping distributed that allows possibility of a 100 times performance gain when compared to Hadoop.
2.It is helpful in Machine learning
Ex: How it is useful
3.Suppose we have 1 RDD, use Thread.sleep , performance algorithm to get the result and create one more transformation and final result will be given below.
4.We can Cache or persist , before calling action
5.We can use the in memory or disk to persist the RDD

If we want to run another transformation , then it will call from cache.


a. Cache/persist
- Org.apache.spark.storage.StorageLevel.MEMORY_ONLY- it is default option and it means data will be cached into memory .
b. Persist
- MEMORY_ONLY
- MEMORY_AND_DISK
- DISK_ONLY
- MEMORY_ONLY_SER- if any memory issue we can serialize the data.
- MEMORY_AND_DISK_SER
- …_2 – all these options appended with _2 , So the data will be replicated with another worker.
- This required to computation upon failure.as the DAG scheduler opt’s for the alternate storage location, which will re replicate the data.
- OFF_HEAP- which will store the data in memory of the JVM Heap.
- NONE – the default storage for any RDD.
c. Unpersist(blocking:Boolean=true) – to clear the cache.- No need to call explicitly once RDD is out of scope then automatically clear the cache.

Accumulator
 1. We have seen so many methods either transform or action on RDD.
 2. Accumulator is nothing but to accumulating the values for the shared variables across all clusters.
How to create Accumulator?
val accumulator = sc.accumulator(0,”Accumulator Name”):Accumulator[Int]
 it will accept  Int , Double, Float and Long
ex:
     rdd.foreach(x=>{ 

          doSomethingWith(x) // Action Methods
          accumulator +=1   // it is same like java to increment the value. And called as Worker

      }

val  accumulatedValue = accumulator.value // This is final accumulated value called as Driver

If any worker goes down, then already accumulated value will be there with Driver. If again new worker start and picks the down node, then again it will accumulate the value. It is mismatch. For this we have to find the error accumulated.

Rdd.foreach(x=>{
   Try{
   }
Catch({
      Case _=> errorCounterAccumulator+=1;  // This will useful, do we need to store accumulate the value in case of error or not.
}
}

Java in Spark

In Java 8 we have Lambdas. But before that we have no lambda expressions. For this we need to write different syntax in Spark RDD.

Ananymous inner class
JavaRDD.[INSERT METHOD OF CHOICE]{
   new Function(){
      Public TOut call(TIn value){
      //process(value) -> TOut
      }
   }
}
Functions available in Java


The above all methods available in org.apache.spark.api.java.function
Java does not have implicits, we need to create manually

JavaPairRDD mapToPair (PairFunction)

Thank you very much for viewing this post.

Sunday, July 3, 2016

Spark Fundamentals, Spark Core , Spark History,Spark RDD

Why do we require Spark?
1. Data will be in one machine is very difficult to process , and it will be increase day by day
Spark
1. Easy Readability
2. Expressiveness
3. Fast
4. Testability
5. Interactive
6. Fault Tolerant
7. Unify Big Data
Spark overview
1. Basics of Spark
2. Core API
3. Cluster Managers
4. Spark Maintenance
Libraries
1. SQL
2. Streaming
3. MLib/GraphX
Troubleshooting/Optimization
Basics of Spark
1. Hadoop
2. History of Spark
3. Installation
4. Big Data’s Hello World

If we want to run streaming data, then we need STORM. Like this we need different frame works to run the different big data items like Hive, Scalding, HBase , Apache DRILL, Flume,mahout and Apache GIRAPH to unify all these things Spark came into picture.


1. Spark is a unified flatform for Big Data
2. It originates from core libraries


Abstractions FTW
Hadoop MR will take – 110000 lines of code
Impala will take – 90000 lines of code
Strom will take – 70000 lines of code
Giraph – 60000 lines of code
Finally Spark will take all together – 80000(includes Spark core- 40000+Spark SQL-30000+Streaming-6000+Graph X- 4000)


History of Spark
MapReduce-2004
Hadoop – 2006
Spark – 2009
Spark paper – BSD Open Source – 2010
amp Labs – 2011
Databricks -2013
Given to Apache – 2013
Top Level Downloaded and in apache – 2014
Databricks== Stability
Every three months , they will have releases.

Who is using Spark
Over 500 companies using Spark
Like PANDORA, NETFLIX, OOYALA, Goldmansachs, ebay, yahoo,conviva,hhmi and jannelia for healthcare
Spark Installation

Check at http://www.javaguruonline.com/2016/06/getting-started-with-spark-and-word.html

Spark Languages
We can write more than one language to write Scala applications
1. Scala
2. Java
3. Python
4. R

Hello Big Data
Word count example in http://www.javaguruonline.com/2016/06/getting-started-with-spark-and-word.html

Big Data
1. IOT – internet of things- fairly large amount of data.
2. Spark unified data flatform.
Spark Logistics
Experimental
Developer API
Alpha Component
Unit testing is Very easy in Spark

Resources
1. Amplabs- for big data-moores –law-means-better decisions
2. Chrisstucchio- Hadoop_hatred
3. Aadrake-command-line-tools-can_be-235X-fatser-than-your-hadoop-cluster
4. Quantified-spark-unit-test
5. Spark.apache.org
\Documentation
\Examples
Apache Spark You tube channel.
Community

Spark Core

Spark Maintainers
1. Matei Zaharia
2. Reynold Xin
3. Patric Wendell
4. Josh Rosen

Core API
1. Appify
2. RDD( Resilient Distributed Dataset)
3. Transforming the data
4. Action

Spark Mechanics
1. Driver- Spark Context (It is distributer across workers)

1. Executor - Task
a.Worker
2. Executor -Task
b.Worker
3. Executor Task
c.Worker

Spark Context
a. Task creator
b. Scheduler
c. Data locality
d. Fault Tolerance

RDD
Resilient Distributed Dataset
DAG- Apache Spark has an advanced DAG execution engine that supports cyclic data flow and in-memory computing

Transformations
a. Map
b. Filter

Actions
a. Collect
b. Count
c. Reduce
RDD is immutable. Once created we can’t change
Every Action is fresh submit.

Input – How to load the data
1. Hadoop HDFS
2. File System
3. Amazon S3
4. Data bases
5. Cassandra
6. In Memory
7. Avro
8. Parquet
Lambdas-Anonymous functions
Named Method
def addOne(Item:int)={
 Item+1
} 
Val intList = List(1,2)
for( item <- intList) yield {
addOne(item);
}//List(2,3)

Using lambda function
Val intList = List(1,2)
intList.map(x=>{
addOne(x);
}) }//List(2,3)

We can minimise the above code like below
Val intList = List(1,2)
intList.map(item=>item+1)//List(2,3)

Transformations
RDD will have 2 types of methods
1.Transformations
a.A method used to take our existing data set run with provided function and it transform into another required shape
b.If any method returns another RDD, then it is transformation.

Map – Distributed across Nodes like Node1, Node 2 and Node N
The Given function will execute from all the nodes

Node1
      For (item <- items) {
           Yield mapFunction(item)
       }
mapFunction- transformation function. This is repeated across all the nodes. Instead of repeating all the same data in all nodes , we can avoid configuring mapItemsFunction(items) Ex:instead of creating DB connection each node we will have single DB connection. RDD Combiners We will have mongoDB RDD1 and HDFS file System RDD2, to combine both RDD’s we can use UNION to combinedRDD We can use ++ operator to combine two RDD’s Intersection -RDD1.intersection(RDD2), to get the distinct values from 2 RDDS. Substract - one RDD have only unique values to another RDD Cartesian – One RDD will take each element in another RDD will compare with all possible RDD pairs Zip- Both RDDS should match same no of elements and same number of partitions 2. Actions a. Transformations are lazy and keep the data as distributed as possible. b. Actions typically sent results back to the Driver. 1. Associative Property 2+4+4+7 we can add this values in one go or (2+4) + (4+7) It is nothing but, however we are doing the action, result should be same. Acting on Data Data is distributed on different clusters, If we collect all the data and send to driver, there may be out of memory exceptions. Instead of that we can use take(5), each time once 5 records moved to Driver for computation , then again 5 records will take and send to driver and Driver keep it in Array format for final computation. Persistence Saving data no need to go to Driver. It can directly Store into any DB like 1. Cassandra 2. mongo DB 3. hadoop HDFS 4. AMAZON REDSHIFT 5. MySQL To save the Data we can use different formats 1. saveAsObjectFile(path) 2. saveAsTextFile(path) 3. ExternalConnector 4. Foreach(T => unit) foreachPartition(Iterator[T]=>unit) - Thank you very much for viewing this post.

Friday, July 1, 2016

Getting started with apache Pig, Pig UDF and How to write and execute Pig ,Pig scripts , Grunt shell


What is the Need of Pig?
1.Who don’t know java , then can learn and write Pig script.
2.10 lines of Pig = 200 lines of Java
3.It has built in operations like Join, Group, Filter, Sort and more…
Why we have to go for Pig when we have Map Reduce
1.Because of performance on par with Raw Hadoop
2.Hadoop will take 20 lines of code = 1 line of Pig
3.Hadoop development time is 16 minutes = 1 minute of Pig
Map-Reduce
1.Powerful model for parallelism
2.Based on a rigid procedural structure
3.Provides a good opportunity to parallelize algorithm
Pig
1.It is desirable to have a higher level declarative language.
2.Similar to SQL query where the user specifies “what” and leaves the “how” to the underlying process engine.

Why Pig
1.Java Not Required
2.Can take any type of data like structured or semi structured data.
3.Easy to learn, write and read. Because it is similar to SQL, Reads like series of steps
4.It can extensible by UDF from Java, Python, Ruby and Java script
5.It provides common data operations filters, joins, ordering etc. and nested data types tuples, bags and maps, which is missing in MapReduce.
6.An ad-hoc way of creating and executing map-reduce jobs on very large data sets
7.Open source and actively supported by a community of developers.
Where should we use Pig?
1.Pig is data flow language
2.It is on the top of Hadoop and makes it possible to create complex jobs to process large volumes of data quickly and efficiently
3.It is used in Time Sensitive Data Loads
4.Processing Many Data Sources
5.Analytic Insight Through Sampling.


Where not to use Pig?
1.Really nasty data formats or completely unstructured data(video, audio, raw human-readable text)
2.Perfectly implemented MapReduce code can sometimes execute jobs slightly faster than equally well written Pig code.
3.When we would like more power to optimize our code.
What is Pig?
1.Pig is a open source high level data flow system
2.It provides a simple language queries and data manipulation Pig Latin, that is compiled into map-reduce jobs that are run on Hadoop
Why Is it Important?
1.Companies like Yahoo, Google and Microsoft are collecting enormous data sets in the form of clicks of streams, search logs and web crawls.
2.Some form of ad-hoc processing and analysis of all this information is required.
Where we will use Pig?
1.Processing of Web Logs
2.Data processing for search platforms
3.Support for Ad hoc queries across large datasets.
4.Quick Prototyping of algorithms for processing large data sets.

Conceptual Data flow for Analysis task


How Yahoo uses Pig?
1.Pig is the best suited for the data factory

Data Factory contains
Pipelines:
1.Pipelines bring logs from Yahoo’s web servers
2.These logs are undergo a cleaning steps where boots, company internal views and clicks are removed.
Research:
1.Researchers want to quickly write a script to test theory
2.Pig integration with streaming makes it easy for researchers to take a Perl or Python script and run it against a huge dataset.
Use Case in Health care

1.Take DB Dump in csv format and ingest into HDFS
2.Read CSV file from HDFS using Pig Script
3.De-identify columns based on configurations and store the data back in csv file using Pig script.
4.Store De-identified SCV file into HDFS.
Pig – Basic Program structure.
Script:
1.Pig can run a script file that contains Pig commands
Ex: pig script.pig runs the commands in the file script.pig.
Grunt:
1.Grunt is an interactive shell for running the Pig commands.
2.It is also possible to run Pig scripts from within Grunt using run and exec(execute)
Embedded:
1.Embedded can run Pig programs from Java , much like we can use JDBC to run SQL programs from Java.


Pig Running modes:
1.Local Mode -> pig –x local
2.MapReduce or HDFS mode -> pig
Pig is made up of Two components
1.Pig
a.Pig Latin is used to express Data Flows
2.Execution Environments
a.Distributed execution on a Hadoop Cluster
b.Local execution in a single JVM
Pig Execution
1.Pig resides on User machine
2.Job executes on Hadoop Cluster
3.We no need to install any extra on Hadoop cluster.
Pig Latin Program
1.It is made up of series of operations or transformations that are applied to the input data to produce output.
2.Pig turns the transformations into a series of MapReduce Jobs.

Basic Types of Data Models in Pig

1.Atom
2.Tuple
3.Bag
4.Map
a)Bag is a collection of tuples
b)Tuple is a collection of fields
c)A field is a piece of data
d)A Data Map is a map from keys that are string literals to values that can be any data type.
Example: t= (1,{(2,3),(4,6),(5,7)},[‘apache’:’search’])

How to install Pig and start the pig
1.Down load Pig from apache site
2.Untar the same and place it where ever you want.
3.To start the Pig , type pig in the terminal and it will give you pig grunt shell
Demo:

1.Create directory pig_demo under /home/usr/demo/ mkdir pig_demo
2.Go to /home/usr/demo/pig_demo
3.Create a 2 text files A.txt and B.txt
4.gedit A.txt
add the below type of data in A.txt file.
0,1,2
1,7,8
5.gedit B.txt add the below type of data in B.txt file
0,5,2
1,7,8
6.Now we need to move these 2 files into hdfs
7.Create a directory in HDFS
     Hadoop fs –mkdir /user/pig_demo
8.Copy A.txt and B.txt files into HDFS
     Hadoop fs –put *.txt  /user/pig_demo/
9.Start the pig
    pig –x local

            or 
     pig
 
10.We will get Grunt shell, using grunt shell we will load the data and do the operations the same.
        grunt> a= LOAD ‘/user/pig_demo/A.txt’ using PigStorage(‘,’);
        grunt> b= LOAD ‘/user/pig_demo/B.txt’ using PigStorage(‘,’);
        grunt> dump a;
        // we will load the data and it will display in Pig
        grunt> dump b;
        grunt> c= UNION a,b;
        grunt> dump c;
 
11.We can change the A.txt file data and again we will place it into HDFS using
hadoop fs –put A.txt /user/pig_demo/
And load the data again using grunt shell, then union the a,b files . then combine 2 files using UNION and then dump the C. This is how we can do the load the data instantly.
//If we want split data into column wise 0 column values split into d and e
        grunt> SPLIT c  INTO d IF $0 == 0 , e IF $0 == 1
        grunt> dump d;
        grunt> dump e;
        grunt> lmt = LIMIT c 3;
        grunt> dump lmt;
        grunt> dump c;
        grunt> f= FILTER  c BY  $1 > 3;
        grunt> dump f;
        grunt> g = group c by  $2;
        grunt> dump g;

We can load the data in different format
grunt> a= LOAD ‘/user/pig_demo/A.txt’ using PigStorage(‘,’)  as (int:a1 , int:a2 , int:a3);
grunt> b= LOAD ‘/user/pig_demo/B.txt’ using PigStorage(‘,’)  as (int:b1 , int:b2 , int:b3);
grunt> c= UNION a,b;
grunt> g = group c by  $2;
grunt> f= FILTER  c BY  $1 > 3;
grunt> describe c;
grunt> h= GROUP c ALL;
grunt> i= FOREACH h GENERATE COUNT($1);
grunt> dump h;
grunt> dump i;
grunt> j = COGROUP a BY $2 , b BY $2;
grunt> dump j;
grunt> j = join a by $2 , b by $2;
grunt> dump j;

Pig Latin Relational Operators
1.Loading and storing
a.LOAD- Loads data from the file system or other storage into a relation
b.STORE-Saves a relation to the file system or other storage
c.DUMP-Prints a relation to the console
2.Filtering
a.FILTER- Removes unwanted rows from a relation
b.DISTINCT – Removes duplicate rows from a relation
c.FOREACH .. GENERATE – Adds or removes fields from a relation.
d.STREAM – Transforms a relation using an external program.
3.Grouping and Joining
a.JOIN – Join two or more relations.
b.COGROUP – Groups the data in two or more relations
c.GROUP – Group the data in a single relation
d.CROSS – Creates a Cross product of two or more relations
4.Sorting
a.ORDER – Sorts a relation by one or more fields
b.LIMIT – Limits the size of a relation to the maximum number of tuples.
5.Combining and Splitting
a.UNION – Combines two or more relations into one
b.SPLIT – Splits a relation into two or more relations.

Pig Latins – Nulls
1.In Pig , when a data element is NULL , it means the value is unknown.
2.Pig includes the concept of a data element being NULL.(Data of any type can be NULL)
Pig Latin –File Loaders
1.BinStorage – “binary” storage
2.PigStorage – Loads and stores data that is delimited by something
3.TextLoader – Loads data line by line (delimited by newline character)
4.CSVLoader – Loads CSV files.
5.XMLLoader – Loads XML files.

Joins and COGROUP
1.JOIN and COGROUP operators perform similar functions
2.JOIN creates a flat set of output records while COGROUP creates a nested set of output records.
Diagnostic Operators and UDF Statements
1.Types of Pig Latin Diagnostic Operators
a.DESCRIBE – Print’s a relation schema.
b.EXPLAIN – Prints the logical and physical plans
c.ILLUSTRATE – Shows a sample execution of the logical plan, using a generated subset of the input.
2.Types of Pig Latin UDF Statements
a.REGISTER – Registers a JAR file with the Pig runtime
b.DEFINE-Creates an alias for a UDF, streaming script , or a command specification

    grunt>describe c;
    grunt> explain c;
     grunt> illustrate c;

Pig –UDF(User Defined Function)
1.Pig allows other users to combine existing operators with their own or other’s code via UDF’s
2.Pig itself come with some UDF’s. Few of the UDF’s are large number of standard string –processing, math, and complex-type UDF’s were added.
Pig word count example
1.sudo gedit pig_wordcount.txt

data will be as like this 

hive mapreduce pig Hbase siva raju

// create directory inside HDFS and place this file
hadoop  fs –mkdir /user/pig_demo/pig-wordcount_input
//put pig_wordcount.txt file
hadoop  fs –put  pig_wordcount.txt  /user/pig_demo/pig-wordcount_input/
//list the files inside the mentioned directory
hadoop  fs –ls   /user/pig_demo/pig-wordcount_input/

//load the data into pig
grunt> A = LOAD  ‘/user/pig_demo/pig-wordcount_input/ pig_wordcount.txt’;
grunt> dump A;
grunt> B = FOREACH A generate flatten (TOKENIZE((character)$0)) as word;
grunt> dump B;
grunt> C = Group B by word;
grunt> dump C;
grunt> D =  foreach C generate  group, COUNT(B);
grunt> dump D;
How to write a pig script and execute the same
sudo gedit pig_wordcount_script.pig
//We need to add the below command to the script file.
A = LOAD  ‘/user/pig_demo/pig-wordcount_input/ pig_wordcount.txt’;
B = FOREACH A generate flatten (TOKENIZE((character)$0)) as word;
C = Group B by word;
D =  foreach C generate  group, COUNT(B);
STORE D into ‘/user/pig_demo/pig-wordcount_input/ pig_wordcount_output.txt’;
dump D;
//Once completed then we need to execute the pig script
pig pig_wordcount_script.pig

Create User defined function using java.
1. Open eclipse – create new project – New class-
Import java.io.IOException;
Import org.apache.pig.EvalFunc;
Import org.apache.pig.data.Tuple;
public class ConvertUpperCase extends EvalFunc{
    public String exec(Tuple input)throws IOException{
      If(input == null || input.size()==0){
          return null;
      }
    try{
        String str = (String)input.get(0);
         return str.toUpperCase();
     }
catch(Exception ex){
  throw new IOException(“Caught exception processing row”);
}
     }
}
Once done the coding , then we need to export as jar. Place it where ever you want.

How to Run the jar from through pig script.
1.Create one udf_input.txt file - > sudo gedit udf_input.txt
Siva    raju    1234    bangalore   Hadoop
Sachin    raju    345345    bangalore   data
Sneha    raju    9775    bangalore   Hbase
Navya    raju    6458    bangalore   Hive
2.Create pig_udf_script.pig script - sudo gedit pig_udf_script.pig
3.Create one directory called pig_udf_input
  hadoop  fs –mkdir /user/pig_demo/pig-udf_input
  //put pig_wordcount.txt file
  hadoop  fs –put  udf_input.txt  /user/pig_demo/pig-udf_input/
4.Open the pig_udf_script.pig file
REGISTER /home/usr/pig_demo/ ConvertUpperCase.jar;
A=LOAD  ‘/user/pig_demo/pig-udf_input/ udf_input.txt’ using PigStorage (‘\t’) as (FName:chararray,LName:chararray,MobileNo:chararray,City:chararray,Profession:chararray);
B=FOREACH A generate ConvertUpperCase($0), MobileNo, ConvertUpperCase(Profession), ConvertUpperCase(City);
STORE B INTO ‘‘/user/pig_demo/pig-udf_input/ udf_output.txt’
DUMP B;
Run the UDF script using the following command.
pig pig_udf_script.pig
AddToAny

Contact Form

Name

Email *

Message *