Tuesday, October 24, 2017

Getting started with Pivotal Gemfire On Windows


This post will explain you about , how to start pivotal Gemfire on Windows
Step 1: What is Gemfire?
In-Memory Data Grid powered by Apache Geode
Scale your data services on demand to support high-performance, real-time apps
you can check more info on Gemfire docs

Step 2: Download - pivotal-gemfire-9.1.0.tar.gz using Download Pivotal Gemfire
Step 3: Unzip the downloaded file and set the PATH in environement variables.
Step 4: check the version of the pivotal gemfire, which is available in your system gfsh version --full
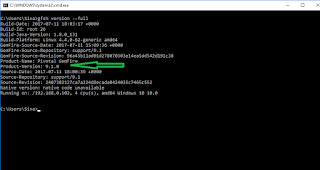
Step 5: Now we need to create a locator - Go to the place which ever the location you want to create locator in command prompt.
Step 6:Start the gfsh.bat file from command prompt.
Step 7: start locator --name=test --J=-Dgemfire.http-service-port=8080 --J=-Dgemfire.http-service.bind-address=localhost or

gfsh>start locator --name=test --J=-Dgemfire.http-service-port=8080 --J=-Dgemfire.http-service-bind-address=LAPTOP-2U8NKC7I
Starting a Geode Locator in F:\softwares\CloudFoundary_apache_gemFire\pivotal-gemfire-9.1.0\bin\test...
.....
Locator in F:\softwares\CloudFoundary_apache_gemFire\pivotal-gemfire-9.1.0\bin\test on LAPTOP-2U8NKC7I[10334] as test is currently online.
Process ID: 11740
Uptime: 3 seconds
Geode Version: 9.1.0
Java Version: 1.8.0_131
Log File: F:\softwares\CloudFoundary_apache_gemFire\pivotal-gemfire-9.1.0\bin\test\test.log
JVM Arguments: -Dgemfire.enable-cluster-configuration=true -Dgemfire.load-cluster-configuration-from-dir=false -Dgemfire.http-service-port=8080 -Dgemfire.http-service-bind-address=LAPTOP-2U8NKC7I -Dgemfire.launcher.registerSignalHandlers=true -Djava.awt.headless=true -Dsun.rmi.dgc.server.gcInterval=9223372036854775806
Class-Path: F:\softwares\CloudFoundary_apache_gemFire\pivotal-gemfire-9.1.0\lib\geode-core-9.1.0.jar;F:\softwares\CloudFoundary_apache_gemFire\pivotal-gemfire-9.1.0\lib\geode-dependencies.jar

Successfully connected to: JMX Manager [host=LAPTOP-2U8NKC7I, port=1099]

Cluster configuration service is up and running.

gfsh>start pulse
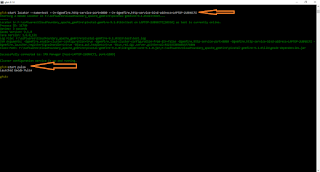
Step 8: Open the start pulse
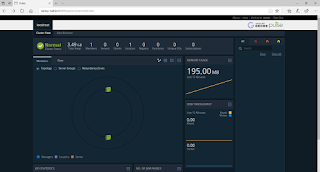
Step 9: Open the browser and enter port as 8080 -> http://laptop-2u8nkc7i:8080/pulse and provide username as admin and password as admin
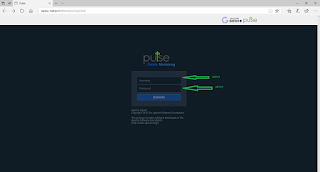
Step 10 cluster details will display after successful login.

Thank you verymuch for viewing this post. If you like this post please write comment and share.

Saturday, October 14, 2017

Getting started with Spring Boot deployed on Google Cloud. Maven, Google CloudSDK installation


This post will explain you. How to deploy springboot application on google cloud

Step 1: Open Open Google Cloud


Step 2: Login into google cloud.
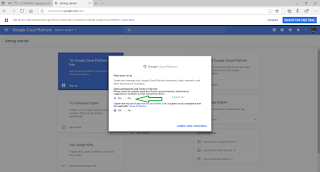
Step 3: Register Cloud application with free trail - Cloud Application Registration

Step 4:Create a new Project -
Provide necessary details and signup the same.
Step 5: Now you are completed signup process . Spring boot application needs to be deployed.
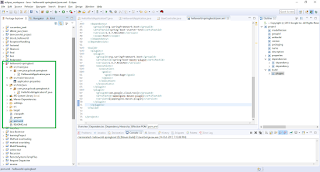
Step 6: Create a maven java project with name - helloworld-springboot and below code to pom.xml file.


  4.0.0

  com.java.gcloud.springboot
  helloworld-springboot
  0.0.1-SNAPSHOT
  jar

  helloworld-springboot
  Demo project for Spring Boot with google cloud


    1.8
    ${java.version} 
    ${java.version} 
    UTF-8
    1.3.1


      org.springframework.boot
      spring-boot-starter-web
      1.5.7.RELEASE


        org.springframework.boot
        spring-boot-maven-plugin
        1.5.7.RELEASE


              repackage


        com.google.cloud.tools
        appengine-maven-plugin
        ${appengine.maven.plugin}


Step 7: Now we need to write controller class name HelloworldApplication.java
package com.java.gcloud.springboot;

import org.springframework.boot.SpringApplication;
import org.springframework.boot.autoconfigure.SpringBootApplication;
import org.springframework.web.bind.annotation.PathVariable;
import org.springframework.web.bind.annotation.RequestMapping;
import org.springframework.web.bind.annotation.RequestMethod;
import org.springframework.web.bind.annotation.RestController;

@SpringBootApplication
@RestController
public class HelloworldApplication {
  @RequestMapping("/")
  public String home() {
    return "Hello World.. Welcome to Spring Boot.. which is deployed on Google cloud appengine!";
  }

  @RequestMapping(value = "/add/{a}/{b}", method = RequestMethod.GET)
  public String add(@PathVariable("a") int a,@PathVariable("b") int b) {
    return "Addition of a["+a+"] and b ["+b+"]is   ======   " + (a+b) ;
  }
  
  @RequestMapping(value = "/substract/{a}/{b}", method = RequestMethod.GET)
  public String substract(@PathVariable("a") int a,@PathVariable("b") int b) {
    return "Substract of a["+a+"] and b ["+b+"]is   ======   " + (a-b) ;
  }
  
  @RequestMapping(value = "/multiply/{a}/{b}", method = RequestMethod.GET)
  public String multiply(@PathVariable("a") int a,@PathVariable("b") int b) {
    return "Multiply of a["+a+"] and b ["+b+"]is   ======   " + (a*b) ;
  }
  
  @RequestMapping(value = "/division/{a}/{b}", method = RequestMethod.GET)
  public String division(@PathVariable("a") int a,@PathVariable("b") int b) {
    return "Division of a["+a+"] and b ["+b+"]is   ======   " + (a/b) ;
  }

  public static void main(String[] args) {
    SpringApplication.run(HelloworldApplication.class, args);
  }
}


Step 8: Run the pom.xml file using mvn clean install
Step 9: Now we need to run the application. go to the directory , where jar created and run the
java -jar   
another way to execute the application is right click on the HelloWorldApplication Run As- JavaApplication.
Step 10: Once spring boot started successfully then go to browser and hit http://localhost:8080 .
you should get the -Hello World.. Welcome to Spring Boot.. which is deployed on Google cloud appengine!

Step 11: That is done. Now we need to deploy this application on google cloud.
Step 12: Install the Google Cloud SDK for windows version and set the PATH in environment variables.
Step 13: Go to the place where pom.xml file is there in command prompt.
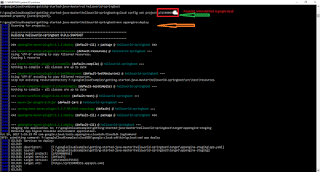
gcloud config set project p7259000552 After this command
mvn appengine:deploy

Step 14: You will get Build Success message. So application has been deployed successfully.
Step 15: Verify, whether it has been deployed or not - https://.appspot.com/
Step 16: This application will have simple math operations like add,sustarct,multiply,division if you click any of this links you will get appropriate results.
https://p7259000552.appspot.com/add/20/30
   https://p7259000552.appspot.com/substract/20/30
   https://p7259000552.appspot.com/multiply/20/30
   https://p7259000552.appspot.com/division/20/30


Thank you verymuch for viewing this post. If you like please share and comment.

Thursday, October 12, 2017

CRUD (Create, Read,Update,Delete) operations with Spring Boot , Mysql, JPA , Hibernate with in built Tomcat server.


This post will explain you. How to work with Spring boot and Mysql CRUD(create,read,update,delete) operations
Step 1: Open eclipse and create a java project.. more details please check my previous post getting started with spring boot.

Step 2: create a new pom.xml file under project and the below code to that file.


    4.0.0

    org.springframework
    spring_boot_first
    0.1.0

  
        org.springframework.boot
        spring-boot-starter-parent
        1.5.1.RELEASE


                   org.springframework.boot
                   spring-boot-starter-web
            
     
                   org.springframework.boot
                   spring-boot-starter-tomcat
             
      
                    org.springframework.boot
                    spring-boot-starter-security
       
       
                     org.springframework.boot
                     spring-boot-starter-data-jpa
        
                             
                                     org.apache.tomcat
                                     tomcat-jdbc


                       mysql
                       mysql-connector-java
                
   
                         commons-dbcp
                         commons-dbcp


        1.8


Step 3:Create new model object called User.
 package springboot.model;

import javax.persistence.Column;
import javax.persistence.Entity;
import javax.persistence.GeneratedValue;
import javax.persistence.GenerationType;
import javax.persistence.Id;
import javax.persistence.Table;

@Entity
@Table
public class User {
 @Id
 @Column
 private long id;
 @Column
 private String name;
 @Column
 private String gender;
 @Column
 private String country;
 @Column
 private String password;
 
 
 public long getId() {
  return id;
 }
 public void setId(long id) {
  this.id = id;
 }
 public String getName() {
  return name;
 }
 public void setName(String name) {
  this.name = name;
 }
 public String getGender() {
  return gender;
 }
 public void setGender(String gender) {
  this.gender = gender;
 }
 public String getCountry() {
  return country;
 }
 public void setCountry(String country) {
  this.country = country;
 }
 public String getPassword() {
  return password;
 }
 public void setPassword(String password) {
  this.password = password;
 }


}
Step 4: Create UserService and UserServiceImpl under package springboot.service
  package springboot.service;

import java.util.List;

import springboot.model.User;

public interface UserService {

   public List getUsers();
   public List createOrUpdateUser( User user);
   public List deleteUser( User user);
   
 
}
Step 5: Add below code in UserServiceImpl.

  package springboot.service;

import java.util.List;

import org.springframework.beans.factory.annotation.Autowired;
import org.springframework.stereotype.Component;

import springboot.dao.UserDAO;
import springboot.model.User;

@Component
public class UserServiceImpl implements UserService{

 @Autowired
 private UserDAO userDAO;
 
 @Override
 public List getUsers() {
  return userDAO.getUsers();
 }
 
 public List createOrUpdateUser( User user){
  return userDAO.createOrUpdateUser(user);
 }
   public List deleteUser( User user){
    return userDAO.deleteUser(user);
   }

 public void setUserDAO(UserDAO userDAO) {
  this.userDAO = userDAO;
 }

}


Step 6: Create UserDAO and UserDAOImpl under package springboot.dao as mentioned below
 package springboot.dao;

import java.util.List;

import javax.transaction.Transactional;

import org.springframework.data.repository.CrudRepository;

import springboot.model.User;

@Transactional
public interface UserDAO {
 public List getUsers();
 public List createOrUpdateUser( User user);
 public List deleteUser( User user);

}

Step 7: Add below code inside UserDAOImpl
 package springboot.dao;

import java.util.List;

import org.hibernate.Criteria;
import org.hibernate.Session;
import org.hibernate.SessionFactory;
import org.springframework.beans.factory.annotation.Autowired;
import org.springframework.stereotype.Component;

import springboot.model.User;

@Component
public class UserDAOImpl implements UserDAO{
 
 @Autowired
 private SessionFactory sessionFactory;

 public List getUsers(){
  Criteria criteria = sessionFactory.openSession().createCriteria(User.class);
  return criteria.list();
 }
 
 public List createOrUpdateUser( User user){
  Session session = sessionFactory.openSession();
  User oldUser = session.get(User.class, user.getId() );
  //System.out.println("oldUser id["+ oldUser.getId()+"]");
  if(oldUser == null){
   session.save(user);
   session.flush();
   System.out.println("Created or Update Successful");
    }
  Criteria criteria = sessionFactory.openSession().createCriteria(User.class);
  return criteria.list();
 }
 public List deleteUser( User user){
  Session session = sessionFactory.openSession();
  User oldUser = session.get(User.class, user.getId() );
  if(oldUser != null){
   session.delete(oldUser);
   session.flush();
   System.out.println("Deleted successfully");
  }
  Criteria criteria = sessionFactory.openSession().createCriteria(User.class);
  return criteria.list();
 }

 public void setSessionFactory(SessionFactory sessionFactory) {
  this.sessionFactory = sessionFactory;
 }

}

Step 8: Create BeanConfig class. which will create EntityManagerFactory.
 package springboot;

import javax.persistence.EntityManagerFactory;

import org.hibernate.SessionFactory;
import org.springframework.beans.factory.annotation.Autowired;
import org.springframework.context.annotation.Bean;
import org.springframework.context.annotation.Configuration;

@Configuration
public class BeanConfig {

 @Autowired
 private EntityManagerFactory entityManagerFactory;

 @Bean
 public SessionFactory getSessionFactory() {
     if (entityManagerFactory.unwrap(SessionFactory.class) == null) {
         throw new NullPointerException("factory is not a hibernate factory");
     }
     return entityManagerFactory.unwrap(SessionFactory.class);
 }

 public void setEntityManagerFactory(EntityManagerFactory entityManagerFactory) {
  this.entityManagerFactory = entityManagerFactory;
 }

}

Step 9: Now we need to add code related to database details called application.properties
  # ===============================
# = DATA SOURCE
# ===============================

# Set here configurations for the database connection
spring.datasource.url = jdbc:mysql://localhost:3306/employee?useSSL=false

# Username and password
spring.datasource.username = root
spring.datasource.password = root

spring.jpa.show-sql = true
spring.jpa.hibernate.ddl-auto = update
spring.jpa.hibernate.naming-strategy = org.hibernate.cfg.ImprovedNamingStrategy
spring.jpa.properties.hibernate.dialect = org.hibernate.dialect.MySQL5Dialect
Step 10: Create a RestController class. Name it as UserController
package springboot;

import java.util.List;

import org.springframework.beans.factory.annotation.Autowired;
import org.springframework.http.HttpStatus;
import org.springframework.http.ResponseEntity;
import org.springframework.stereotype.Controller;
import org.springframework.web.bind.annotation.PathVariable;
import org.springframework.web.bind.annotation.RequestMapping;
import org.springframework.web.bind.annotation.RequestMethod;
import org.springframework.web.bind.annotation.RequestParam;

import springboot.model.User;
import springboot.service.UserService;

@Controller
public class UserController {
 
 @Autowired
 private UserService userService;
 
 @RequestMapping(value = "/list", method = RequestMethod.GET)
 public ResponseEntity userDetails() {
        
  List userDetails = userService.getUsers();
  return new ResponseEntity(userDetails, HttpStatus.OK);
 }
 
 @RequestMapping(value = "/create/{id}/{name}/{password}/{gender}/{country}/", method = RequestMethod.GET)
 public ResponseEntity createOrUpdateUserDetails(@PathVariable("id") long id, @PathVariable("name") String name,
   @PathVariable("password") String password,@PathVariable("gender") String gender,@PathVariable("country") String country) {
        User user = new User();
        user.setId(id);
        user.setName(name);
        user.setCountry(country);
        user.setGender(gender);
        user.setPassword(password);
  List userDetails = userService.createOrUpdateUser(user);
  return new ResponseEntity(userDetails, HttpStatus.OK);
 }
 @RequestMapping(value = "/delete/{id}", method = RequestMethod.GET)
 public ResponseEntity deleteUserDetails(@PathVariable("id") long id) {
        User user = new User();
        user.setId(id);
  List userDetails = userService.deleteUser(user);
  return new ResponseEntity(userDetails, HttpStatus.OK);
 }


 public void setUserService(UserService userService) {
  this.userService = userService;
 }

}

Step 11: Now we need to run this application through spring boot. So we have to write Application class.
  package springboot;

import java.util.Arrays;

import org.springframework.boot.CommandLineRunner;
import org.springframework.boot.SpringApplication;
import org.springframework.boot.autoconfigure.SpringBootApplication;
import org.springframework.context.ApplicationContext;
import org.springframework.context.annotation.Bean;

@SpringBootApplication
public class Application {

    public static void main(String[] args) {
        SpringApplication.run(Application.class, args);
    }

    @Bean
    public CommandLineRunner commandLineRunner(ApplicationContext ctx) {
        return args -> {

            System.out.println("Let's inspect the beans provided by Spring Boot:");

            String[] beanNames = ctx.getBeanDefinitionNames();
            Arrays.sort(beanNames);
            for (String beanName : beanNames) {
                System.out.println(beanName);
            }

        };
    }

}


Step 12: Now we need to build and run this application.
Right click on the pom.xml file and Run As - clean install
Once that is done. Right click on the Application.java and Run As-> Java Application. Below details will be printed in Console
     .   ____          _            __ _ _
 /\\ / ___'_ __ _ _(_)_ __  __ _ \ \ \ \
( ( )\___ | '_ | '_| | '_ \/ _` | \ \ \ \
 \\/  ___)| |_)| | | | | || (_| |  ) ) ) )
  '  |____| .__|_| |_|_| |_\__, | / / / /
 =========|_|==============|___/=/_/_/_/
 :: Spring Boot ::        (v1.5.1.RELEASE)

2017-10-12 17:17:15.600  INFO 13036 --- [           main] springboot.Application                   : Starting Application on LAPTOP-2U8NKC7I with PID 13036 (F:\eclipse_workspace\spring_boot_first\target\classes started by Siva in F:\eclipse_workspace\spring_boot_first)
2017-10-12 17:17:15.626  INFO 13036 --- [           main] springboot.Application                   : No active profile set, falling back to default profiles: default
2017-10-12 17:17:16.033  INFO 13036 --- [           main] ationConfigEmbeddedWebApplicationContext : Refreshing org.springframework.boot.context.embedded.AnnotationConfigEmbeddedWebApplicationContext@23bb8443: startup date [Thu Oct 12 17:17:15 IST 2017]; root of context hierarchy


Step 13: Use http://localhost:8080/list -- it will display all the records which is there inside user table.
If it askes username and password - then username will be - user and password will be check Using default security password: in console. that is your password.


Step 14: Use http://localhost:8080/create/16/sanju/sam/M/India/ - it will insert record inside DB and will display all the records from user table.

Step 15 : http://localhost:8080/delete/16 - it will delete where id is 16 and display all the results from user table.

Step 16 : Now we will learn how to create database and create a table.
Step 17: Install mysql and create database with name- employee. and create a table name called User with columns as mentioned below.
     CREATE TABLE user (
  id int(11) NOT NULL,
  name varchar(45) DEFAULT NULL,
  gender varchar(10) DEFAULT NULL,
  password varchar(45) DEFAULT NULL,
  country varchar(45) DEFAULT NULL,
  PRIMARY KEY (`id`)) 
     

Step 18: If you want to use another database. simply change the application.properties respective DB details and dialect along with respective connecter in pom.xml

Thanks for viewing this post. If you like this please share and write comments.


Thursday, October 5, 2017

Getting started with spring boot , eclipse and maven


This post will explain about How to work with spring boot , eclipse and maven

Step 1: Start eclipse
Step 2: Create new java project
Step 3 : Add below code into pom.xml file
       

    4.0.0

    org.springframework
    spring_boot_first
    0.1.0

    
        org.springframework.boot
        spring-boot-starter-parent
        1.5.7.RELEASE


            org.springframework.boot
            spring-boot-starter-web
        
        
            org.springframework.boot
            spring-boot-starter-actuator
        
        
            org.springframework.boot
            spring-boot-starter-test
            test


        1.8


                org.springframework.boot
                spring-boot-maven-plugin
            
            
                maven-failsafe-plugin


                            integration-test
                            verify


Step 4: Right click on Project-> Configure->Convert To Maven Project
Step 5: If maven plugin not installed in your eclipse then got to market place of eclipse and search for maven , install from there.
Step 6: Now we need to create source folder -
create a folder with name main under src folder
create a folder with name java under main folder
create a folder with name test under main folder

Step 7: Link created folder to src.
Right click on src -> new -> Source folder -> browse on Folder Name-> Give upto main/java
Check the first check box

Right click on src -> new -> Source folder -> browse on Folder Name-> Give upto main/test
Check the first check box

Step 8: Create package wiht name springboot and create a class called HelloController.java


     package springboot;

import org.springframework.web.bind.annotation.RestController;
import org.springframework.web.bind.annotation.RequestMapping;

@RestController
public class HelloController {
    
    @RequestMapping("/")
    public String index() {
        return "Greetings from Spring Boot you have done the greate job!";
    }
    
}


Step 9: Create a class called Application . This is the main class to run the spring boot application.

    package springboot;

import java.util.Arrays;

import org.springframework.boot.CommandLineRunner;
import org.springframework.boot.SpringApplication;
import org.springframework.boot.autoconfigure.SpringBootApplication;
import org.springframework.context.ApplicationContext;
import org.springframework.context.annotation.Bean;

@SpringBootApplication
public class Application {

    public static void main(String[] args) {
        SpringApplication.run(Application.class, args);
    }

    @Bean
    public CommandLineRunner commandLineRunner(ApplicationContext ctx) {
        return args -> {

            System.out.println("Spring boot beans:");

            String[] beanNames = ctx.getBeanDefinitionNames();
            Arrays.sort(beanNames);
            for (String beanName : beanNames) {
                System.out.println(beanName);
            }

        };
    }

}


Step 10:Now we need to run this project. Right click on the pom.xml file and Run As -> maven install
Step 11: After Build success . Now we Need to run the Spring Boot Applcation.
Step 12 : Right click on the Application.java Run As - Java Application.
Step 13 : Once executed successfully, then open any Browser and type - http://localhost:8080/
Step 14: Out put will be -Greetings from Spring Boot you have done the greate job! - This details will be available in HelloController.java
Step 15: If you notice that , spring boot will have in built tomcat. Once we started Spring boot, then it will start the tomcat. No external server configuration required.
Step 16 : if you want to know more about spring boot please check the Spring Boot
Step 17 : if you want to change the out put in HelloController. change the return value and again try to run the Application.java.
In this case you may get the below error
      2017-10-05 11:23:38.382  INFO 9172 --- [           main] o.s.c.support.DefaultLifecycleProcessor  : Starting beans in phase 0
2017-10-05 11:23:41.318 ERROR 9172 --- [           main] o.a.coyote.http11.Http11NioProtocol      : Failed to start end point associated with ProtocolHandler ["http-nio-8080"]

java.net.BindException: Address already in use: bind
 at sun.nio.ch.Net.bind0(Native Method) ~[na:1.8.0_131]
 at sun.nio.ch.Net.bind(Unknown Source) ~[na:1.8.0_131]
 at sun.nio.ch.Net.bind(Unknown Source) ~[na:1.8.0_131]
        service.getName(): "Tomcat";  Protocol handler start failed
 at org.apache.catalina.connector.Connector.startInternal(Connector.java:1029) ~[tomcat-embed-core-8.5.20.jar:8.5.20]
 at org.apache.catalina.util.LifecycleBase.start(LifecycleBase.java:150) ~[tomcat-embed-core-8.5.20.jar:8.5.20]
 ... 13 common frames omitted
Caused by: java.net.BindException: Address already in use: bind
The Tomcat connector configured to listen on port 8080 failed to start. The port may already be in use or the connector may be misconfigured.


To Kill the existing port 8080, which is already in use.
Step 18: Go to command prompt- type netstat -a -o -n
Step 19 find the PID for tomcat port 0.0.0.0:8080 then kill that PID using below command
Step 20 - taskkill /F /PID 28345

Thanks for viewing this post.


AddToAny

Contact Form

Name

Email *

Message *