Wednesday, February 27, 2013

Convert word document (.docx) to PDF


This post will describes how to convert word document to PDF using Java.

To convert document to Pdf we will have different type of approaches.
But in this post i am using  docx4j. It is one of the good API for conversion from XSLT to PDF and Word Document to PDF etc..


We can convert from document to Pdf with Simple java program.

Steps to follow.

Step1 :open Eclipse and create new java project- provide name as you like.

Step 2: Create new Java class  which ever you like (ex: ConvertDocToPDF )

Step 3: Paste the below lines of code inside main method of created java class


 try {


long start = System.currentTimeMillis();

// 1) Load DOCX into WordprocessingMLPackage

InputStream is = new FileInputStream(new File("test.docx"));
WordprocessingMLPackage wordMLPackage = WordprocessingMLPackage.load(is);
//If your header and body information got over lapped then use the below code
List sections = wordMLPackage.getDocumentModel().getSections();
for (int i = 0; i < sections.size(); i++) {

System.out.println("sections Size" + sections.size());
wordMLPackage.getDocumentModel().getSections().get(i).getPageDimensions().setHeaderExtent(3000);
}

//if you want use any Physical fonts then use the below code.

Mapper fontMapper = new IdentityPlusMapper();

PhysicalFont font = PhysicalFonts.getPhysicalFonts().get("Comic Sans MS");

fontMapper.getFontMappings().put("Algerian", font);

wordMLPackage.setFontMapper(fontMapper);

// 2) Prepare Pdf settings

PdfSettings pdfSettings = new PdfSettings();

// 3) Convert WordprocessingMLPackage to Pdf

org.docx4j.convert.out.pdf.PdfConversion conversion = new org.docx4j.convert.out.pdf.viaXSLFO.Conversion(wordMLPackage);

OutputStream out = new FileOutputStream(new File("test.pdf"));
conversion.output(out,pdfSettings);
System.err.println("Time taken to Generate pdf  "+ (System.currentTimeMillis() - start) + "ms");
} catch (Throwable e) {

e.printStackTrace();
}


Step 4: Now you can run the Java program, PDF will be generate for your Document file.
Wednesday, February 13, 2013

spring and xslt example

This post will describe to work with spring and xslt.

1. open Eclipse and create a dynamic webproject - provide name as  spring-xslt(you can give what ever name you want)

2. After that select the target runtime environment(ex: location of tomcat or Jboss or respective server)

3. open web.xml which already created by eclipse for you, modify as mentioned below.


<web-app id="WebApp_ID" version="2.4" xmlns:xsi="http://www.w3.org/2001/XMLSchema-instance" xmlns="http://java.sun.com/xml/ns/j2ee" xsi:schemalocation="http://java.sun.com/xml/ns/j2ee http://java.sun.com/xml/ns/j2ee/web-app_2_4.xsd">
<display-name>spring-xslt</display-name>

<welcome-file-list>
   <welcome-file>index.html</welcome-file>
</welcome-file-list>

</div>

<servlet>

<servlet-name>simple</servlet-name>
  <servlet-class>
   org.springframework.web.servlet.DispatcherServlet
  </servlet-class>
</servlet>

<servlet-mapping>
  <servlet-name>simple</servlet-name>
  <url-pattern>*.htm</url-pattern>
</servlet-mapping>

</web-app>


4. After that create simple-servlet.xml like mentioned below and put inside WEB-INF

<?xml version="1.0" encoding="UTF-8"?>
<beans xmlns="http://www.springframework.org/schema/beans"
       xmlns:xsi="http://www.w3.org/2001/XMLSchema-instance"
        xsi:schemaLocation="http://www.springframework.org/schema/beans 
         http://www.springframework.org/schema/beans/spring-beans.xsd" >
                 
  <bean id="viewResolver" class="org.springframework.web.servlet.view.ResourceBundleViewResolver" >
  <property name="order"><value>1</value></property>
  <property name="basename" value="views" />
   </bean>
  <bean id="xsltViewResolver"
  class="org.springframework.web.servlet.view.xslt.XsltViewResolver" >
  <property name="order"><value>2</value></property>
  <property name="viewClass"
  value="org.springframework.web.servlet.view.xslt.XsltView" /> 
  <property name="sourceKey" value="obj" /> 
  <property name="suffix" value=".xsl" />
  <property name="prefix" value="/WEB-INF/xsl/" />
  </bean>
  <bean id="simpleUrlMapping"
  class="org.springframework.web.servlet.handler.SimpleUrlHandlerMapping" >
  <property name="mappings" >
  <value>
  /login.htm=myxsl
  </value>
  </property>
  </bean>
  <bean id="myxsl"
  class="com.siva.HomePageController" />
  <!--<bean id="myxsl"
  class="com.siva.XsltDisplayController" />
 --></beans>
   
5. Now we have to create xslt file under /WEB-INF/xsl/home.xslt and place the below mentioned code

<?xml version="1.0" encoding="utf-8"?>
<xsl:stylesheet version="1.0" xmlns:xsl="http://www.w3.org/1999/XSL/Transform">
<xsl:output method="html" omit-xml-declaration="yes"/>
<xsl:template match="/">
<html>
<head><title>Hello!</title></head>
<body>
<h1>My First Words</h1>
<xsl:apply-templates/>
</body>
</html>
</xsl:template>
<xsl:template match="word">
<xsl:value-of select="."/><br/>
</xsl:template>
</xsl:stylesheet>

6. Now Need to create Contoller class by extending AbstractCommandController.
package com.siva;

import java.util.ArrayList;
import java.util.HashMap;
import java.util.List;
import java.util.Map;
import javax.servlet.http.HttpServletRequest;
import javax.servlet.http.HttpServletResponse;
import org.springframework.web.servlet.ModelAndView;
import org.springframework.web.servlet.mvc.AbstractController;
public class HomePageController extends AbstractController{
protected ModelAndView handleRequestInternal(
HttpServletRequest request,
HttpServletResponse response) throws Exception {

Map map = new HashMap();
List wordList = new ArrayList();

wordList.add("hello");
wordList.add("world");

map.put("wordList", wordList);
return new ModelAndView("home", map);
}
}

7. Need to create xslt view class to iterate the xslt elements.

package com.siva;

import java.util.Iterator;
import java.util.List;
import java.util.Map;

import javax.servlet.http.HttpServletRequest;
import javax.servlet.http.HttpServletResponse;
import javax.xml.parsers.DocumentBuilderFactory;
import javax.xml.transform.Source;
import javax.xml.transform.dom.DOMSource;
import org.springframework.web.servlet.view.xslt.AbstractXsltView;
import org.w3c.dom.Document;
import org.w3c.dom.Element;
import org.w3c.dom.Text;
public class HomePage extends AbstractXsltView {
protected Source createXsltSource(Map model, String rootName, HttpServletRequest
request, HttpServletResponse response) throws Exception {
Document document = DocumentBuilderFactory.newInstance().newDocumentBuilder().newDocument();
Element root = document.createElement(rootName);

List words = (List) model.get("wordList");
for (Iterator it = words.iterator(); it.hasNext();) {
String nextWord = (String) it.next();
Element wordNode = document.createElement("word");
Text textNode = document.createTextNode(nextWord);
wordNode.appendChild(textNode);
root.appendChild(wordNode);
}
return new DOMSource(root);
}
}
8.Create views.properties file under WEB-INF/classes/views.properties

home.(class)=com.siva.HomePage
home.stylesheetLocation=/WEB-INF/xsl/home.xslt
home.root=words

9.finally create one index.html or jsp to submit the form.

<body>
<form action="login.htm" name="login">
Word Id :<input type="text" value="" name="wordId">
Word NAME :<input type="text" value="" name="wordName">
<input type="submit" value="submit">

</form>

</body>

Above mentioned html/jsp is for to submit the form, if we required fileds need to be eneterd by the user then we have to get that values from command object, and then needs to process.

10. Now Everthing is completed. Once you configured and copied the above code into respective places.
We can exceuting the application and can able to see the results.
11. for this project required jars are..

commons-logging-1.1.1.jar
log4j-1.2.15.jar
spring-2.5.6.jar
spring-beans.jar
spring-webmvc.jar
jdom-1.0.jar


Wednesday, February 15, 2012

Axis Webservice implemenation with Eclipse

I get a chance to post small topic related to webservice implementation with eclipse galilio.
This is the easy way to implement webservice.
This example is bottom up approach- from Java - to - WSDL

Step1 : Start Eclipse
Step2 : Open Eclipse-> File -> New Dynamic web project
Step3 : Give project name as you like (ex: test_webservice_server)
Step4 : Select Dynamic web module version as 2.4
Step5 : Select target run time as Apache tomcat version and specify the loaction of
tomcat server installed location.(Ex: c:/tomcat)
Step6 : Click on Finish button.


Before creating webservice we need to write the interface and implementation classes to which methods we need to create webservice.

In this example i created one interface called ArthimeticService, having different methods for doing arthemetic operations.

Then created one Class- ArthimeticServiceImpl which implemnts ,ArthimeticService interface.


Now It's time to create webservice.


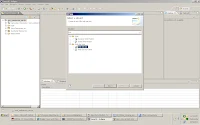
Step1 : Right Click on the Created project
Step2 : Select New - Other - Webservice


Step3 : Click On Next button.


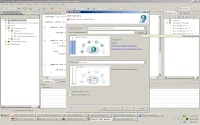
Step4 : Select Service Implementation(Which we already created ex:
ArthimeticServiceImpl)
Step5 : Click on Next- Next -(If screen shows the start server button click on that)- Finish


Once we completed above steps our webservice is ready to use by clients.

We need to check whether our webservice is working or not

Open Created wsdl under Webcontent folder
Go to the <wsdlsoap:address location> copy the value and paste in browser address bar with wsdl like the below.

http://localhost:8888/test_webservice_server/services/ArthimeticServiceImpl?wsdl
Please check the port your server is running(most of the cases it will be 8080)
Once this ready then we can create the client from any system.

Now the time for creating webservice client to access the webservice server.


Step1 : create new - project - dynamic web project (ex: test_webservice_client)
Step2 : Select Dynamic web module version as 2.4.
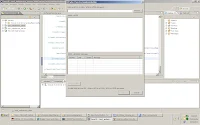
Step3 : Rigth Click on the created project- New - webservice client.


Step4 : Click on Next button.
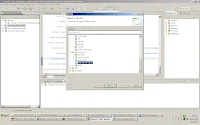
Step5 : Select the service definition
Step6 : Click on the Browse button


Step7 : Locate the webservice wsdl location
(where wsdl is running : ex http://localhost:8888
/test_webservice_server/services/ArthimeticServiceImpl?wsdl)
Step8: If webservice is running from another system
(instead of localhost mention IP address)

Step9: After Locating WSDL, click on OK- Finish


Step 10: Now we our webservice client also ready.
Step 11: Now we need test this application, wether it is working or not, for that i
am creating simple Test class which will call the Proxy class and
internally it will call the webservice server and will give the response
to us.


Ex:

package com.siva;

import java.rmi.RemoteException;

public class Test {

public static void main(String[] args) {
ArthimeticServiceImplProxy proxy = new ArthimeticServiceImplProxy();
int result = 0;
try {
result = proxy.add(20, 30);
} catch (RemoteException e) {
e.printStackTrace();
}
System.out.println("result is.." + result);
}
}
}


Now you will get result as -- 50

Like this webservices will work.

If you want to call this webservice from JSP and servletes
Then write jsp - with two input paramaters
servlet- will access the two values and return the result after
calling the webservice.
Once everything is completed try this url from your system

http://localhost:8888/test_webservice_client/
then provide input values and click on the Get result then result will display on the screen.

Now you can elaborate what ever ypou like and do modifications for your requirement.

Now you can download the source code from the following link.

DOWNLOAD WEBSERVICE SERVER CODE

DOWNLOAD WEBSERVICE CLIENT CODE


Thursday, December 15, 2011

Password Protected PDF

I got a time to post the important feature for web applications. User need to access statements through PDF. But that PDF needs to be Password protected.

To open the PDF, we can have different Password implemenations like (telephone no, DOB,Bank id, Last 4 digit of account no and name Etc...)

Now i am implementing password feature through the Random number Genaration.

import java.io.FileOutputStream;
import java.util.Random;

import com.itextpdf.text.Document;
import com.itextpdf.text.Paragraph;
import com.itextpdf.text.pdf.PdfWriter;

public class ProtectPDFPassword {

public static byte[] UserPassword= "UserPassword".getBytes();
public static byte[] OwnerPassword = "OwnerPassword".getBytes();
public static void main(String[] args){
try {

Document Document_For_Protection = new Document();
PdfWriter EncryptPDF= PdfWriter.getInstance(Document_For_Protection, new FileOutputStream(generatePin()+".pdf"));
EncryptPDF.setEncryption(UserPassword, String.valueOf(generatePin()).getBytes(),
PdfWriter.ALLOW_PRINTING, PdfWriter.STANDARD_ENCRYPTION_128);
EncryptPDF.createXmpMetadata();
Document_For_Protection.open();
Document_For_Protection.add(new Paragraph("Some Contents for Password Protection"));
Document_For_Protection.add(new Paragraph("Password is :"+"password"));
Document_For_Protection.close();
}
catch (Exception i)
{
System.out.println(i);
}
}

public static int generatePin() throws Exception {
Random generator = new Random();
generator.setSeed(System.currentTimeMillis());
int num = generator.nextInt(99999) + 99999;
System.out.println("Random number value---" + num);

if (num < 100000 || num > 999999) {
num = generator.nextInt(99999) + 99999;

if (num < 100000 || num > 999999) {

throw new Exception("Unable to generate PIN at this time..");
}
}
return num;
}

Required Jars's


itext-5.0.2.jar
bcprov-jdk15-136.jar

AddToAny

Contact Form

Name

Email *

Message *