Thursday, March 1, 2018

Java Program to check whether given word is Palindrome or not


This post will explain us, how to implement palindrome logic with different ways, using java.

public class WordPalindrome {
  public static void main(String[] args) {
   String word="LIRIL";
   boolean isPalin = isPalindromeOne(word);
   if(isPalin){
    System.out.println("Given word ["+word+"] is palindrome");
   }else{
    System.out.println("Given word ["+word+"] is not palindrome");
   }
   word = "Hello";
   isPalin = isPalindromeOne(word);
   if(isPalin){
    System.out.println("Given word ["+word+"] is palindrome");
   }else{
    System.out.println("Given word ["+word+"] is not palindrome");
   }
   
  }


  public static boolean isPalindromeOne(String word){
   boolean isPalindrome = false;
   //first way of checking
   char[] array = word.toCharArray();
   char[] newArray = new char[array.length];
   for (int i = 0; i < array.length; i++) {
  char c = array[array.length-i-1];
  newArray[i] =(char)c;
 }
   if(word.equalsIgnoreCase(String.valueOf(newArray))){
    isPalindrome = true;
   }
   //second way of checking
   String reverse ="";
   for (int i = 0; i < word.length(); i++) {
  char c= word.charAt(i);
  reverse = c+reverse;
 }
   if(reverse.equalsIgnoreCase(word)){
    isPalindrome = true; 
   }


   return isPalindrome;
  }


}


Saturday, February 10, 2018

Jersy Rest Webervice with eclipse and Weblogic 12c or tomcat


How to work with jersy rest webservice using eclipse and weblogic server/tomcat

Step 1: Create a dynamic web project in eclipse and provide project name


Step 2: open web.xml and add below configuration code for rest webservices.


  jersyRestService
  
    index.html
    index.htm
    index.jsp
    default.html
    default.htm
    default.jsp
  
      
        Jersey Web Application
        com.sun.jersey.spi.container.servlet.ServletContainer
    
    
        Jersey Web Application
        /rest/*


Step 3: Create one file name called weblogic.xml and add the below code.


12.2
    
        jax-rs
        2.0
        2.22.1.0
        false


Step 4: Download rest api related jar -http://repo1.maven.org/maven2/com/sun/jersey/jersey-archive/1.19.1/jersey-archive-1.19.1.zip Unzip the same and place the jar inside lib folder of the project.


Step 5: Create a class name called RestServiceAPI.java add below code.

package com.siva.restservice;

import javax.ws.rs.GET;
import javax.ws.rs.Path;
import javax.ws.rs.PathParam;
import javax.ws.rs.Produces;
import javax.ws.rs.core.MediaType;
/**
 * 
 * @author Siva
 *
 */

@Path("/helloRest")
public class SimpleRestService {
	
	
	@GET
	@Produces(MediaType.TEXT_PLAIN)
	public String getDetails(){
		System.out.println("This is Get request");
		return "Hello Welcome to Rest webservice";
	}
	@GET
	@Path("/getDetail/{requestParam}")
	@Produces(MediaType.TEXT_PLAIN)
	public String getDetailsWithParameter(@PathParam("requestParam") String requestParam){
		System.out.println("USer request paramater["+requestParam +"]");
		System.out.println("This is Get request");
		return "Hello Welcome to Rest webservice you have given input as -"+requestParam;
	}

}


Step 6: Create one config class called- ApplicationConfig.java
Right click on src-> Webservice->RestWebservice->select Classname- which class needs to be configured in ApplicationConfig Click Next-> Finish

package rest.application.config;

import java.util.HashSet;
import java.util.Set;

import javax.ws.rs.ApplicationPath;
import javax.ws.rs.core.Application;
/**
 * 
 * @author Siva
 *
 */
@ApplicationPath("resources")
public class ApplicationConfig  extends Application{

	public Set> getClasses(){
		return getRestClasses();
	}
	
	private Set> getRestClasses(){
	  Set> resources = new HashSet>();	
	  resources.add(com.siva.restservice.SimpleRestService.class);
	  return resources;
	}
	
}


Step 7: This is very important step

Run the weblogic server and open the console
http://localhost:7001/console provide username and password and login the same into weblogic server admin console

Step 8: Click on the Deployments- the install the jax-rs-2.0.war, which is inside-
Oracle_home/wlserver/common/deployable-libraries
If you are working on jsr311 then deploy jsr311-api-111.war which is available on same path.


For Tomcat Deployment Step 3 , 6,7,8 not required

Right click on the Project and Run AS - server- select appropriate server and deploy the same.

if you want to test in browser use-
http://localhost:8080/jersyRestService/rest/helloRest
http://localhost:8080/jersyRestService/rest/helloRest/getDetail/helloRequest


Step 9: Create rest client class which get the test results for rest webservice
package com.siva.restservice.test;

import javax.ws.rs.core.MediaType;

import com.sun.jersey.api.client.Client;
import com.sun.jersey.api.client.WebResource;
/**
 * 
 * @author Siva
 *
 */
public class RestServiceClient {
	
	public static void main(String[] args) {
		String uri = "http://localhost:8080/jersyRestService/rest/helloRest";
		try{
			
			Client client = Client.create();
			WebResource resource = client.resource(uri);
			String response = resource.type(MediaType.TEXT_PLAIN).get(String.class);
			System.out.println("Response from Rest webservice["+response+"]");
			String request = "GetRestWithParam";
			uri = uri.concat("/getDetail/").concat(request);
			resource = client.resource(uri);
			String response1 = resource.type(MediaType.TEXT_PLAIN).get(String.class);
			System.out.println("Response from Rest webservice with parameter["+response1+"]");
		}
		catch(Exception ex){
			ex.printStackTrace();
		}
	}

}


Step 10: You can see the output as below

Response from Rest webservice[Hello Welcome to Rest webservice]
Response from Rest webservice with parameter[Hello Welcome to Rest webservice you have given input as -GetRestWithParam]


Thank you very much for viewing this post. If you like, don't forget to share/comment.


Sunday, November 12, 2017

Read and Parse XML using JAXB and write to a flat file with fixed length format using fixedFormat4j and Java


This post will explain, how to read xml ,parse xml and write to a flat file with fixed length format.

Step 1: Create a maven project -< xmltofile>


Step2: paste the below code into pom.xml file.


  4.0.0
  xmltofile
  xmltofile
  0.0.1-SNAPSHOT
  
    src
    
      
        maven-compiler-plugin
        3.5.1
        
          1.8
          1.8


    com.ancientprogramming.fixedformat4j
    fixedformat4j
    1.2.2


Step 3: Now we need to create company.xml file under project- create one xml file add the below xml to that file.


                siva
                34
                Male
                35000
                01/07/1983
                
Present Bangalore Karnataka India
Permanent Kadapa AndharaPradesh India
Sanjay 27 Male 55000 01/07/1988
Present Bangalore Karnataka India
Permanent Hyderabad Telangana India
Madhan 34 Male 800000 01/07/1983
Present and Permanent Bangalore Karnataka India

Step 4: Create pojo classes , which need to be parsed as per above xml.

i have created 3 classes - Company.java -> List of Employee.java -> List Of Address.java


Company.java - xmlroot elment is company which is there in xml.

package xmltofile;

import java.util.ArrayList;
import java.util.List;

import javax.xml.bind.annotation.XmlElement;
import javax.xml.bind.annotation.XmlRootElement;

@XmlRootElement(name="company")
public class Company {
 
 private List employee = new ArrayList();

 @XmlElement(name="employee")
 public List getEmployee() {
  return employee;
 }

 public void setEmployee(List employee) {
  this.employee = employee;
 }

}


Employee.java

package xmltofile;

import java.util.ArrayList;
import java.util.List;

import javax.xml.bind.annotation.XmlElement;
public class Employee {
 
 private String name;
 private int age;
 private String gender;
 private Double salary;
 private String dob;
 List
address = new ArrayList
(); public String getName() { return name; } public void setName(String name) { this.name = name; } public int getAge() { return age; } public void setAge(int age) { this.age = age; } public String getGender() { return gender; } public void setGender(String gender) { this.gender = gender; } public Double getSalary() { return salary; } public void setSalary(Double salary) { this.salary = salary; } @XmlElement public List
getAddress() { return address; } public void setAddress(List
address) { this.address = address; } public String getDob() { return dob; } public void setDob(String dob) { this.dob = dob; } }


Address.java

package xmltofile;

import javax.xml.bind.annotation.XmlRootElement;

public class Address {
 private String city;
 private String type;
 private String state;
 private String country;
 public String getCity() {
  return city;
 }
 public void setCity(String city) {
  this.city = city;
 }
 public String getType() {
  return type;
 }
 public void setType(String type) {
  this.type = type;
 }
 public String getState() {
  return state;
 }
 public void setState(String state) {
  this.state = state;
 }
 public String getCountry() {
  return country;
 }
 public void setCountry(String country) {
  this.country = country;
 }

}

Step 5: Now we need to write class using fixedformat4j API-


CompanyHeader.java

package xmltofile.fixedformat;

import com.ancientprogramming.fixedformat4j.annotation.Field;
import com.ancientprogramming.fixedformat4j.annotation.Record;

@Record
public class CompanyHeader {
 
 private String header1;
 private String header2;
 private String header3;
 
 @Field(offset = 1, length = 20)
 public String getHeader1() {
  return header1;
 }
 public void setHeader1(String header1) {
  this.header1 = header1;
 }
 @Field(offset = 30, length = 50)
 public String getHeader2() {
  return header2;
 }
 public void setHeader2(String header2) {
  this.header2 = header2;
 }
 @Field(offset = 60, length = 100)
 public String getHeader3() {
  return header3;
 }
 public void setHeader3(String header3) {
  this.header3 = header3;
 }


}


EmployeeHeader.java- This class will have - each filed -at what is the starting index and data length of the eachfiled


package xmltofile.fixedformat;

import com.ancientprogramming.fixedformat4j.annotation.Field;
import com.ancientprogramming.fixedformat4j.annotation.Record;

@Record
public class EmployeeHeader {

 private String nameHeader;
 private String ageHeader;
 private String genderHeader;
 private String salaryHeader;
 private String dobHeader;
 private String addressHeader;
 
 @Field(offset = 1, length = 50)
 public String getNameHeader() {
  return nameHeader;
 }
 public void setNameHeader(String nameHeader) {
  this.nameHeader = nameHeader;
 }
 @Field(offset = 55, length = 3)
 public String getAgeHeader() {
  return ageHeader;
 }
 public void setAgeHeader(String ageHeader) {
  this.ageHeader = ageHeader;
 }
 @Field(offset = 60, length = 10)
 public String getGenderHeader() {
  return genderHeader;
 }
 public void setGenderHeader(String genderHeader) {
  this.genderHeader = genderHeader;
 }
 @Field(offset = 75, length = 10)
 public String getSalaryHeader() {
  return salaryHeader;
 }
 public void setSalaryHeader(String salaryHeader) {
  this.salaryHeader = salaryHeader;
 }
 @Field(offset = 90, length = 15)
 public String getDobHeader() {
  return dobHeader;
 }
 public void setDobHeader(String dobHeader) {
  this.dobHeader = dobHeader;
 }
 @Field(offset = 120, length = 200)
 public String getAddressHeader() {
  return addressHeader;
 }
 public void setAddressHeader(String addressHeader) {
  this.addressHeader = addressHeader;
 }
 

}


Step 6: Now we need to write test class to Parse the employee.xml using JAXB context and create the Flat file
and write the xml data into file at specified index.

XMLReaderAndWriteToFile.java

package xmltofile;

import java.io.BufferedWriter;
import java.io.File;
import java.io.FileWriter;
import java.io.IOException;

import javax.xml.bind.JAXBContext;
import javax.xml.bind.Unmarshaller;

import com.ancientprogramming.fixedformat4j.format.FixedFormatManager;
import com.ancientprogramming.fixedformat4j.format.impl.FixedFormatManagerImpl;

import xmltofile.fixedformat.CompanyHeader;
import xmltofile.fixedformat.EmployeeHeader;

public class XMLReaderAndWriteToFile {

 public static void main(String[] args) {
  BufferedWriter bw = null;
  try {
   JAXBContext context = JAXBContext.newInstance(Company.class);
   // Create Unmarshaller using JAXB context
   Unmarshaller unmarshaller = context.createUnmarshaller();
   System.out.println("xml file started to load...");
   Company company = (Company) unmarshaller.unmarshal(new File("employee.xml"));
            System.out.println("xml file loaded and parsed successfully..");
   // Write to file with fixedformat
            System.out.println("Flat file started to create...");
   bw = new BufferedWriter(new FileWriter("fixedLength.txt", true));
   System.out.println("empty flat file created...");
   getCompanyHeader(bw);
   System.out.println("company header written successfully to file.");
   getEmployeeHeader(bw);
   System.out.println("employee header written successfully to file.");
   for (Employee employee : company.getEmployee()) {
    EmployeeHeader employeeDetails = new EmployeeHeader();
    employeeDetails.setNameHeader(employee.getName());
    employeeDetails.setAgeHeader(String.valueOf(employee.getAge()));
    employeeDetails.setGenderHeader(employee.getGender());
    employeeDetails.setDobHeader(String.valueOf(employee.getDob()));
    employeeDetails.setSalaryHeader(String.valueOf(employee.getSalary()));
    String completeAddress = "  ";
    for (Address address : employee.getAddress()) {
     String addressDetails = address.getCity() + " " + address.getState() + " " + address.getCountry()
       + " - " + address.getType();
     completeAddress = completeAddress.concat(addressDetails) + "     ";
    }
    employeeDetails.setAddressHeader(completeAddress);
    FixedFormatManager manager1 = new FixedFormatManagerImpl();
    String data1 = manager1.export(employeeDetails);
    bw.write(data1);
    bw.newLine();

   }
   System.out.println("Employee details written successfully to file.");

  } catch (Exception ex) {
   ex.printStackTrace();
  } finally {
   try {
    bw.close();
   } catch (IOException e) {
    e.printStackTrace();
   }
  }

 }

 private static void getEmployeeHeader(BufferedWriter bw) throws IOException {
  EmployeeHeader employeeHeader = new EmployeeHeader();
  employeeHeader.setNameHeader("Employee Name");
  employeeHeader.setAgeHeader("Age");
  employeeHeader.setGenderHeader("Gender");
  employeeHeader.setDobHeader("DOB");
  employeeHeader.setSalaryHeader("Salary");
  employeeHeader.setAddressHeader("Address");
  FixedFormatManager manager = new FixedFormatManagerImpl();
  String data = manager.export(employeeHeader);
  bw.write(data);
  bw.newLine();
  bw.newLine();
  bw.newLine();
 }

 private static void getCompanyHeader(BufferedWriter bw) throws IOException {
  CompanyHeader companyHeader = new CompanyHeader();
  companyHeader.setHeader1("ABC Company");
  companyHeader.setHeader2("Bangalore");
  companyHeader.setHeader3("India");
  FixedFormatManager manager = new FixedFormatManagerImpl();
  String data = manager.export(companyHeader);
  bw.write(data);
  bw.newLine();
  bw.newLine();
  bw.newLine();

 }

}


Output file will be like this.

ABC Company                  Bangalore                                                                                                                         


Employee Name                                         Age  Gender         Salary         DOB                           Address                                                                                                                                                                                                 


siva                                                         34   Male           35000.0        01/07/1983                      Bangalore Karnataka India - Present     Kadapa AndharaPradesh India - Permanent                                                                                                                       
Sanjay                                                     27   Male           55000.0        01/07/1988                      Bangalore Karnataka India - Present     Hyderabad Telangana India - Permanent                                                                                                                         
Madhan                                                   34   Male           800000.0       01/07/1983                     Bangalore Karnataka India - Present and Permanent                                                                                                                                                     


Thank you verymuch for viewing this post. If you like this don't forget to share.


Monday, November 6, 2017

sun.security.validator.ValidatorException: PKIX path building failed: sun.security.provider.certpath.SunCertPathBuilderException: Gradle eclipse


sun.security.validator.ValidatorException: PKIX path building failed: sun.security.provider.certpath.SunCertPathBuilderException:


If you are getting this error . While running the gradle build task from eclipse.
cacert might becorrupted.. which is there inside jdk/jre/lib

to change this copy or download the latest cacert from other system or internt.

create gradle.properties file and place it inside your .gradle home, which is configured in eclipse.

systemProp.javax.net.ssl.trustStore=C:\\Users\\ca-certs


Wednesday, November 1, 2017

Getting Started with Spring Boot Application on Pivotal Cloud Foundry Platform On Windows Environment , Pivotal Webservice Console and Microservice


This Post will explain , how to Deploy Spring Boot Application on Pivotal Cloud Foundry Platform


Now a days Cloud Computing and Microservice have become very popular concept and almost all the organizations are investing and adapting it very fast. Currently there are only

few popular cloud providers in the market and Pivotal Cloud Foundry is one of them. It is a PaaS(Platform AS A Servcie) service where we can easily deploy and manage our

applications and the Cloud Foundry will take care of the rest of the cloud based offerings like scalability, high availability etc.

Today we will learn to deploy spring boot application in Pivotal cloud foundry platform called as Pivotal Web Services.


Step 1: What is Cloud Foundry?


Cloud Foundry is an open-source platform as a service (PaaS) that provides you with a choice of clouds, developer frameworks, and application services. It is open source and it is governed by the Cloud Foundry Foundation. The original Cloud Foundry was developed by VMware and currently it is managed by Pivotal

Step 2: Now we need to install Cloud Foundary on Windows

Step 3: Download Cloud Foundary Windows Installer using this link

Step 4: Unzip the file, From the place where you have saved the downloaded file.

Step 5: Double Click on the cf_installer.exe file and click on the next.. next buttons until it completes


Step 6: If you have successfully installed then you can check the CLI version or other details

Enter cf command prompt. It will give list of options which cf will accept.
c:/> cf vesion -  will give full CLI version details


Step 7: Now we need to be setup Pivotal Webservice Console (PWS)

Step 8: Provide necessary details and sign up the same.


Once sign up is completed, we can log into the Pivotal webservice console through the login screen of the pivotal web service console.

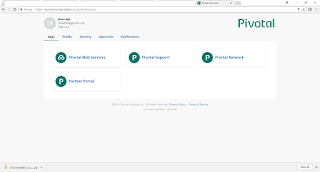
After providing login credentials successfully we will get into the cloud foundry console where we can see all the deployed applications, can monitor the applications and do many more activities. Here we need to add org and space etc...

Step 9: Once we have created org and space successfully.. now we need to deploy the spring boot application in PCF.

Step 10: Before that , Login in to PWS (Pivotal Webservice Console) using CLI


c:/> cf login -a api.run.pivotal.io

Provide username and password which is given , while registering the PWS.

same way we can use Logout
c:/> cf logout

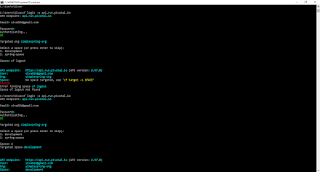
Step 11: Now login and logout is working with out any issues.

Step 12: Now write simple spring boot application and run the same in locally.

If you want to write simple one follow the https://start.spring.io/ - which will create sample spring boot application for you and modify as per your requirment.

i have created one sample arthimetic operations spring boot application.. check in
my previous post for the same.

add the below code into bootstrap.properties under src\main\resources


server.contextPath = /
                management.security.enabled = false


Step 13: Once we have completed the Spring boot application and executed successfully in local environment.

Now we need to push the same into Pivotal cloud Foundary.

Step 14: login into PWS using CLI c:/> cf login -a api.run.pivotal.io

Step 15: Go to where spring boot application is saved . Then push to PCF

F:\spring_boot_example\helloworld-springboot>cf push helloworld-springboot -p target\helloworld-springboot-0.0.1-SNAPSHOT.jar


Step 16: Now we have deployed spring boot application into Pivotal Cloud Foundary Successfully.

Step 17: Open the PWS console and check the details. whether pushed application through CLI is available or not in PWS console.


Step 18: Open the below links and you can see the output as follows.

https://helloworld-springboot.cfapps.io/
https://helloworld-springboot.cfapps.io/add/20/30
https://helloworld-springboot.cfapps.io/substract/20/30
https://helloworld-springboot.cfapps.io/multiply/20/30
https://helloworld-springboot.cfapps.io/division/20/30


Step 19: This is how we will implement spring boot application and we can deploy the same in Pivotal Cloud Foundary.

Thank you very much for viewing this post. if you like this please share the same
If you face any issues.. write a comment and you will get reply the same

Tuesday, October 24, 2017

Getting started with Pivotal Gemfire On Windows


This post will explain you about , how to start pivotal Gemfire on Windows
Step 1: What is Gemfire?
In-Memory Data Grid powered by Apache Geode
Scale your data services on demand to support high-performance, real-time apps
you can check more info on Gemfire docs

Step 2: Download - pivotal-gemfire-9.1.0.tar.gz using Download Pivotal Gemfire
Step 3: Unzip the downloaded file and set the PATH in environement variables.
Step 4: check the version of the pivotal gemfire, which is available in your system gfsh version --full

Step 5: Now we need to create a locator - Go to the place which ever the location you want to create locator in command prompt.
Step 6:Start the gfsh.bat file from command prompt.
Step 7: start locator --name=test --J=-Dgemfire.http-service-port=8080 --J=-Dgemfire.http-service.bind-address=localhost or

gfsh>start locator --name=test --J=-Dgemfire.http-service-port=8080 --J=-Dgemfire.http-service-bind-address=LAPTOP-2U8NKC7I
Starting a Geode Locator in F:\softwares\CloudFoundary_apache_gemFire\pivotal-gemfire-9.1.0\bin\test...
.....
Locator in F:\softwares\CloudFoundary_apache_gemFire\pivotal-gemfire-9.1.0\bin\test on LAPTOP-2U8NKC7I[10334] as test is currently online.
Process ID: 11740
Uptime: 3 seconds
Geode Version: 9.1.0
Java Version: 1.8.0_131
Log File: F:\softwares\CloudFoundary_apache_gemFire\pivotal-gemfire-9.1.0\bin\test\test.log
JVM Arguments: -Dgemfire.enable-cluster-configuration=true -Dgemfire.load-cluster-configuration-from-dir=false -Dgemfire.http-service-port=8080 -Dgemfire.http-service-bind-address=LAPTOP-2U8NKC7I -Dgemfire.launcher.registerSignalHandlers=true -Djava.awt.headless=true -Dsun.rmi.dgc.server.gcInterval=9223372036854775806
Class-Path: F:\softwares\CloudFoundary_apache_gemFire\pivotal-gemfire-9.1.0\lib\geode-core-9.1.0.jar;F:\softwares\CloudFoundary_apache_gemFire\pivotal-gemfire-9.1.0\lib\geode-dependencies.jar

Successfully connected to: JMX Manager [host=LAPTOP-2U8NKC7I, port=1099]

Cluster configuration service is up and running.

gfsh>start pulse

Step 8: Open the start pulse
Step 9: Open the browser and enter port as 8080 -> http://laptop-2u8nkc7i:8080/pulse and provide username as admin and password as admin

Step 10 cluster details will display after successful login.


Thank you verymuch for viewing this post. If you like this post please write comment and share.


Saturday, October 14, 2017

Getting started with Spring Boot deployed on Google Cloud. Maven, Google CloudSDK installation


This post will explain you. How to deploy springboot application on google cloud

Step 1: Open Open Google Cloud


Step 2: Login into google cloud.
Step 3: Register Cloud application with free trail - Cloud Application Registration

Step 4:Create a new Project -
Provide necessary details and signup the same.
Step 5: Now you are completed signup process . Spring boot application needs to be deployed.
Step 6: Create a maven java project with name - helloworld-springboot and below code to pom.xml file.


  4.0.0

  com.java.gcloud.springboot
  helloworld-springboot
  0.0.1-SNAPSHOT
  jar

  helloworld-springboot
  Demo project for Spring Boot with google cloud


    1.8
    ${java.version} 
    ${java.version} 
    UTF-8
    1.3.1


      org.springframework.boot
      spring-boot-starter-web
      1.5.7.RELEASE


        org.springframework.boot
        spring-boot-maven-plugin
        1.5.7.RELEASE


              repackage


        com.google.cloud.tools
        appengine-maven-plugin
        ${appengine.maven.plugin}


Step 7: Now we need to write controller class name HelloworldApplication.java
package com.java.gcloud.springboot;

import org.springframework.boot.SpringApplication;
import org.springframework.boot.autoconfigure.SpringBootApplication;
import org.springframework.web.bind.annotation.PathVariable;
import org.springframework.web.bind.annotation.RequestMapping;
import org.springframework.web.bind.annotation.RequestMethod;
import org.springframework.web.bind.annotation.RestController;

@SpringBootApplication
@RestController
public class HelloworldApplication {
  @RequestMapping("/")
  public String home() {
    return "Hello World.. Welcome to Spring Boot.. which is deployed on Google cloud appengine!";
  }

  @RequestMapping(value = "/add/{a}/{b}", method = RequestMethod.GET)
  public String add(@PathVariable("a") int a,@PathVariable("b") int b) {
    return "Addition of a["+a+"] and b ["+b+"]is   ======   " + (a+b) ;
  }
  
  @RequestMapping(value = "/substract/{a}/{b}", method = RequestMethod.GET)
  public String substract(@PathVariable("a") int a,@PathVariable("b") int b) {
    return "Substract of a["+a+"] and b ["+b+"]is   ======   " + (a-b) ;
  }
  
  @RequestMapping(value = "/multiply/{a}/{b}", method = RequestMethod.GET)
  public String multiply(@PathVariable("a") int a,@PathVariable("b") int b) {
    return "Multiply of a["+a+"] and b ["+b+"]is   ======   " + (a*b) ;
  }
  
  @RequestMapping(value = "/division/{a}/{b}", method = RequestMethod.GET)
  public String division(@PathVariable("a") int a,@PathVariable("b") int b) {
    return "Division of a["+a+"] and b ["+b+"]is   ======   " + (a/b) ;
  }

  public static void main(String[] args) {
    SpringApplication.run(HelloworldApplication.class, args);
  }
}


Step 8: Run the pom.xml file using mvn clean install
Step 9: Now we need to run the application. go to the directory , where jar created and run the
java -jar   
another way to execute the application is right click on the HelloWorldApplication Run As- JavaApplication.
Step 10: Once spring boot started successfully then go to browser and hit http://localhost:8080 .
you should get the -Hello World.. Welcome to Spring Boot.. which is deployed on Google cloud appengine!

Step 11: That is done. Now we need to deploy this application on google cloud.
Step 12: Install the Google Cloud SDK for windows version and set the PATH in environment variables.
Step 13: Go to the place where pom.xml file is there in command prompt.
gcloud config set project p7259000552 After this command
mvn appengine:deploy

Step 14: You will get Build Success message. So application has been deployed successfully.
Step 15: Verify, whether it has been deployed or not - https://.appspot.com/
Step 16: This application will have simple math operations like add,sustarct,multiply,division if you click any of this links you will get appropriate results.
https://p7259000552.appspot.com/add/20/30
   https://p7259000552.appspot.com/substract/20/30
   https://p7259000552.appspot.com/multiply/20/30
   https://p7259000552.appspot.com/division/20/30


Thank you verymuch for viewing this post. If you like please share and comment.

AddToAny

Contact Form

Name

Email *

Message *