Saturday, January 23, 2016

Create a blog app using Web2py


1. Start web2py
2. Usually blog will have post and view the post details
3. Validations required to validate the post
4. Database design to store title, content, image category , blog posted date etc..
First we need to create model


5. Edit the db.py file
6.End of the file add the below code, to create a table 'blog' along with columns

db.define_table('blog',
                 Field('blog_title'),
                 Field('blog_details'),
                 Filed('blog_image'),
                 Field('blog_url'),
                 Field('blog_category'),
                 Field('blog_date_posted'))


We need to use validators inside model, more validators look inside

http://web2py.com/examples/static/web2py_cheatsheet.pdf

db.define_table('blog',
                 Field('blog_title', requires=IS_NOT_EMPTY()),
                 Field('blog_details', type='text'),
                 Filed('blog_image',requires=IS_URL()),
                 Field('blog_url',requires=IS_URL()),
                 Field('blog_category',requires=IS_IN_SET(['News','Events','Technology','Business'])),
                 Field('blog_date_posted', type='date',requires=IS_DATE()))


7. Need to add validation for table details


8.Now we need to create a controller, to post the blog app
9.Create controller name called blog under controller section
10.Edit blog.py
11. Add two methods one is called post and one is view


def post():
       form =SQLFORM(db.blog).process()
       return locals()
      def view():
      rows = db(db.blog).select(orderby=~db.blog.id)
      return locals()


12.Now we need to create views as blog/post and blog/view
13.Edit the blog/post.py
{{extend 'layout.html'}}
     

post a blog as you like

{{=form}}

http://127.0.0.1:8000/sivaweb2py/blog/post


14.If you submit without entering any values, then it will show the validation errors


Provide the details as required and submit the same. You can see the success message.

Need to know more about SQLFORMS and validators
http://web2py.com/books/default/chapter/29/07/forms-and-validators
Now we need to update the blog

Edit the blog.py and add the below code for update method

def update():
    record = db.blog(request.args(0)) or redirect (URL(post))
    form = SQLFORM(db.blog,record)
    if form.process().accepted:
        response.flash = T('Record Updated')
    else:
        response.flash=T('Please complete the form')
    return locals()


Create update view under views section
{{extend 'layout.html'}}
            

Update the form

{{=form}}

Click on the below link to update the record or provide number after update method which ever record want to update
http://127.0.0.1:8000/sivaweb2py/blog/update/1


Now we need to create the view page

{{extend 'layout.html'}}
      

View the blog


{{ for x in rows:}}
blog image

{{=x.blog_title}}

categrory:{{=x.blog_category}}

blog Details:{{=x.blog_details}}

blog posted:{{=x.blog_date_posted}}

{{ pass }}


After adding the above code in view.py, if we check the result using below url
http://127.0.0.1:8000/sivaweb2py/blog/view


This is how we can create a blog app using web2py.


Sunday, January 10, 2016

Getting started with web2py framework


    Full Stack web development with Python (Web2Py)
    How to download and install web2py
1.  Go  to http://web2py.com/
2.   Down load latest version http://web2py.com/init/default/download
     Unzip the downloaded file
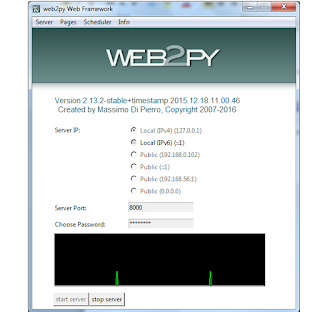
     CliCk on the Web2py.exe file to it will open the window like below


           Provide the password(any password) and start the server
           Server has been started. Now we need to create a application using web2py framework.
           http://localhost:8000


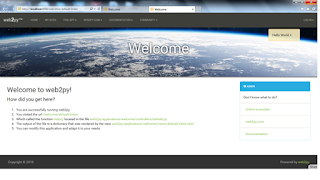
         Click on the Admin,  which is there on the right side in the page. And provide the password which      we have given while starting the server


                After Successful Login,  page will be open like below.

               Create a new application using this framework- > New simple application –
       Application Name - ex: sivaweb2py
              Click on the create button. Now we have created application successfully.
               Need to run the application
               http://localhost:8000/sivaweb2py


              Now we need to write sample code in this application. So we need to understand basics of  the
       framework
               Need to edit the application


      This framework will follow MVC architecture
          Model- Contains db details
         Controller – Method and logic details
         Views – Html input/output to the user

Now we need to create one controller and respective views
Click on the Create button under Controller Section
I have given controller name as basics – basics.py will be created under controller

       Now edit the controller – Click on the basics.py
     def helloworld():
     msg= "Hello welcome to basics controller!"
     return locals()


 In the above code helloworld is method name . Copy the code and paste the same in your file.
  Save the file and go to back – by click on the back buton
  Now we need to create a  view- under Views section
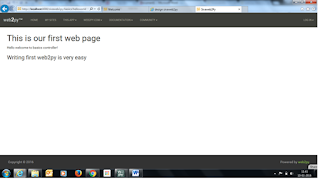
  View name should be as method name  ex: basics/helloworld

   {{extend 'layout.html'}}
    This is our first web page
   {{ =msg}}

Writing first web2py is very easy


Monday, December 14, 2015

Getting started with Oracle Stored Procedure and parse clob xml data and cursor


This Post will having the details to create stored procedure in oracle and parsing the clob data through stored procedure.
employee.xml
-------------


  siva
  32
  M

Above xml will be stored as clob data in Person table

Person table Schema -

Id NUMBER,
Name Varchar2(50),
employee_details clob

Above xml will be stored as clob data in Person table
create table PERSON (Id NUMBER, Name varchar2(50), employee_details clob);
  create table EMPLOYEE (Name varchar2(50), age NUMBER ,sex varchar2(10));
We need to parse the clob data using oracle procedure

create or replace PROCEDURE SP_PARSE_CLOB (person_id NUMBER) AS
  PERSION_ID Person.id%type;
  PERSON_NAME Person.name%type;
  EMPLOYEE_DETAILS Person.employee_details%type;
  name varchar2(50);
  age varchar2(50);
  sex varchar2(50);
  EMPLOYEE_exc EXCEPTION;
  -- Create a cursor
 cursor personDataCursor IS SELECT id, Name,employee_details from PERSON;
 BEGIN
   OPEN personDataCursor;
 LOOP
 FETCH personDataCursor into PERSION_ID,PERSON_NAME,EMPLOYEE_DETAILS;
 EXIT WHEN personDataCursor%notfound;
 IF XMLTYPE(EMPLOYEE_DETAILS).existSNode('/Employee/name/text()') > 0 THEN
   name := XMLTYPE(EMPLOYEE_DETAILS).extract('/Employee/name/text()').getStringVal();
 END IF;
 IF XMLTYPE(EMPLOYEE_DETAILS).existSNode('/Employee/age/text()') > 0 THEN
  age := XMLTYPE(EMPLOYEE_DETAILS).extract('/Employee/age/text()').getStringVal();
 END IF;
 IF XMLTYPE(EMPLOYEE_DETAILS).existSNode('/Employee/sex/text()') > 0 THEN
  sex := XMLTYPE(EMPLOYEE_DETAILS).extract('/Employee/sex/text()').getStringVal();
 END IF;
 dbms_output.put_line('Name:'|| name|| ' ' || 'Age:' || ' ' ||age || ' ' || 'Sex:' || ' ' || sex);
 -- Inset into another table
BEGIN
  insert into EMPLOYEE(name,age,sex) values(name,age,sex);
 EXCEPTION
    WHEN OTHERS
   THEN
    RAISE EMPLOYEE_exc;
  END;
  commit;
  END LOOP;

EXCEPTION
    WHEN EMPLOYEE_exc
      THEN
        rollback;
     -- Do what ever you want like insert log details in any another table
    commit;
    DBMS_OUTPUT.PUT_LINE ('Insertion failed in EMPLOYEE : '|| '' || name);
    END;

Monday, December 7, 2015

ArithmeticOperations Example using Python

Arithmetic operation using python in windows.
In my previous post , I have written how to install python in windows and add plugin into eclipse.


In this post I am going to explain simple arithmetic operations.

Step 1: Open eclipse - File - New - PyDev Project - arithmeticoperation_test
Step 2: Right click on the - src - New- PyDevModule- ArithmeticOperation
Step 3:Paste below code into ArithmeticOperation.py file.


'''
Created on 07-Dec-2015


@author: rajusiva

'''
a = input("Enter a value:")
b = input("Enter b value:")
print("Addition of 2 values is[",int(a)+int(b),"]")
print("subtract of 2 values is[",int(a)-int(b),"]")
print("Multiply of 2 values is[",int(a)*int(b),"]")
print("Division of 2 values is[",int(a)/int(b),"]")
print("Exponent of 2 values is[",int(a)**int(b),"]")
print("Modules of 2 values is[",int(a)%int(b),"]")
print("Floor Division of 2 values is[",int(a)//int(b),"]")

Step 4: Right click on the program-Run As- Python Run
Step 5: output as follows


Enter a value:25
Enter b value:10
Addition of 2 values is[ 35 ]
subtract of 2 values is[ 15 ]
Multiply of 2 values is[ 250 ]
Division of 2 values is[ 2.5 ]
Exponent of 2 values is[ 95367431640625 ]
Modules of 2 values is[ 5 ]
Floor Division of 2 values is[ 2 ]

Sunday, December 6, 2015

Getting started with python using eclipse

Getting started with Python using eclipse

Step1: Download latest Python from the python site.
                 https://www.python.org/downloads/


Step2:  Click on the downloaded exe file. Then it will open like below screen


Step 3: While installing , you need to  check the both check box.

Step 4: Click the Customize installation, .


Step 5: Click on the Next button,

Step 6: Change the Customize install location(C:\Python32), you can give any location where ever
                  you need python to be install. Then click finish

Step 7:  Python installed successfully on your machine.

Step 8: Now we need to download eclipse latest version for windows from this link.
                    http://www.eclipse.org/downloads/
Step 9 : unzip the downloaded eclipse.
Step 10:  open eclipse and select workspace
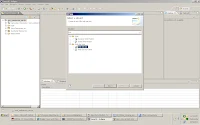
Step 11:   Click on help – Install New Software

Step 12: Provide   http://pydev.org/updates as mentioned below screenshot select all checkboxes, then click finish.
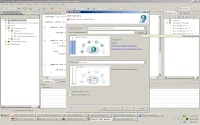
Step 13 :Select the checkboxes to install the python plugin in eclipse


Step 14: Need to configure python in eclipse.
  Go to eclipse – Windows- preferences-


Step 15: Check for PyDev or python – Python Interpreter – Click on the new button
Add the Interpreter Name and Interpreter Executable – where ever your python installed location
Python plugin has been configured in your eclipse successfully.
Step 16 : create PyDev project- Give any project name (helloworld_python)
    In eclipse- File- New - PyDev project


Provide name as  - helloworld_python then click finish, But make sure – Create src folder and add it to the PYTHONPATH- radio button selected


Step 17: Now python project created. Need to create Python Module in order to start the coding.
              Right click on the src folder of the python project- >new -> pyDevModule


Step 18: Click finish

Copy below code into your program

def hello(userInput):
    return "Hello World:"+userInput
userInput= input("Please type your name:")
print(hello(userInput))


Step 19: How to run the python program – Right click on the program
  Run As – Python Run

Input - Please type your name: siva
Output- Hello World: siva

Saturday, November 21, 2015

Hadoop Oozie Framework


Oozie  -  Framework

Oozie is a workflow/coordination system that you can use to manage Apache Hadoop jobs.

Oozie server a web application that runs in java servlet container(the standard Oozie distribution is using Tomcat).

This server supports reading and executing Workflows. Coordinators and Bundles definitions.

Oozie is a framework which is used to handle to run the Hadoop jobs.
It is same like Autosys,Cron jobs, ContolM  Scheduling tools

HPDF – Hadoop process definition language – defining the job details, start node , stop node ,input directory ,output directory etc.. details.
Main features:
Execute and Monitor workflows in Hadoop
Periodic scheduling of workflows
Trigger execution of data availability
HTTP and command line interface and webconsole
Oozie work flow start
Go to installation directory of oozie
Ex: cd /usr/lib/oozie-4.0.0/
:  ./bin/oozie-start.sh
Once it’s started then click the below URL to check whether Oozie started or not.
localhost:11000/oozie

In Oozie webconsole, you can see the job information (logs,configuration,etc..)

Oozie Workflow:

PREP: when a workflow job is first created it will be PREP state. Job is defined but not running.

RUNNING: When a CREATED workflow job is started.it goes into RUNNING state, it will remain in RUNNING state while it does not reach it’s end state, ends in error or it is suspended.

SUSPENDED: A RUNNING workflow job can be suspended, it will remain in SUSPENDED state until the workflow job is resumed or it’s killed.


Scheduling with Oozie


Coordinator to Map Reduce  ->   Launch MR jobs at Regular intervals

Map Reduce to HDFS -> Write Files


Oozie – workflow.xml

The workflow definition language is  XML based and it is called HPDL- Hadoop Process Definiton language).

Workflow.xml minimum details we need to mention like name, starting point and ending point.

Ex:
                                   Name=”WorkFlowRunnerTest”>


Flow control nodes: Provides a way to control the workflow execution path
Start node start : This specifies a starting point of an Oozie Workflow
End node end: This specifies an end point for an Oozie Workflow.
To this we need to add action , and within that we will specify the map-reduce parameters.

   
      localhost:8032
      hdfs://localhost:9000 


           mapred.input.dir
           {inputDir}
      
       
           mapred.output.dir
           (outputDir)
        
action requires and tags to direct the next action on success or failure.

Job.properties file needs to mention details like input dir, output dir.
Job.properties file no need to move to HDFS.


Running a Oozie Application

1. Create a directory for Oozie Job(WordCountTest)
2. Write a application and create a jar (ex:Mapreduce jar). Move this jar to lib folder in WordCountTest directory.
3. Job.properties and workflow.xml inside WordCountTest directory
4. Move this directory to HDFS
5. Running the application
oozie job  -oozie http://localhost:11000/oozie  - config  job.properties –run
    (job.properties should be from local path)

Workflow Job Status command
oozie job –info job_123
Workflow Job Log
oozie job  –log  job_123
 Workflow Job definition
  oozie job  –definition job_123
   Oozie version
   oozie admin –oozie http://localhost:11000/oozie -version

Oozie Coordinator

The Oozie Coordinator supports the automated starting of Oozie workflow process.

It is typically used for the design and execution of recurring invocations of Workflow processed triggered by time and/or data availability.


         hdfs://bar:9000/app/logs/${YEAR}/${MONTH}/${DAY}/${HOUR}


                       ${current(0)}


                              hdfs://localhost:9000/WordCountTest_TimeBased
                              
              inputData
              ${data(‘inputLogs’)}


Oozie commands

Checking the multiple workflow jobs

oozie jobs –oozie http://localhost:11000/oozie -localtime -len -filter status=RUNNING

Checking the status of the multiple coordinator jobs

oozie  jobs –oozie  http://localhost:11000/oozie -jobtype coordinator

Killing a workflow , Coordinator or Bundle Job

oozie  job –oozie  http://localhost:11000/oozie -kill

Checking the Status of a workflow , Coordinator or Bundle Job or a Coordinator Action

oozie job –oozie  http://localhost:11000/oozie –info


Hope this will guide you how to work with Oozie framework.


Saturday, September 5, 2015

struts multibox example

Struts multibox [multiple check boxes] example

1. create a memeber variables and respective setters and getters in any form class like below

import org.apache.struts.action.ActionForm;
   
   public class LanguageForm extends ActionForm
    private String[] selectedLanguages = {}; 
 private String[] languages = {"Java","J2EE","JSP","STRUTS","Spring"}; 
 
 public String[] getSelectedLanguages() {
  return selectedLanguages;
 }

 public void setSelectedLanguages(String[] selectedLanguages) {
  this.selectedLanguages = selectedLanguages;
 }

 public String[] getLanguages() {
  return languages;
 }

 public void setLanguages(String[] languages) {
  this.languages = languages;
 }
 

2. Add below code inside action class to display languages in JSP

public class LanguageAction extends Action {
 private static final String SUCCESS = "success";

 /**
  * 
  */
 public ActionForward execute(ActionMapping mapping, ActionForm form,
   HttpServletRequest request, HttpServletResponse response)
   throws Exception {
          String selectedLanguageValues="";
    LanguageForm languageForm = (LanguageForm)form;
   for (String selectedLanguage : languageForm.getSelectedLanguages()) {
    selectedLanguageValues = selectedLanguageValues.concat(selectedLanguage+",");
   }
   if(selectedLanguageValues != null && !selectedLanguageValues.isEmpty()){
    selectedLanguageValues = selectedLanguageValues.substring(0,selectedLanguageValues.length()-1);
   }
   System.out.println("selectedLanguageValues["+selectedLanguageValues+"]");
   return SUCCESS;
   
 }
}

3. JSP code as mentioned below

<%@taglib uri="http://jakarta.apache.org/struts/tags-html" prefix="html"%>
         <%@taglib uri="http://jakarta.apache.org/struts/tags-bean" prefix="bean"%>
         <%@taglib uri="http://struts.apache.org/tags-logic" prefix="logic"%>


4. Need to do respective configuratio in struts-config.xml like action class, form class etc...
Refer Struts Step By Step example in this blog for configuration related details.

Friday, September 4, 2015

Create WordCount example using mapreduce framework in hadoop using eclipse run on windows

Create WordCount example using mapreduce framework in hadoop using eclipse run on windows
1. Open Eclipse
2. Create new java project and named it as - mapreduce_demo
3. Create Java class with name WordCount.java

How map reduce will work in hadoop
Approach:1
input.txt file having the following data..
(map)
--------------------------------------------------------------------------------------
abc def ghi jkl mno pqr stu vwx    P1- abc 1 def 1 ghi 1 jkl 1 mno-1 pqr 1  stu 1 vwx 1
abc def ghi jkl mno pqr stu vwx    P2- abc 1 def 1 ghi 1 jkl 1 mno-1 pqr 1  stu 1 vwx 1
abc def ghi jkl mno pqr stu vwx    P3- abc 1 def 1 ghi 1 jkl 1 mno-1 pqr 1  stu 1 vwx 1
abc def ghi jkl mno pqr stu vwx    P4- abc 1 def 1 ghi 1 jkl 1 mno-1 pqr 1  stu 1 vwx 1
abc def ghi jkl mno pqr stu vwx    P5- abc 1 def 1 ghi 1 jkl 1 mno-1 pqr 1  stu 1 vwx 1
abc def ghi jkl mno pqr stu vwx    P6- abc 1 def 1 ghi 1 jkl 1 mno-1 pqr 1  stu 1 vwx 1
abc def ghi jkl mno pqr stu vwx    P7- abc 1 def 1 ghi 1 jkl 1 mno-1 pqr 1  stu 1 vwx 1
abc def ghi jkl mno pqr stu vwx    P8- abc 1 def 1 ghi 1 jkl 1 mno-1 pqr 1  stu 1 vwx 1
abc def ghi jkl mno pqr stu vwx    P9- abc 1 def 1 ghi 1 jkl 1 mno-1 pqr 1  stu 1 vwx 1
abc def ghi jkl mno pqr stu vwx    P10- abc 1 def 1 ghi 1 jkl 1 mno-1 pqr 1  stu 1 vwx 1
---------------------------------------------------------------------------------------
map
-----
  processes one line at a time, as provided by the specified TextInputFormat
  emits a key-value pair of < , 1>.


Reducer
----------
The Reducer implementation, via the reduce method just sums up the values, which are the occurence counts for each key  
    emit(eachWord, sum)

4. Paste the below code in the WordCount.java file
import java.io.IOException;
import java.util.StringTokenizer;

import org.apache.hadoop.conf.Configuration;
import org.apache.hadoop.fs.Path;
import org.apache.hadoop.io.IntWritable;
import org.apache.hadoop.io.LongWritable;
import org.apache.hadoop.io.Text;
import org.apache.hadoop.mapreduce.Job;
import org.apache.hadoop.mapreduce.Mapper;
import org.apache.hadoop.mapreduce.Reducer;
import org.apache.hadoop.mapreduce.lib.input.FileInputFormat;
import org.apache.hadoop.mapreduce.lib.input.TextInputFormat;
import org.apache.hadoop.mapreduce.lib.output.FileOutputFormat;
import org.apache.hadoop.mapreduce.lib.output.TextOutputFormat;

public class WordCount {

  public static class Map extends Mapper{

    public void map(LongWritable key, Text value, Context context
                    ) throws IOException, InterruptedException {
      StringTokenizer itr = new StringTokenizer(value.toString());
      while (itr.hasMoreTokens()) {
        value.set(itr.nextToken());
        context.write(value, new IntWritable(1));
      }
    }
  }

  public static class Reduce extends Reducer {
   
   
    public void reduce(Text key, Iterable values,
                       Context context) throws IOException, InterruptedException {
     
      int sum = 0;
      for (IntWritable val : values) {
        sum += val.get();
      }
       context.write(key, new IntWritable(sum));
    }
  }

  public static void main(String[] args) throws Exception {
    Configuration conf = new Configuration();
    Job job = new Job(conf,"mywordcount");
    
    job.setJarByClass(WordCount.class);
    job.setMapperClass(Map.class);
    job.setReducerClass(Reduce.class);
    
    job.setOutputKeyClass(Text.class);
    job.setOutputValueClass(IntWritable.class);
    
    job.setInputFormatClass(TextInputFormat.class);
    job.setOutputFormatClass(TextOutputFormat.class);
    
    Path outputPath = new Path(args[1]);
    
    FileInputFormat.addInputPath(job, new Path(args[0]));
    FileOutputFormat.setOutputPath(job, new Path(args[1]));
    
    outputPath.getFileSystem(conf).delete(outputPath);
    
    System.exit(job.waitForCompletion(true) ? 0 : 1);
  }
}
5. Set up the build path to avoid errors.
Right Click on the project(mapreduce_demo)->Properties->Java Build Path-> Libraries ->Add External Jars
select jar's from
c:\hadoop\hadoop-2.4.1\share\hadoop\common
 c:\hadoop\hadoop-2.4.1\share\hadoop\common\lib
 c:\hadoop\hadoop-2.4.1\share\hadoop\mapreduce
 c:\hadoop\hadoop-2.4.1\share\hadoop\mapreduce\lib
 
6. Once you completed the above steps, now we need to create jar to run the WordCount.java in hadoop.
7. Create Jar:

Right click on the project(mapreduce_demo)->Export->Jar(Under java)->Click Next->Next->Main Class->
Select WordCount->Click Finish
8. Now we have created jar successfully.
9. Before Executing the jar, need to start the (namenode,datanode,resourcemanager and nodemanager)
10. c:\hadoop\hadoop-2.4.1\sbin>start-dfs.cmd
11. c:\hadoop\hadoop-2.4.1\sbin>start-yarn.cmd
12. Check whether any inut files available in the hdfs system already if not create the same.

Hadoop basic commands:


c:\hadoop\hadoop-2.4.1\bin>hdfs dfs -ls input (If it is not created) then use below command to create directory
c:\hadoop\hadoop-2.4.1\bin>hdfs dfs -mkdir input
Copy any text file into input directory of hdfs
c:\hadoop\hadoop-2.4.1\bin>hdfs dfs -copyFromLocal input_file.txt input
Verify file has been copied to hdfs or not using below command
c:\hadoop\hadoop-2.4.1\bin>hdfs dfs -ls input
Verift the data of the file which you copied into hdfs
c:\hadoop\hadoop-2.4.1\bin>hdfs dfs -cat input.
 
13. Once above steps's done. Now run the mapreduce program using the following command
c:\hadoop\hadoop-2.4.1\bin>
yarn jar c:\hadoop\hadoop-2.4.1\wordcount.jar input/ output/

14. verify the result.

c:\hadoop\hadoop-2.4.1\bin>hdfs dfs -cat output
verify the status of the job details and output through web url

http://localhost:50075
http://localhost:8088/cluster


Friday, August 29, 2014

RPC (Remote Procedure Call)

RPC- Remote Procedure Call
 The term itself defines calling remote methods through client program.
In this post added both server and client in the same package.
Normally we have to write server classes which having business functionality
and client will only will access that methods.

Step 1: Start Eclipse
Step 2: Create new dynamic project(name it as you like Ex: rpc-test
Step 3: Create a server class(Ex:Calculator)under src folder
Step 4: Write methods as of your requirement

Ex:
package com.siva;

public class Calculator 
{
public int add(int i1, int i2) {
return i1 + i2;
}
public int substract(int i1, int i2) {
return i1 - i2;
}
public int multiply(int i1, int i2) {
return i1 * i2;
}
}

Step 5: We have to write configuration of xmlrpcservlet in web.xml
Step 6: Open web.xml, which is under WEB-INF/

XmlRpcServlet
org.apache.xmlrpc.webserver.XmlRpcServlet

enabledForExtensionstrue
Sets, whether the servlet supports vendor extensions for XML-RPC.


XmlRpcServlet
xmlrpc

Step 7: Need to declare server class location in the properties file name called-
XmlRpcServlet.properties under package - org.apache.xmlrpc.webserver
Step 8: XmlRpcServlet.properties file details as mentioned below

Calculator=com.siva.Calculator

The bold Calculator is being used in clent class to access the Calculator methods.

Step 9: Write the Client class

package com.siva;

import java.net.URL;
import org.apache.xmlrpc.client.XmlRpcClient;
import org.apache.xmlrpc.client.XmlRpcClientConfigImpl;

public class SimpleClient {

public SimpleClient() {

try {
System.out.println("Try to call calculator methods via XML-RPC...");
XmlRpcClientConfigImpl config = new XmlRpcClientConfigImpl();

//server ip addess or machine name/project name/servlet url pattern
config.setServerURL(new URL("http://127.0.0.1:8080/rpc-test/xmlrpc"));

XmlRpcClient client = new XmlRpcClient();
client.setConfig(config);

Object[] params = new Object[] { new Integer(2), new Integer(3) };
Integer result = (Integer) client.execute("Calculator.substract", params);

System.out.println("The returned values is: " + result);

} catch (Exception e) {
e.printStackTrace();
}
}

public static void main(String[] args) {
new SimpleClient();
}

}
in the above client class to call the RPC methods, first we have to provide the server ip addrss, url pattern name
While calling the method name which being used for to access the business logic.

Step 10: required jars

commons-logging-1.1.jar
ws-commons-util-1.0.2.jar
xmlrpc-client-3.1.3.jar
xmlrpc-common-3.1.3.jar
xmlrpc-server-3.1.3.jar

Step 11 : Required Tomcat server or any webserver to run the application

Step 12 : Start the server after adding project to the server and run the client application,
Run As Java Application, you will see the result.
If you want to call another methods , change the method name from Clicent class and stop start the
server.

I hope this post will help to get basic knowledge about RPC.


Thursday, July 31, 2014

struts example


Struts example

Below post shows how to build simple application with struts.

open eclipse -> project -> create dynamic Webproject->

provide name as - struts_sample [As you like]

select Dynamic web module version as 2.5

Then click on Finish button.

-> open the web.xml , which available inside WEB-INF folder

copy the below code and paste in side web.xml .
      
             action 
              org.apache.struts.action.ActionServlet     
               
                   config                   /WEB-INF/struts-config.xml              
              1
  
     
		       action   
		       *.do


-> Create xml and name it as struts-config.xml inside WEB-INF.
->open the struts-config.xml and paste the below code inside the struts-config.xml


-> Now it's time to start our work like creating jsp files, form classes, action classes and need to add required jars.

-> first we will write jsp page. Here i am writting 4 jsp pages
1. login.jsp
2. welcome.jsp
3. adduser.jsp
4. success.jsp

-> create one folder inside WebContent with name jsp [WebContent/jsp/login.jsp] -- this is for login details which will have user name and password along with validation.
paste the below code inside login.jsp

	<%@taglib uri="http://jakarta.apache.org/struts/tags-html" prefix="html"%><%@taglib
	uri="http://jakarta.apache.org/struts/tags-bean" prefix="bean"%>


Login page


Login


-> create welcome.jsp [WebContent/jsp/welcome.jsp] -- this is for after successful login details .
paste the below code inside welcome.jsp
	
	<%@ page language="java" contentType="text/html; charset=ISO-8859-1"
	pageEncoding="ISO-8859-1"%>


Welcome page


	<%        String message = (String)request.getAttribute("message");    %>
	

Welcome User : <%= message %>

You have successfully logged in.

-> create adduser.jsp [WebContent/jsp/adduser.jsp] -- this contains user details along with required validation.
paste the below code inside adduser.jsp

	<%@taglib uri="http://jakarta.apache.org/struts/tags-html" prefix="html"%><%@taglib
	uri="http://jakarta.apache.org/struts/tags-bean" prefix="bean"%>


Add User


-> create success.jsp [WebContent/jsp/success.jsp] -- this page will display after successful user details.
paste the below code inside success.jsp
	<%@taglib uri="http://jakarta.apache.org/struts/tags-html" prefix="html"%><%@taglib
	uri="http://jakarta.apache.org/struts/tags-bean" prefix="bean"%>


Login page


success

successfully Added.
-> We need to create java classes.
-> create a package -> com.siva.form
-> com.siva.action

->create LoginForm.java inside com.siva.form package and paste the below code.
package com.siva.form;

import javax.servlet.http.HttpServletRequest;

import org.apache.struts.action.ActionErrors;
import org.apache.struts.action.ActionForm;
import org.apache.struts.action.ActionMapping;
import org.apache.struts.action.ActionMessage;

/**
 * 
 * @author sivaraju
 *
 */
public class LoginForm extends ActionForm {
	/**
	 * 
	 */
	private static final long serialVersionUID = -1743531020254647308L;
	private String userName;
	private String password;

	public ActionErrors validate(ActionMapping mapping,
			HttpServletRequest request) {
		ActionErrors actionErrors = new ActionErrors();
		if (userName == null || userName.trim().equals("")) {
			actionErrors.add("userName", new ActionMessage("error.username"));
		}
		try {
			if (password == null || password.trim().equals("")) {
				actionErrors.add("password",
						new ActionMessage("error.password"));
			}
		} catch (Exception e) {
			e.printStackTrace();
		}
		return actionErrors;
	}

	public String getUserName() {
		return userName;
	}

	public void setUserName(String userName) {
		this.userName = userName;
	}

	public String getPassword() {
		return password;
	}

	public void setPassword(String password) {
		this.password = password;
	}
}
->create UserForm.java inside com.siva.form and paste below code

  package com.siva.form;

import javax.servlet.http.HttpServletRequest;

import org.apache.struts.action.ActionErrors;
import org.apache.struts.action.ActionForm;
import org.apache.struts.action.ActionMapping;
import org.apache.struts.action.ActionMessage;

/**
 * 
 * @author sivaraju
 *
 */
public class UserForm extends ActionForm {
	/**
	 * 
	 */
	private static final long serialVersionUID = -2087861874662967982L;
	private String userName;
	private String sex;
	private int age;

	public ActionErrors validate(ActionMapping mapping,
			HttpServletRequest request) {
		ActionErrors actionErrors = new ActionErrors();
		try {
				if (userName == null || userName.trim().equals("")) {
					actionErrors.add("userName", new ActionMessage("error.username"));
				}
				if (sex == null || sex.trim().equals("")) {
					actionErrors.add("sex",new ActionMessage("error.sex"));
				}
				if (age <=0 ) {
					actionErrors.add("age",new ActionMessage("error.age"));
				}
			
		} catch (Exception e) {
			e.printStackTrace();
		}
		return actionErrors;
	}

	public String getUserName() {
		return userName;
	}

	public void setUserName(String userName) {
		this.userName = userName;
	}
	public String getSex() {
		return sex;
	}

	public void setSex(String sex) {
		this.sex = sex;
	}

	public int getAge() {
		return age;
	}

	public void setAge(int age) {
		this.age = age;
	}

	
}
-> create LoginAction.java inside com.siva.action pakage and paste the below code
  package com.siva.action;

import javax.servlet.http.HttpServletRequest;
import javax.servlet.http.HttpServletResponse;

import org.apache.struts.action.Action;
import org.apache.struts.action.ActionForm;
import org.apache.struts.action.ActionForward;
import org.apache.struts.action.ActionMapping;

import com.siva.form.LoginForm;

public class LoginAction extends Action {
	private static final String FAILURE = "failure";
	private static final String SUCCESS = "success";

	public ActionForward execute(ActionMapping mapping, ActionForm form,
			HttpServletRequest request, HttpServletResponse response)
			throws Exception {
		String target = null;
		LoginForm loginForm = (LoginForm) form;
		if (loginForm.getUserName().equals("admin")
				&& loginForm.getPassword().equals("admin123")) {
			target = SUCCESS;
			request.setAttribute("message", loginForm.getUserName());
		} else {
			target = FAILURE;
		}
		return mapping.findForward(target);
	}
}
-> create AddUserAction.java inside com.siva.action package and paste below code.
package com.siva.action;

import javax.servlet.http.HttpServletRequest;
import javax.servlet.http.HttpServletResponse;

import org.apache.struts.action.Action;
import org.apache.struts.action.ActionForm;
import org.apache.struts.action.ActionForward;
import org.apache.struts.action.ActionMapping;

import com.siva.form.UserForm;
/**
 * 
 * @author sivaraju
 *
 */
public class AddUserAction extends Action {
	private static final String SUCCESS = "success";

	/**
	 * 
	 */
	public ActionForward execute(ActionMapping mapping, ActionForm form,
			HttpServletRequest request, HttpServletResponse response)
			throws Exception {
		UserForm userForm = (UserForm) form;
		System.out.println("username["+userForm.getUserName()+"]");
		System.out.println("Age["+userForm.getAge()+"]");
		System.out.println("Sex["+userForm.getSex()+"]");
		//If this details need to store in db. Then need to get the db details from data source object. Store as per requirement.
		return mapping.findForward(SUCCESS);
	}
	
	
}
->create MessageResource.properties file inside src/resource [src/resource/MessageResource.properties] and paste the below code
label.username = User Name
label.password = Password
label.welcome = Welcome 
error.username =Username is required.
error.password = Password is required.


label.age = Age
label.sex = Sex

label.adduser = Add User


error.age = Age is required field
error.sex=Sex is required field 
-> Add the below jars inside lib folder.(Among below jar's few of the jar's may not be required]
    bcprov-jdk14-121.jar
    commons-digester-2.1.jar
    commons-fileupload-1.1.1.jar
    commons-io-1.2.jar
    commons-lang-2.4.jar
    org-apache-commons-logging.jar
    org.apache.commons.beanutils.jar
    servlet-api.jar
    struts.jar
	
	
-> Right click on the project-> Run As-> Run On Server-> [select the server which ever server you want to run the application]. Tomcat is prefered. -> http://localhost:8080/struts_sample/login.jsp [ after submitting it will redirect to welcome.jsp]- username - admin / password - admin123 -> http://localhost:8080/struts_sample/jsp/adduser.jsp [after submitting it will redirec tto success.jsp]. In this way stuts application will work.

Wednesday, February 27, 2013

Convert word document (.docx) to PDF


This post will describes how to convert word document to PDF using Java.

To convert document to Pdf we will have different type of approaches.
But in this post i am using  docx4j. It is one of the good API for conversion from XSLT to PDF and Word Document to PDF etc..


We can convert from document to Pdf with Simple java program.

Steps to follow.

Step1 :open Eclipse and create new java project- provide name as you like.

Step 2: Create new Java class  which ever you like (ex: ConvertDocToPDF )

Step 3: Paste the below lines of code inside main method of created java class


 try {


long start = System.currentTimeMillis();

// 1) Load DOCX into WordprocessingMLPackage

InputStream is = new FileInputStream(new File("test.docx"));
WordprocessingMLPackage wordMLPackage = WordprocessingMLPackage.load(is);
//If your header and body information got over lapped then use the below code
List sections = wordMLPackage.getDocumentModel().getSections();
for (int i = 0; i < sections.size(); i++) {

System.out.println("sections Size" + sections.size());
wordMLPackage.getDocumentModel().getSections().get(i).getPageDimensions().setHeaderExtent(3000);
}

//if you want use any Physical fonts then use the below code.

Mapper fontMapper = new IdentityPlusMapper();

PhysicalFont font = PhysicalFonts.getPhysicalFonts().get("Comic Sans MS");

fontMapper.getFontMappings().put("Algerian", font);

wordMLPackage.setFontMapper(fontMapper);

// 2) Prepare Pdf settings

PdfSettings pdfSettings = new PdfSettings();

// 3) Convert WordprocessingMLPackage to Pdf

org.docx4j.convert.out.pdf.PdfConversion conversion = new org.docx4j.convert.out.pdf.viaXSLFO.Conversion(wordMLPackage);

OutputStream out = new FileOutputStream(new File("test.pdf"));
conversion.output(out,pdfSettings);
System.err.println("Time taken to Generate pdf  "+ (System.currentTimeMillis() - start) + "ms");
} catch (Throwable e) {

e.printStackTrace();
}


Step 4: Now you can run the Java program, PDF will be generate for your Document file.

Wednesday, February 13, 2013

spring and xslt example

This post will describe to work with spring and xslt.

1. open Eclipse and create a dynamic webproject - provide name as  spring-xslt(you can give what ever name you want)

2. After that select the target runtime environment(ex: location of tomcat or Jboss or respective server)

3. open web.xml which already created by eclipse for you, modify as mentioned below.


<web-app id="WebApp_ID" version="2.4" xmlns:xsi="http://www.w3.org/2001/XMLSchema-instance" xmlns="http://java.sun.com/xml/ns/j2ee" xsi:schemalocation="http://java.sun.com/xml/ns/j2ee http://java.sun.com/xml/ns/j2ee/web-app_2_4.xsd">
<display-name>spring-xslt</display-name>

<welcome-file-list>
   <welcome-file>index.html</welcome-file>
</welcome-file-list>

</div>

<servlet>

<servlet-name>simple</servlet-name>
  <servlet-class>
   org.springframework.web.servlet.DispatcherServlet
  </servlet-class>
</servlet>

<servlet-mapping>
  <servlet-name>simple</servlet-name>
  <url-pattern>*.htm</url-pattern>
</servlet-mapping>

</web-app>


4. After that create simple-servlet.xml like mentioned below and put inside WEB-INF

<?xml version="1.0" encoding="UTF-8"?>
<beans xmlns="http://www.springframework.org/schema/beans"
       xmlns:xsi="http://www.w3.org/2001/XMLSchema-instance"
        xsi:schemaLocation="http://www.springframework.org/schema/beans 
         http://www.springframework.org/schema/beans/spring-beans.xsd" >
                 
  <bean id="viewResolver" class="org.springframework.web.servlet.view.ResourceBundleViewResolver" >
  <property name="order"><value>1</value></property>
  <property name="basename" value="views" />
   </bean>
  <bean id="xsltViewResolver"
  class="org.springframework.web.servlet.view.xslt.XsltViewResolver" >
  <property name="order"><value>2</value></property>
  <property name="viewClass"
  value="org.springframework.web.servlet.view.xslt.XsltView" /> 
  <property name="sourceKey" value="obj" /> 
  <property name="suffix" value=".xsl" />
  <property name="prefix" value="/WEB-INF/xsl/" />
  </bean>
  <bean id="simpleUrlMapping"
  class="org.springframework.web.servlet.handler.SimpleUrlHandlerMapping" >
  <property name="mappings" >
  <value>
  /login.htm=myxsl
  </value>
  </property>
  </bean>
  <bean id="myxsl"
  class="com.siva.HomePageController" />
  <!--<bean id="myxsl"
  class="com.siva.XsltDisplayController" />
 --></beans>
   
5. Now we have to create xslt file under /WEB-INF/xsl/home.xslt and place the below mentioned code

<?xml version="1.0" encoding="utf-8"?>
<xsl:stylesheet version="1.0" xmlns:xsl="http://www.w3.org/1999/XSL/Transform">
<xsl:output method="html" omit-xml-declaration="yes"/>
<xsl:template match="/">
<html>
<head><title>Hello!</title></head>
<body>
<h1>My First Words</h1>
<xsl:apply-templates/>
</body>
</html>
</xsl:template>
<xsl:template match="word">
<xsl:value-of select="."/><br/>
</xsl:template>
</xsl:stylesheet>

6. Now Need to create Contoller class by extending AbstractCommandController.
package com.siva;

import java.util.ArrayList;
import java.util.HashMap;
import java.util.List;
import java.util.Map;
import javax.servlet.http.HttpServletRequest;
import javax.servlet.http.HttpServletResponse;
import org.springframework.web.servlet.ModelAndView;
import org.springframework.web.servlet.mvc.AbstractController;
public class HomePageController extends AbstractController{
protected ModelAndView handleRequestInternal(
HttpServletRequest request,
HttpServletResponse response) throws Exception {

Map map = new HashMap();
List wordList = new ArrayList();

wordList.add("hello");
wordList.add("world");

map.put("wordList", wordList);
return new ModelAndView("home", map);
}
}

7. Need to create xslt view class to iterate the xslt elements.

package com.siva;

import java.util.Iterator;
import java.util.List;
import java.util.Map;

import javax.servlet.http.HttpServletRequest;
import javax.servlet.http.HttpServletResponse;
import javax.xml.parsers.DocumentBuilderFactory;
import javax.xml.transform.Source;
import javax.xml.transform.dom.DOMSource;
import org.springframework.web.servlet.view.xslt.AbstractXsltView;
import org.w3c.dom.Document;
import org.w3c.dom.Element;
import org.w3c.dom.Text;
public class HomePage extends AbstractXsltView {
protected Source createXsltSource(Map model, String rootName, HttpServletRequest
request, HttpServletResponse response) throws Exception {
Document document = DocumentBuilderFactory.newInstance().newDocumentBuilder().newDocument();
Element root = document.createElement(rootName);

List words = (List) model.get("wordList");
for (Iterator it = words.iterator(); it.hasNext();) {
String nextWord = (String) it.next();
Element wordNode = document.createElement("word");
Text textNode = document.createTextNode(nextWord);
wordNode.appendChild(textNode);
root.appendChild(wordNode);
}
return new DOMSource(root);
}
}
8.Create views.properties file under WEB-INF/classes/views.properties

home.(class)=com.siva.HomePage
home.stylesheetLocation=/WEB-INF/xsl/home.xslt
home.root=words

9.finally create one index.html or jsp to submit the form.

<body>
<form action="login.htm" name="login">
Word Id :<input type="text" value="" name="wordId">
Word NAME :<input type="text" value="" name="wordName">
<input type="submit" value="submit">

</form>

</body>

Above mentioned html/jsp is for to submit the form, if we required fileds need to be eneterd by the user then we have to get that values from command object, and then needs to process.

10. Now Everthing is completed. Once you configured and copied the above code into respective places.
We can exceuting the application and can able to see the results.
11. for this project required jars are..

commons-logging-1.1.1.jar
log4j-1.2.15.jar
spring-2.5.6.jar
spring-beans.jar
spring-webmvc.jar
jdom-1.0.jar


Wednesday, February 15, 2012

Axis Webservice implemenation with Eclipse

I get a chance to post small topic related to webservice implementation with eclipse galilio.
This is the easy way to implement webservice.
This example is bottom up approach- from Java - to - WSDL

Step1 : Start Eclipse
Step2 : Open Eclipse-> File -> New Dynamic web project
Step3 : Give project name as you like (ex: test_webservice_server)
Step4 : Select Dynamic web module version as 2.4
Step5 : Select target run time as Apache tomcat version and specify the loaction of
tomcat server installed location.(Ex: c:/tomcat)
Step6 : Click on Finish button.


Before creating webservice we need to write the interface and implementation classes to which methods we need to create webservice.

In this example i created one interface called ArthimeticService, having different methods for doing arthemetic operations.

Then created one Class- ArthimeticServiceImpl which implemnts ,ArthimeticService interface.


Now It's time to create webservice.


Step1 : Right Click on the Created project
Step2 : Select New - Other - Webservice


Step3 : Click On Next button.


Step4 : Select Service Implementation(Which we already created ex:
ArthimeticServiceImpl)
Step5 : Click on Next- Next -(If screen shows the start server button click on that)- Finish


Once we completed above steps our webservice is ready to use by clients.

We need to check whether our webservice is working or not

Open Created wsdl under Webcontent folder
Go to the <wsdlsoap:address location> copy the value and paste in browser address bar with wsdl like the below.

http://localhost:8888/test_webservice_server/services/ArthimeticServiceImpl?wsdl
Please check the port your server is running(most of the cases it will be 8080)
Once this ready then we can create the client from any system.

Now the time for creating webservice client to access the webservice server.


Step1 : create new - project - dynamic web project (ex: test_webservice_client)
Step2 : Select Dynamic web module version as 2.4.
Step3 : Rigth Click on the created project- New - webservice client.


Step4 : Click on Next button.
Step5 : Select the service definition
Step6 : Click on the Browse button


Step7 : Locate the webservice wsdl location
(where wsdl is running : ex http://localhost:8888
/test_webservice_server/services/ArthimeticServiceImpl?wsdl)
Step8: If webservice is running from another system
(instead of localhost mention IP address)

Step9: After Locating WSDL, click on OK- Finish


Step 10: Now we our webservice client also ready.
Step 11: Now we need test this application, wether it is working or not, for that i
am creating simple Test class which will call the Proxy class and
internally it will call the webservice server and will give the response
to us.


Ex:

package com.siva;

import java.rmi.RemoteException;

public class Test {

public static void main(String[] args) {
ArthimeticServiceImplProxy proxy = new ArthimeticServiceImplProxy();
int result = 0;
try {
result = proxy.add(20, 30);
} catch (RemoteException e) {
e.printStackTrace();
}
System.out.println("result is.." + result);
}
}
}


Now you will get result as -- 50

Like this webservices will work.

If you want to call this webservice from JSP and servletes
Then write jsp - with two input paramaters
servlet- will access the two values and return the result after
calling the webservice.
Once everything is completed try this url from your system

http://localhost:8888/test_webservice_client/
then provide input values and click on the Get result then result will display on the screen.

Now you can elaborate what ever ypou like and do modifications for your requirement.

Now you can download the source code from the following link.

DOWNLOAD WEBSERVICE SERVER CODE

DOWNLOAD WEBSERVICE CLIENT CODE


AddToAny

Contact Form

Name

Email *

Message *